

Introduction: Carter's Lasercut Tank - Panzer IV G/H (motorized)


Hello everyone ! i wanted to share with you my last tank.
This is the Panzer IV, or the PzKpfW IV Ausf. G / H (without / with the plates). It was the most used and the most emblematic german tank during the WWII.
The scale is approximatively 1:18, with its 38cm length, 17cm width, and 16cm height.
You can find the plans on its Thingiverse page, with my others models. Also, an online 3D model is available here .
Thanks caractere for working on the motorization and the code.
The majority of the parts are cut in 3mm material. A small part is cut in 6mm and 2.5mm material.
There are more than 500+ parts, so you will need to be patient when you cut it. Dont throw away your scraps, there are parts inside other parts or really tiny parts. You will also need :
- 12x Ø3mm 10mm screws,
- 16x Ø3mm 20mm screws,
- 11x Ø3mm 50mm screw,
- 26x (if possible) Ø4mm 8mm long tubes as wheels hinges (i used those),
- 2x Ø3mm ~6cm rods,
- A large amount of toothpicks (Ø2mm),
- A Ø22mm bearing (the same ones used for the fidget spinners),
- 4x little zipties,
If you want to motorize it, you will need :
Step 1: The Frame

To begin, just assemble the main part of the model. This one is easy. We will add all the details at the end.
Step 2: The Top


It begin to be trickier. Don't mistake the "D" and "S" frame, the "D" stand for the driver side (left side), and the "S" stands for the shooter side (right). The perpendicular rods are here the handle the plates and the relief details.
Step 3: The Turret


Assemble some inside details before glueing everything; you won't have access to the inside after.
Step 4: Attach the Turret to the Top


Stack all those circles on the 50mm (or 40mm) screw through the bearing.
Step 5: The Sides


those parts are handled with the four bolts we tied onto the main frame. I made it removable to have a better access to the electronic parts we will put later.
Step 6: The Wheels


We will stack every layers of each wheel around the plastic rolls (it allows a better roll and avoids the thread wear on the wheel). Make sure the wheels are perpendicular compared to the pivot axis. Beware, there are some details to not forget :
For the drive wheel, the teeth must be perfectly aligned. You can assemble the tool with the negative shape of the wheel to help you. Use the rods as a pivot for this wheel.
For the bottom wheels, align the holes for a better looking.
For the top wheels, watch out for the middle layer, this one is thin.
Step 7: The Tracks


Aaaaah, the longest part. Do be hurry for it, it will be long, about half a day for each track.
Cut the tooth link part in 2.5mm material. Cut it in 3mm would be a bit too wide to fit in the wheels slots.
The holes have a different diameter. Those connected to the slat are a bit smaller to handle the toothpick, and the three others holes (on the two studs and the tooth link) are bit bigger to make a good hinge.
Step 8: The Details


The best part. Follow the photos to put everything on its place.
Step 9: The Armor Plates


For the turret armor, glue the plates around the round frame. leave about 4.5mm down and 20.5 up for a correct height.
For the side armor, glue the stuff together. There is no indication about the plate position on the frame, glue 16mm away from the top of the frame and 40mm away from the front.
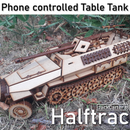
Step 10: The Motorization

Coming soon !
Connect the 32G servos to the drive wheels with the 6mm gears.
For the turret, fix the 9G motor.
Upload the joined code on your microcontroller. For the pins :
- The + side of the battery on the VCC pin, and the - side on the ground (GND),
- The left 32G on the A1 pin,
- The right one on the A2 pin,
- The 9G on the A3 pin.
Connect your phone or your computer to your NodeMCU via WiFi. open your navigator and go to 192.165.0.1. You now have access to the interface, and control your tank.


