

Introduction: Connect Raspberry Pi to Laptop Screen Without LAN Cable or WIFI


In this tutorial I am going to demonstrate how we can connect Raspberry pi to laptop screen without LAN cable or Wifi. Raspberry Pi has composite video out socket which supports four different modes
1. sdtv_mode=0 Normal NTSC
2. sdtv_mode=1 Japanese version of NTSC – no pedestal
3. sdtv_mode=2 Normal PAL
4. sdtv_mode=3 Brazilian version of PAL – 525/60 rather than 625/50, different subcarrier .
So by using this we can use laptop screen to show Rpi screen. Rather than using lan cable this method is very simple to implement.
Lets do it!
Step 1: Required Stuffs


1. Raspberry Pi (supports composite video out)
2. USB 2.0 Easycap Easier Cap DC60-008 Tv Dvd Vhs Video Adapter
3. 3.5mm Stereo TRRS Male to 3 RCA Female Composite AV Cable Adapter
4. Wireless keyboard Mouse
5. Easycap Software
Step 2: Raspberry Pi 3.5mm Jack

The Pi Model B+, Pi 2 and Pi 3 features a 4-pole 3.5mm audio jack which also includes the composite video signal. This has allowed for the removal of the composite video socket found on the original Model B.
The new jack is a 4-pole socket which carries both audio and video signals. It’s similar to sockets found on other multimedia devices such as iPods, MP3 players and smartphones. It now used on the A+, B+, Pi 2 and Pi 3.
Step 3: 4-pole Audio Jack

This style of connector is sometimes referred to as “TRRS“, which stands for “Tip-Ring-Ring-Sleeve”.
The four conductors carry video, left audio, right audio and ground. Cables are easy to obtain but use different configurations so you must be sure how your cable is wired before attempting to use it with the Pi.
Step 4: 3.5mm Audio Jack Cable Availability

Cables are readily available but they don’t all follow the same standard so you need to be careful before assuming it will work with your Pi. The good news is that many will still work but you may need to swap the video cable for one of the audio channels.
Cables should be avoided where the ground connection appears on any ring other than Ring 2. As you can see from the table all the cables where the ground in on Ring 2 will work with the Pi although the camcorder style will require you swap your Video with the Right Audio plug.
Traditionally composite video uses the yellow coloured sockets whereas audio uses the Red (Right channel) and White (Left channel). Cables are available with both RCA plugs or RCA sockets on the end. Make sure you buy a cable with the appropriate connectors for your video and audio accessories.
Referance: https://www.raspberrypi-spy.co.uk/2014/07/raspber...
Step 5: Multimeter Test

If you’ve got a multimeter you can check where the ground is on your cable. Check the continuity between the rings on the cable’s 3.5mm plug and the outer metal shell on the coloured RCA plugs.
If the shells are connected to “Ring 2” as shown above your cable should be OK. Finally if the ground appears on “Ring 4” the cable should not be used with the Pi’s audio jack. But we can make it Work.
Step 6: Make RCA Cable Work for Raspberry Pi


Traditional RCA cable has four rings. Ring 2 is for Video but for Rpi Ring 2 is ground.
So we can make changes in normal RCA cable
Step1: Cut the wire having Yellow pin and connect its wires inverted.
Step2: Also cut the Red & White pin wires take black(gnd) wire out and connect it with Yellow pins black wire.
Its done...
Step 7: Software Installation

Purchase an Easycap audio and Video capturing device which is also called as USB tv tunner device, you can buy at cheap price.
Install the software provided with Device in CD with key.
Complete the setup.
Step 8: Make Final Connections

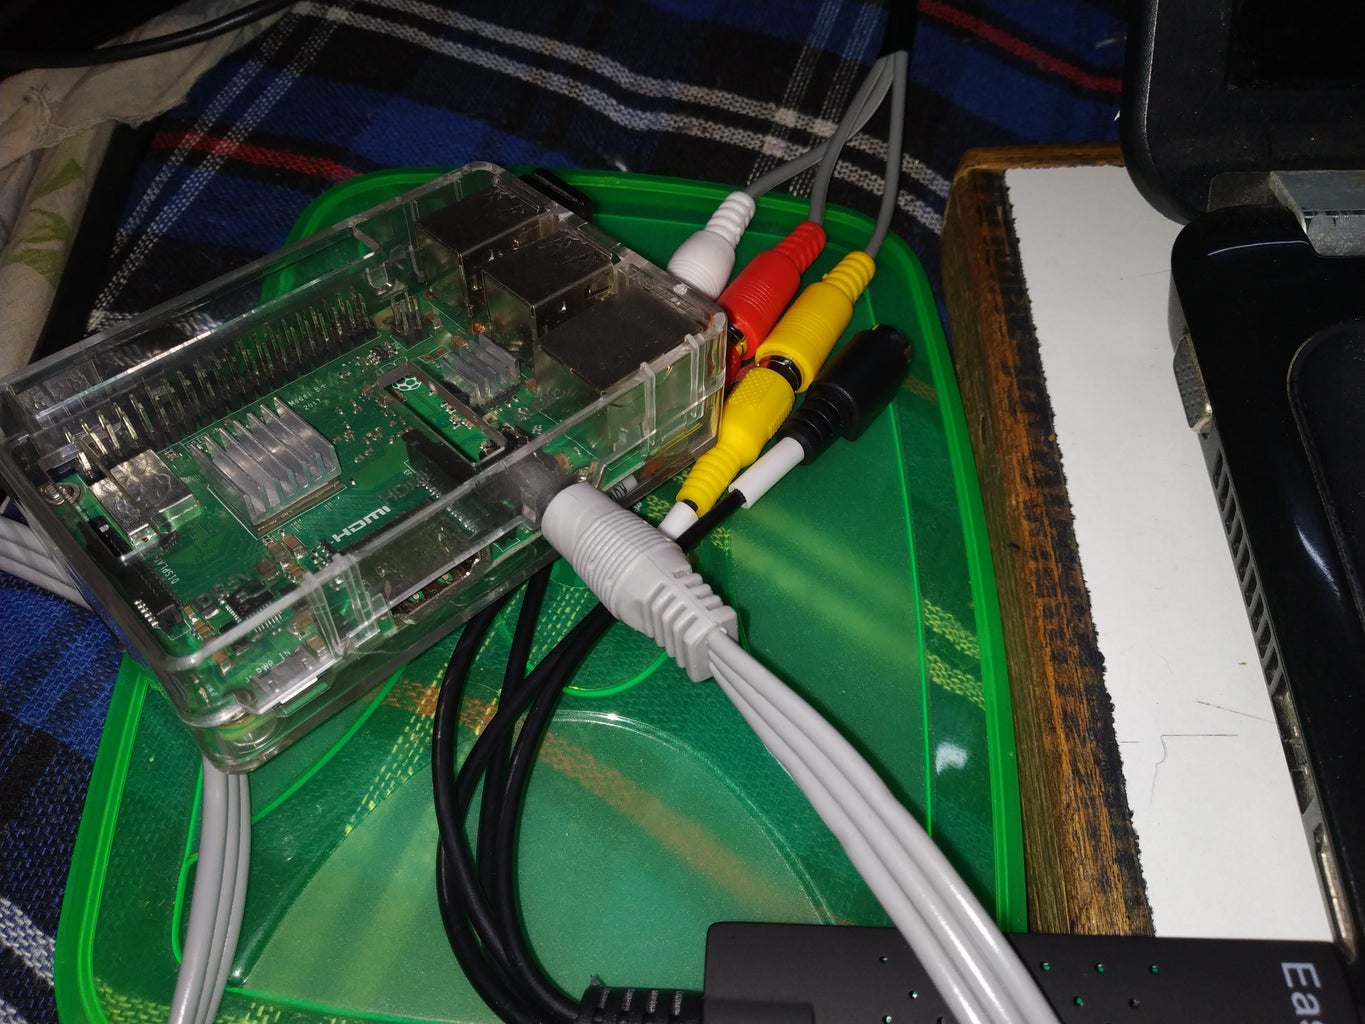

Connect RCA male cable to RCA female of Easycap and plug into the laptop wait until device driver install.
plug 3.5mm jack to the Raspberry Pi. Power Up the Raspberry Pi.
Configure video Out of Raspberry pi (optional)
Read: https://bhavyanshu.me/tutorials/force-raspberry-pi...
to change video standard on laptop go to changevideoStandard.exe and choose suitable standard same as choosed in raspberry pi.
Step 9: Great Its Done


