

Introduction: Controlling DC Motor Using Arduino
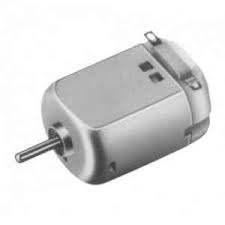
Know your DC Motor
Unlike Servo Motors, DC motors are typical to be controlled with Arduino. Rotations in DC motors are relative unlike Servo Motors where rotations are absolute. These require great precision while operating, otherwise it may damage the Arduino.
Problem 1: Heavy Base Drive
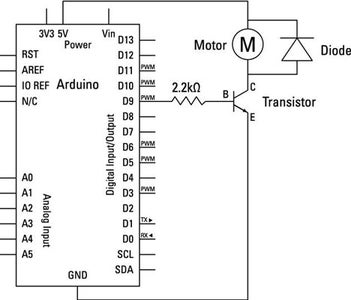
Excess power cannot be delivered by using an external power supply aided by transistor. The minute base current can be supplied by the Arduino, whereas the collector-emitter branch can aid the heavy current through the DC Motor.
Problem 2: Back EMF
The DC Motor produces a back EMF due to rotation of the inner core. This is of opposite polarity relative to the power source. This can be avoided by coupling a diode about the terminals of the motor. When the opposite EMF is produced, the diode turns in Forward Bias and thus shorts the motor. Thus the current is prevented from flowing back into the Arduino.
Step 1: Stuffs Required


1x DC Motor
1x Arduino Uno (or any other variant will do)
1x Transistor
1x Diode
1x Resistor (330 Ω)
Few jumper wires, DC power supply
Step 2: Step-by-Step Procedure
1.) Check the diode and transistor beforehand to avoid any trouble to the Arduino.
2.) Connect the circuit as shown in the layout.
3.) Upload the code on the Arduino.
4.) You are done!
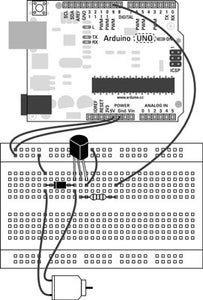
Step 3: Layouts
Step 4: The Code
int motorPin=10;
void setup()
{
pinMode(motorPin,OUTPUT);
}
void loop()
{
digitalWrite(motorPin,HIGH);
delay(1000);
digitalWrite(motorPin,LOW);
delay(2000);
}
Step 5: You Are Done!


