

Introduction: Create a Video Game With RPG Maker XP


Learning to use RMXP!
Hello! This instructable is about creating a simple game with RMXP, a program that can be downloaded for a free trial or bought for $60.00 at http://tkool.jp/products/rpgxp/eng/. This tutorial will go deeper into RMXP abilities without changing the script.
When I was first making games with RMXP, I had no idea what I was doing, wandering aimlessly among the many features of the program. Many of the RMXP fan sites do not have one big tutorial to show you what to do. This tutorial is to help you to learn the program easily.
I have now had RMXP for two years, and I would like to share this knowledge with the public. Please, enjoy this tutorial, and feel free to ask any questions you might have!
Step 1: Creating a New Game, Opening Folders, and Saving Your Project.


How to create a new document.
This step will be describing how to create a game, open your created game, and save the game you made. If you know how to do these things, or have a new game already open, skip this step.
To create a new game, navigate your mouse to File -> New Project. It has a icon of paper with the edge folded over. Or, just press Ctrl+N. A window will pop up, that shows what you want to name your project, and what you want the folder it to be saved in called. For this demonstration, make both "RMXP Game Tutorial."
Saving your created game "RMXP Game Tutorial."
Once you have your new project open, let's learn to save it. When ever I say save, and continue, do this step. Navigate your mouse to File -> Save Project. Click this once. Your game will be saved in the folder RPGXP in My Documents by itself, so it will be saved here for this tutorial.
Opening your saved game "RMXP Game Tutorial."
Now that you have saved "RMXP Game Tutorial.", you need to now how to open it. Close down RPG Maker XP, or select File -> Open Project (Alliteratively Ctrl+O) and go to the folder RPGXP. Open the folder, and select the project under the name you gave in "Folder Name:" (See image below).
Step 2: Exploring the RMXP Face.


Overview:
In this step, you will learn the features of RMXP. This means you will learn about layers, events, the database, materials, and the map. If you know about these features, please, skip ahead.
Layers:
In the RMXP face, there are four buttons. They look like this: The first three are sheets of paper with one orange sheet, and the fourth is a blue cube. The first three are called layers. Layers are need for basic map-making. The first layer is what will be on the very bottom of the map. This is usually ground or terrain on which the character walks. DO NOT put other foliage on the first layer, because on the game, under the tree will be the color grey. The second and third layer are pretty much the same, so use them if two objects are two close together on one layer that it blocks the other out.
Events:
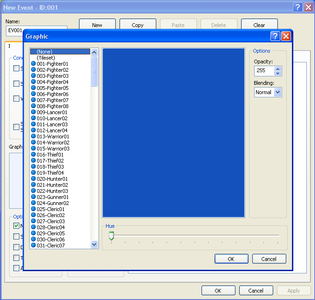
Events are what makes the game work. Events will be explained in further steps, but this will be an overview. Events will be on the top layer, or the blue cube on the interface. First, select the square on which you want the event. People can be added to the map through the Events bar, under "Graphic:" Once you have selected a square, double-click it, and a whole window of things will pop up. Select the first line of "List of Event Commands:" Another big window will pop up. These will be explained in further steps, but some of these are self explanatory, such as "Show text...", and "Show Choices..."
The Database:
The database is located on the toolbar. It has everything needed to make a wonderful RPG. This is where you enter Weapons, Enemies, Animations, and Actors that are in your game. Each one can have virtually limitless amounts of your created material. In the "Items" section, on the left side there is the place where you can add custom items, and a list of all the items added to your game by RPG Maker XP. In the middle, you can edit pre-made items, or the items you make. On the right side, you can edit the element and the state your item leaves upon you or the enemies. Most of the other parts of the database are in this format, so look around, and add some custom weapons and items!
Materials:
In the materials section of the toolbar, you can upload pictures or icons you make to add to your game. If you have custom materials, put it in the proper place. Battlebacks are where the player battles, battlers are the people who you fight with, Characters are who you walk around with (requires a proper format), Gameovers are what happens when the player loses the game, and Icons are what icon displays on weapons in the items part of the menu. Tilesets are maps, and pictures can be inserted into your game (i.e. a newspaper can be placed showing what is happening at the time of your game.)
Map:
The map is where everything happens in your game. The map size can be edited by "Map Properties" in the bottom left hand corner of the screen. Right click "MAP001" and select "Map Properties". A window will pop up and you can select what monsters you will encounter in this map. You will walk around the map with the arrow keys.
Step 3: Making Events - Part One

Overview:
In this step, we will be making some basic events to add to our game. These will include:
"Show text..."
"Show choices..."
"Transfer player..."
"Show Animation..."
"Set move route..."
"Battle processing..."
"Shop processing..."
"Name input processing..."
"Call menu screen..." and
"Call save screen..."
Show Text:
When you make an event "Show text...", you will add text to your game. This is your most used event! You need this in every game. This can be applied to a person, so it appears that the person is talking, or sometimes at the beginning when creating a character. I will use the example of text applied to a person. Double-click any place on the map, and select graphic in the center of the left side. Select any person you want, from the list, than go down to the bottom where it says Trigger. If it isn't already set to "Action Button", go and press it. Now go to the big bar "List of Event Commands:". Double click the top bar like before, and click the first option that comes up, called "Show text..." and add the text. "Hi! This is the RPG Maker instructables guide by Yuzippy!" Once you press OK, you should see this on the events.
@>Text: Hi! This is the RPG Maker instructables guide by
: : Yuzippy
@>
Add another text that says "Would you like to learn how to place this game?". Now what it should look like is this.
@>Text: Hi! This is the RPG Maker instructables guide by
: : Yuzippy
@>Text: Would you like to learn how to play this game?
@>
Now we will learn how to add choices the player can choose from.
Show Choices:
After the last piece of text, add another event. This time, choose the button under the add text, "Show choices..." A window will pop up, that has four text boxes. The first two say Yes and No. The text in the text boxes will be the choices that the player sees. With these four text boxes, you can have many different things to choose from. Now press OK, and on the screen will be the following:
@>Text: Hi! This is the RPG Maker instructables guide by
: : Yuzippy
@>Text: Would you like to learn to play this game?
@>Show Choices: Yes, No
: When [Yes]
@>
: When [No]
@>
: Branch End
@>
Transferring a player:
When you are playing a game, you will want to have multiple maps, so that you can explore diverse lands or going into buildings. To do this, you must have a second map, so right click on "MAP001" and select "New map...". Press OK, and "MAP002" will appear indented underneath "MAP001". Place any ground you would like, and select any tile you would like under "MAP001". Add an event at the edge of "MAP001" and go to the second page, and select "Transfer player..." A window will pop up, and under direct appointment, select anywhere on "MAP002". Press OK. Under "Trigger", put "Player Touch". Now press F12, and walk to the place where you put the event. You will be transfered to the next map!
Show Animation:
Sometimes, during a game, you will want to make a cut scene. The cut scene itself is difficult to make, but some simple animations can be displayed by using the Show Animation: technique. This displays a little animation over the characters head, such as an exclamation mark, or question mark. RMXP comes with many built into the system, but also you can make some for yourself. To do this, make a person (Such as the King from the earlier step). Under "Yes" in "Show Choices", add a new event. In the Event Commands menu, go to the second page. Go down 7 on the first column and select it. Up pops "Show Animation"! Now, choose "This Event", or "001: EV001". They are the same thing. This is who shows the animation. You want the king to show the animation! So, after that, under "Animation:" select "098: EM Exclamation". Now if you choose yes to the king, an exclamation will pop up!
Set Move Route:
During the making of a game, not all the time will you want to give control of the character to the player. Such like during a cutscene, when you want your character to go somewhere. This can be achieved using the event "Set move route..." When doing this, you must first choose the event you wish to move, such as a character that you have made, or the player itself. To do this for the character you made, double-click the character event, and name it (at the top) something, such as "moving character 1". For using the character you play with, just choose the name under the drop down window below:
1) Got to that event with the king. Under the Show Choices > Yes, add the new event "Set Move Route..." Under the drop down menu, at the top left hand corner, there should only be two options that you can choose from to move. "Player" and "This Event". For this tutorial, click "Player".
2) Press "Turn Down". This will make the character face downwards. Then press "Move Down", say, three times. It is important to know the difference between these two.
3) Press OK, APPLY, OK. Test the game. Your character should move down if he says yes to the King.
Battle Processing:
During the course of the game, there can be times where you wish a character to fight a monster when something happens, be it touch the monster or say the wrong words to an angry villager. To achieve this, you can use the event "Battle Processing..." When you do this, monster will pop up. So, for the example, under the King event, under "When No" add the new event "Battle Processing..." Under the Troop Drop Down menu, click (or it may already be highlighted) 001: Ghost*2. This will make two ghosts show up, the easiest monster to fight. Then, check the box "Continue even when loser". This means that even if you lose the fight, you will continue fighting. You have now effectively learned how to summon a monster using Battle Processing...
Shop Processing:
Similar to the event "Battle Processing..." this event will make a shop pop up. This can be used when talking to different shop keepers. In this case, just before the choice of the King. A window will pop up, with a blank excel looking spreadsheet, with two different columns, Good and Price. Double click on the blank white space, and the choice of items and weapons you have made in your database will appear. If you choose the good, you can edit the price in the database. If the character has enough gold, he can then buy that item!
Name Input Processing:
This was the hardest for me when I first started with XP. I wanted the character to create a name for their character. I searched through numerous forums before I found this. When you use Name Input Processing, the box will pop up with the entire choice of what you want to name your character, such as letters and numbers. This will make the name of your character always appear as you entered, for example, on the menu, that name will appear instead of the defualt character names like Basil. Then, to call on the character name, during Show Text... place this: /n[1] and it will be replaced with the name given at the Name Input Processing.
Call Menu Screen (and) Call Save Screen:
When you call menu screen, the Menu screen will pop up (usually you must press Esc to do this). This can be good to illustrate how the game works, showing the character the inventory, or skills they own. When you Call Save Screen, the save screen will open (also usually must press Esc). This is useful before you make the character fight a new boss monster, or before a major part of the story takes place.
Attachments

Step 4: You Have the Knowledge of a True Video Game Designer!
With these new events I showed you here, you should be able to create simple games. There is a feature that I did not mention, though, and that is called scripting. Scripting is the process of changing the game's core RPG engine. This can change the battle scene, or what appears in the menu, how the game starts, and how the game looks. This is a difficult concept to learn, and it is surely beyond me.
With these things known, go out and create a video game to share with the world! If you want me to make more tutorials (which I probably will, regardless of wether or not you say I should) just comment what you would like to learn about. I am thinking about making a guide like this for RMXP, and anothe smaller project, creating Touch'n'Go monsters! Thanks for reading!
Yuzippy!


