

Introduction: DIY Mini-Papercraft Shoe Box/Gift Box


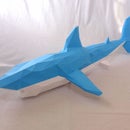
It's holiday time, and with Christmas coming up soon, it's also time for you to get your gifts ready. For people getting tiny gifts or gift cards, packaging them attractively can be hard. Here's a solution: the mini papercraft shoebox.
This little box is a great way to present small gifts in, and is the perfect size to fit a gift card. It's also great for any of the sneaker fans in your life. The box itself measures about 3 and 5/8 inches wide (9 cm), 2 and 1/4 inches deep (5 and 1/2 cm), and 1 and 1/4 inches tall (3 cm). This papercraft is also super simple to make, taking about a total of 15 minutes. My personal favorite part of the project is adding a logo. If you're giving a gift card, a fun thing to do is to add the logo of the company/store to which the gift card is for! If you don't want the box to look like a shoebox and just want a basic open/close box, simply omit cutting out the circular holes to avoid the finger notches. Making the box is fun for you, and is fun for the person receiving the gift. There's an unlimited number of twists you can add to this model to make it your own, and it's up to you to put whatever you want in it.
To purchase the PDF Pack for this box for $2.99 USD, click this link to the item on my Etsy shop.
https://www.etsy.com/listing/261249588/mini-paperc...
The PDF pack contains an A4 and Letter Sized pattern for this design. Every purchase helps keep Verticees running.
Note: The PDF Pack does not include any logos since those are not my intellectual property, and therefore cannot be sold. I am not affiliated with any of the companies displayed above (except for Verticees, of course).
Step 1: Get the Materials

Here's what you'll need for this project:
Glue: I'm using Aleene's Quick Dry Tacky Glue, which bonds pieces of paper together in around 30 seconds. However, any tacky glue will be fine, and you can even use a glue stick for this model if you choose.
Paper: Good quality cardstock is also a must. I'm using acid and lignin free cardstock from Michaels to ensure the longevity of the model. It has a 65lb or 176g/m^2 weight. You'll only need one page of cardstock for this model, and maybe another scrap to make the logo on the box.
Scissors or Knife: I personally prefer to use my stainless steel scissors for cutting out the pieces. For this project, you'll also need an X-Acto knife to cut out the circular holes in this craft (which later become notches in the papercraft).
Ruler and Scoring Tool: To make folds neat and clean, I highly advise the use of a ruler and scoring tool. The scoring tool I used is a mechanical pencil WITHOUT ANY LEAD. By using the ruler to make a straight path while you run the tip of the pencil over the lines, you can make very crisp, professional folds. If you use lead in the pencil, you won't be able to distinguish the different folds, so make sure your pencil has no writing capabilities! However, any object with a precise tip will do, including a dead pen.
Toothpicks: Toothpicks are helpful. I used them for spreading the glue around the flaps once I put on a drop. The toothpicks help spread the glue evenly and avoid excess glue from oozing out when the flap is pressed to the paper. Because they increase the surface area of the glue, it also makes the glue dry faster.
Step 2: Get the PDF and Print

You can buy the PDF pack for this papercraft here (for $1.50 USD):
https://www.etsy.com/listing/261249588/mini-paperc...
For this papercraft, you will only need one sheet of colored paper to make the box itself, as well as one other page (or scrap) of paper to cut out a logo for the box (if you want a logo). It's important to note that the PDF does not include any logos, because those are not my intellectual property. They're just fun designs to put on the box to give it some character, which you will have to get yourself.
Step 3: Cutting the Box


The first step is to cut out the entire design from the paper. Because of the simplicity of the model, this will take no more than 5 minutes. First, just cut out the outside lines so you get the perimeter of the shape.
After that, there's a couple of internal cuts. They are shown in the pictures above. They're called internal cuts because they breach the perimeter of the figure and become flaps.
Here's where you have an option: if you want your box to have the semicircle notches on the sides (which characterize it as a shoebox), use the knife to cut out all 4 circles on the design. If you don't cut out the circles, it will just be a normal gift card box. It's all up to you!
Step 4: Scoring the Lines


For this step, grab your ruler and your scoring tool. Scoring the lines is just aligning the ruler parallel to the lines, and then running the tip of the tool along the line while applying pressure. The result creates a slight impression in the paper, which makes straighter and sharper folds. I do this for all my models.
After you score all the lines, you are ready to fold the box.
Step 5: Folding


Folding this model is very simple, because all the lines are valley folds. A valley fold is a fold where the crease is far from you. In other words, all the flaps you fold will be upwards. The only flap that you may wanna fold backwards is the middle line, only because it may get in the way when you're gluing.
Step 6: Gluing the Bottom Half


Gluing the box together is the last step to putting this box together. Start on the bottom half of the model. Fold the big flaps inward and apply glue to the outer surface, and then fold in the outer walls of the box and attach them to the flaps. To stabilize the box walls, apple glue to the strip of paper with the circles, and fold them down onto the flaps. This helps seal the flaps as well. Now, repeat this entire step on the other side.
Step 7: Gluing the Lid


The last step of finishing the box itself is to glue the lid together. There are two narrow flaps on the lid. Fold them upward and apply glue to the outer surface. Fold those flaps inwards and glue them to the narrow strip of the lid which will become the lip of the lid. The last step is to apply glue to the top of the lid and fold the strip over onto the two flaps you just glued. After this, your box is done!
Step 8: Adding a Logo


Adding a logo is a fun way to spruce up the box. If you're making a mini shoebox, it adds a great effect to create a tiny miniature. When printing a logo, make sure none of the parts of the logo are extremely thing, because that makes it hard to cut out and glue. In the case of the box I just made, I want to give it with an iTunes gift card inside, so I printed out an outline of the iTunes logo. I cut out the outer circle with scissors, and used a knife to cut out the central music note. To glue it on, apple glue to all of the back and attempt to glue it as close to the center of the top of the lid as possible. After this, you're done!
If you still want to make a logo that is very intricate, it can still be done. For example, the Air Jordans shoebox I displayed in the first step contained a very intricate Jumpman logo, which was difficult to cut and very weak when finished. To strengthen it, I applied a coat of paint to harden the paper. I also applied the tacky glue with a brush.
Step 9: Conclusion
Thanks for viewing this Instructable, and I hope you enjoyed making this model. If you make it, I would appreciate you posting a comment with a picture of your finished creation. If you need help, you can PM me or comment a picture of your problem, as it is possible that others are having the same problem as you.
There's tons of room for modification for this instructable. Not only are there tons of different logos and colors for this model to be made in, but you can add create the box with different papers, paint it with different designs, add glitter, and many other options. If you have an idea for a modification, feel free to comment it!

Participated in the
Patterns Contest


