

Introduction: Paper Air Freshener DIY

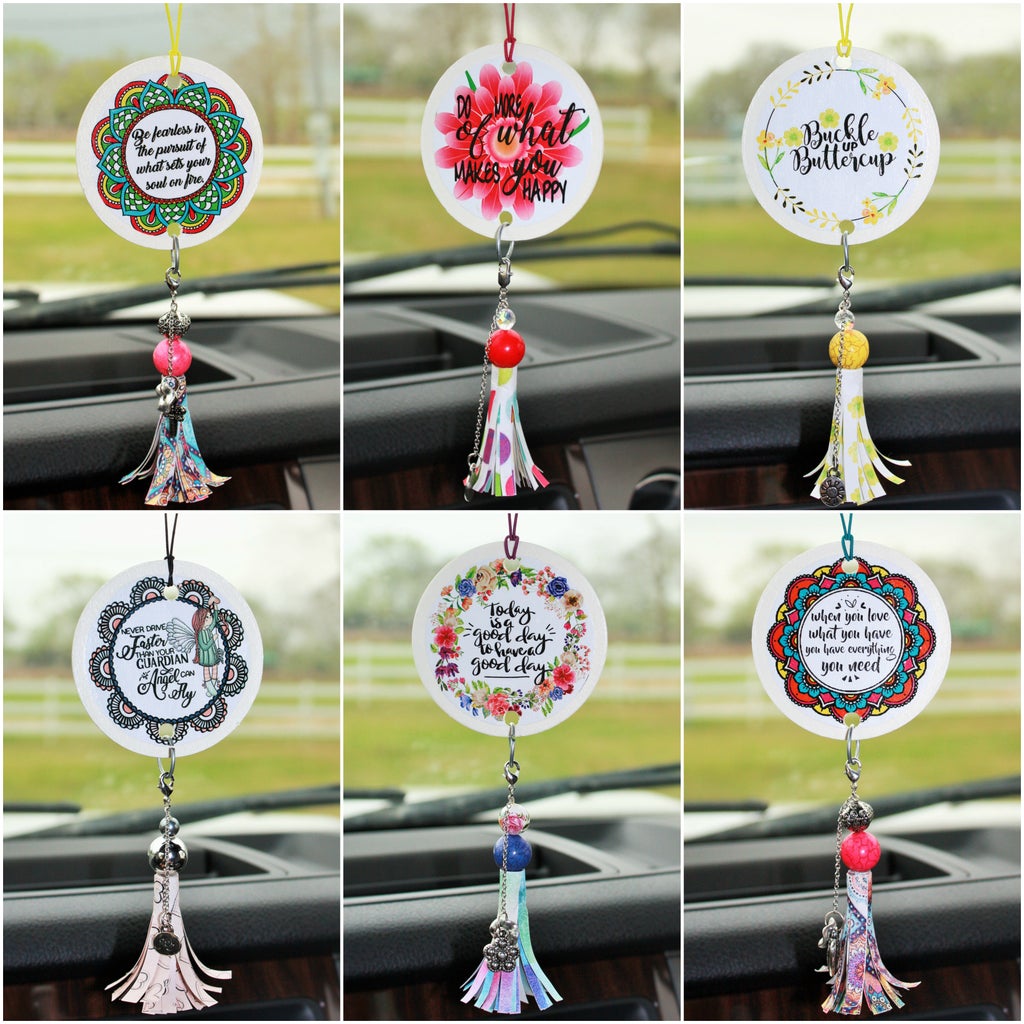


I want to share with you this easy DIY Paper Air Freshener craft. I've added paper tassels to make them even more fancy. Because there are so many ways to customize the look, these are perfect to create for any occasion and will make adorable gifts. Plus they can be made inexpensively with just a few simple items.
Step 1: Tools and Materials

MATERIALS:
Paper (standard printer paper and cardstock)
Blank Paper Air Freshener Paper * This comes in several shape options.
Another alternative is purchasing the air freshener paper in uncut sheets and using a die cutter or scissors to cut your own.
Assorted Beads (found at your local craft store) There are many options
Assorted Charms (Optional - found at your local craft store on the bead isle)
Fragrance Oil or Essential Oil
TOOLS:
Computer
Graphics Software (Optional: Needed if you are creating your own graphics)
Printer and Ink
Paint Brush or Foam Brush (for applying Mod Podge)
Step 2: Select or Make Your Own Decorative Papers

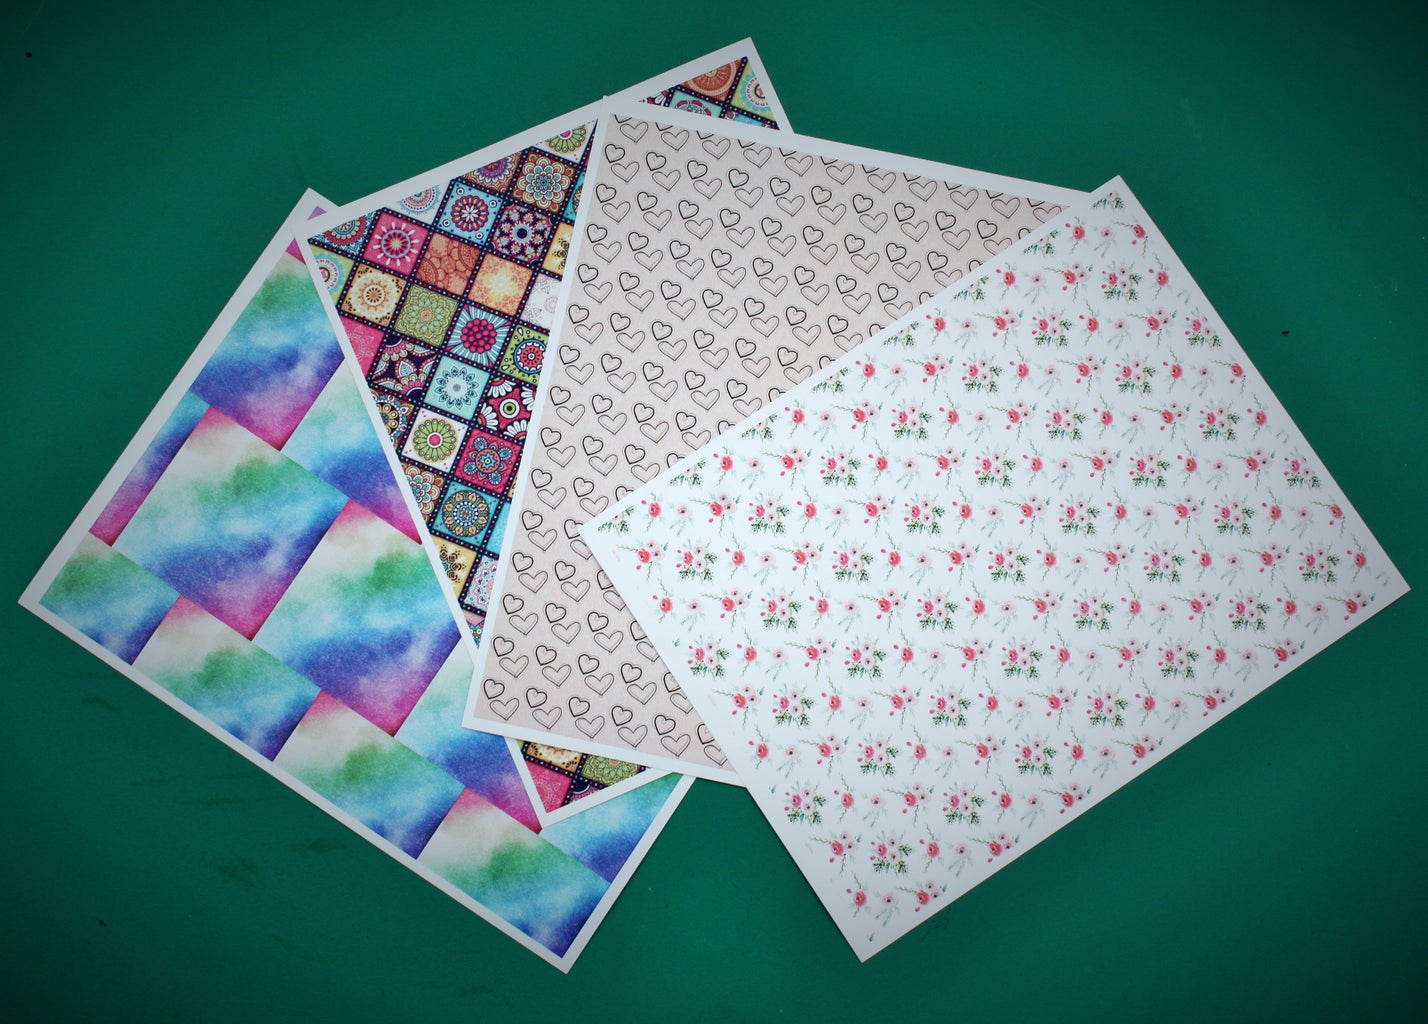
Pre-printed decorative paper can be found at your local crafts store or you can create your own papers using a computer that you can easily print yourself. If you don't have your own graphics software, there are many options for digital graphics and digital papers that can be downloaded and printed.
Here are a few online sites where you can find digital papers (but there are many online to chose from):
To add text to your digital papers, you can hand write or stencil your wording onto the printed paper or you can upload your paper file and create text for it online via a text editor.
Here are a few online text editor sites (but there are many online to chose from).
Another option for creating your own decorative paper is to hand illustrate the paper using paints, markers, pens, pencils, rubber stamps, ink, etc. Or you could even print your own photographs to decorate these paper air fresheners.
Step 3: Cut Your Papers


Cut your printed paper to fit your paper air freshener. There are many options of blank air freshener paper to chose from. The following website offers several pre-cut shapes to chose from Bitter Creek Candle Supply or you can order uncut blank paper from Candles and Supplies and cut your own shapes using a heavy duty die and die cutter, Curio or scissors. For this Instructable, I chose to work with pre-cut 3" circle air freshener blanks so I cut my decorative paper circles to 2.75" round.
Next, cut your paper to size for making your paper tassels by cutting 2" wide by 8" long strips of your decorative paper. Once you have the strip cut, use a ruler and a pencil to draw a horizontal line 1/2" down from the top edge. This line is a guideline for cutting the fringe. Cut verticle slits up from the bottom that are about 1/8" wide stopping at the marked line. Cut the slits all the way down to the other end of the paper. After all the slits are cut, cut the last two slits off the right end by making a horizontal cut across the guideline. This will make a little tab that will help you get the rolling process started nicely.
Step 4: Curl Your Paper


Use your thumb and forefinger to curl the prepared paper strip from the unprinted side. Next, use your fingers to curl the slits outward from the printed side.
Step 5: Roll Your Tassel


Hot glue a small bead onto the end of your 2" eyepin to serve as a keeper to make your paper tassel more durable. Place the pin at the end tab of the strip and roll tightly. Use a small amount of tacky glue across the top (uncut) area as you roll to help secure the rolled tassel.
Step 6: Finishing the Paper Tassel


Apply super glue to the top of the tassel and thread a bead onto the eyepin. Hold in place for a minute to get the bead glued securely to the top of the tassel. Next, add another decorative bead and bend the wire eyepin over to the side. Cut off the excess wire and use your round nose pliers to loop the wire over to secure it at the top of the last bead. Attach a jump ring and lobster claw to the top loop. You can now embellish the paper tassel further by attaching charms, ribbons, tiny silk or paper flowers, lace, etc. I chose to add a small chain and charm to mine.
Step 7: Mod Podge Decorative Paper to Your Paper Air Freshener


Use a paintbrush or foam brush to apply a layer of Mod Podge to the backside of your decorative paper. Smooth the decorative paper onto the front side of your paper air freshener. Allow to dry for 15-20 minutes and then apply a coat of Mod Podge to the front side of the decorative paper. After about 20 minutes, you can apply a second coat of Mod Podge to the front side to make sure everything is sealed nicely.
Step 8: Final Assembly


Use a single hole punch to punch a hole at the top and at the bottom of your air freshener. Make a hanger from elastic cord and attach it to the top hole. Use a jump ring to attach the paper tassel to the bottom hole.
Step 9: Add Scent

Fragrance Oils and Essential Oils come in many scent choices. You can chose your favorite scents to add fragrance to your air freshener and apply a few drops to the back side of the freshener. The scents will last anywhere from a few days to about a week. When the scent fades, all you have to do is re-add some oil to it again.
Step 10: Enjoy or Gift Them!


And that's it! The creative options are endless with this simple little paper project. Please make some of your own and share them here with me. I'd love to see what you create. Happy Paper Crafting!

Participated in the
Paper Contest 2018


