Introduction: Dog Paws Stepping Stones
I wanted to put stepping stones from our walk gate and could not find ones I like so ...... I made them. The idea I had was to make dog paws and as the idea evolved personalizing them with all of our past and present pets became a part of it.
Making the mold started with a wooden form "plug" of what I envisioned the final step to look like, The diameter is 17 1/2" and thickness is 2". The paw pads are raised 1/2". The edges of pads and outside 17" diameter require a slight taper so they don't stick in the final mold. The wood plug was painted with latex paint to act as a separator when laying up the fiberglass mold.
The fiberglass cloth is cut to lay flat around the plug. Polyester resin is brushed into the cloth to saturate it. This process is not technical all you are trying to do is cover the plug and build bulk. Regular fiberglass woven cloth or fiberglass mat can be used. The final thickness of the mold is greater than 1/4 inch. I did the layup in 4 stages to get the final thickness. An air release hole is drilled into the mold between the ”pads” and threaded to accept an air hose fitting.
To add the name I used Photoshop to layout the name into the center paw pad. With the sheet printed the letters are lightly sprayed with 3M 77 spray adhesive then stuck onto the paper in their respective places. The sheet is cut out around the center pad. Spray the letters that are mounted on the sheet, clean the mold where the letters will go with acetone. Align the cut out sheet into the mold and press the letters so they stick onto the mold. Roll the paper away so not to disturb the letters position. Add scotch tape over the air release hole in the mold.
To prepare the fiberglass mold for the concrete grease it with a lithium auto grease and a rag several times for the first pour. On subsequent pours just clean it out and re-grease. Be careful around the letters to not have grease build up on the edges but be sure they are covered.
To get the smooth surface for the “pads” I used a mortar mix (no rocks) and added a little cement. The tint was added to give a tan color. This mixed concrete mix is added to the pad areas slowly and worked into the corners so there are no air bubbles in the finished part. After the pads but before the body pour I bounced the mold on the workbench for several minutes to work the air bubbles to the surface (bottom, because the mold is inverted) The next “body” mix of concrete is poured in and worked into the mold against the walls. When that is all in again bounce the mold to raise the air bubbles.
The mold then sits with a table fan blowing across the top, (actually the bottom when finished). Because the concrete is poured into a fiberglass mold it will not cure fast since the only place for the water to evaporate out is on the top. At about 5 hours, depending on room temperature, it is cured enough to radius the bottom edge smoothing a radius into the concrete helps stop cracking and easier on the hands when carrying. 48 hours after pouring the stone can be removed from the mold. Turn mold upside down, support the stone so it doesn’t fall to the table and insert an airline into the back of the mold, in a few minutes the mold will release from the stone. Allow the stone to sit with the fan blowing on it another 24 hours. Any time after another 48 hours the latex paint can be applied.
I did the mix ratios in metric because my scale had it and it was easier and more precise than pounds and ounces.
Mix ratio for tint, 100 mL tint / 3100 mL water = 3200 mL tinted water
For “PAW PADS”;
2 kilograms mortar mix
268 grams cement
473 milliliters tinted water
For BODY MIX;
13.6 kilograms concrete mix
1.9 liters water
Step 1:
The plug was made from left over wood, the raised pads are ½” tall and slightly tapered on the sides, “draft”. The plug was painted with latex paint then waxed to help separation after the fiber glassing. The white showing is the latex paint remaining after separation.
Step 2:
This is a paper template used to set the lettering in place. The letters are 1/8 thick foam letters from a craft store.
Step 3:
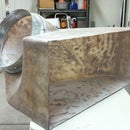
This is the finished mold after many uses. The blotchy spots are repairs to the mold using Bondo. The mold went through a hard life while I was testing many formulas of concrete mixes and release methods. On a few occasions some of the mold was damaged and Bondo came to the rescue. On the back of the mold slightly above center you can see the 1/4 pipe threaded hole for the air fitting I used to separate the mold. The other photo shows the lettering in place from the last stone I made.
Step 4:
The ingredients I use to make a repeatable good quality stone. The ratios are above in the intro.
Step 5:
Edging tool made from sheet metal.
Step 6:
These two stones are a few of the rejects I made while learning the process. The one shows the difference in the tinted pads vs the body mix with no tint. The other one is painted to blend in with the lawn.


