Introduction: Fasteners Tutorial
In this lesson we will be discussing fasteners which attach pieces of metal together using mechanical
attachment. What this means is that two (or more objects) are affixed together by a mechanical means.
There are a number of common methods of fastening pieces of metal together, but there are are a few which are most commonly
encountered such as rivets, sheet metal screws, and nuts and bolts. In
this course we will be focusing primarily on nuts and bolts. The nice thing about this method is that it is very strong, and can typically be
easily undone.
This class will not be discussing other forms of attachment including welding, brazing,
soldering, or gluing. For more information about these subjects, check
out the Welding, Jewelry, and the Glue classes.
Step 1: Nuts and Bolts
Nuts and bolts are typically two pieces of hardened steel with threading upon them. A bolt is a threaded shaft with larger head that can be grabbed with a tool. A nut is a piece of metal with a threaded hole. The nut simply twists onto the bolt to form a strong bond. There are more types of nuts and bolts that you can ever imagine. Bolts can vary in the type of threading they have, the shape of their head, the materials they are made out of, and the manner of tool used to grab it. Nuts can vary by about as many criteria as well.
Step 2: Threading
When approaching bolt threading, there are two aspects that you need to pay attention to, and those are the pitch and diameter. The pitch is the distance between the peaks of threads. The diameter is the width of the bolt's shaft.
In the United States, the diameter can either be measured in imperial or metric. In most the rest of the world, you will likely be dealing exclusively in metric.
To further confuse matters, the pitch is then measured differently depending on the type of bolt you are using.
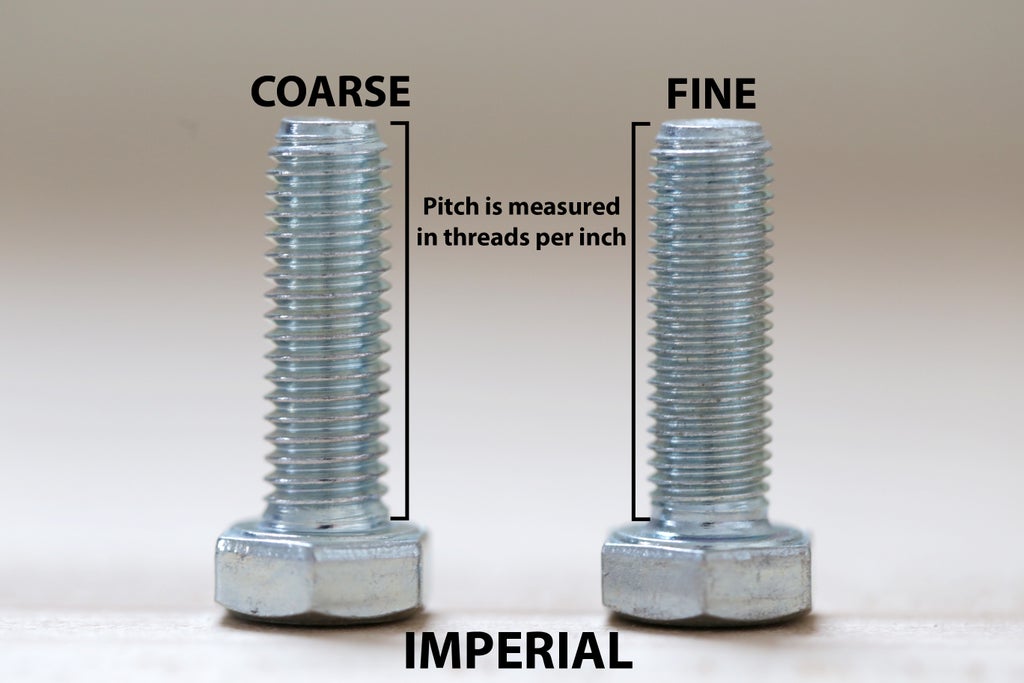
Imperial bolts measure pitch in threads per inch. For instance, say you have a 1/4-20 bolt. This means that it is 1/4" wide and has 20 threads per inch. If you want a finer threading, you may consider getting a 1/4-32 bolt, it is still 1/4" wide, but now has 32 threads per inch.
The more threads it has per inch, the finer the threading is considered. Conversely, bolts with less threads are considered "coarse." Regardless of threading, you will always need a nut with an identical pitch to match it.
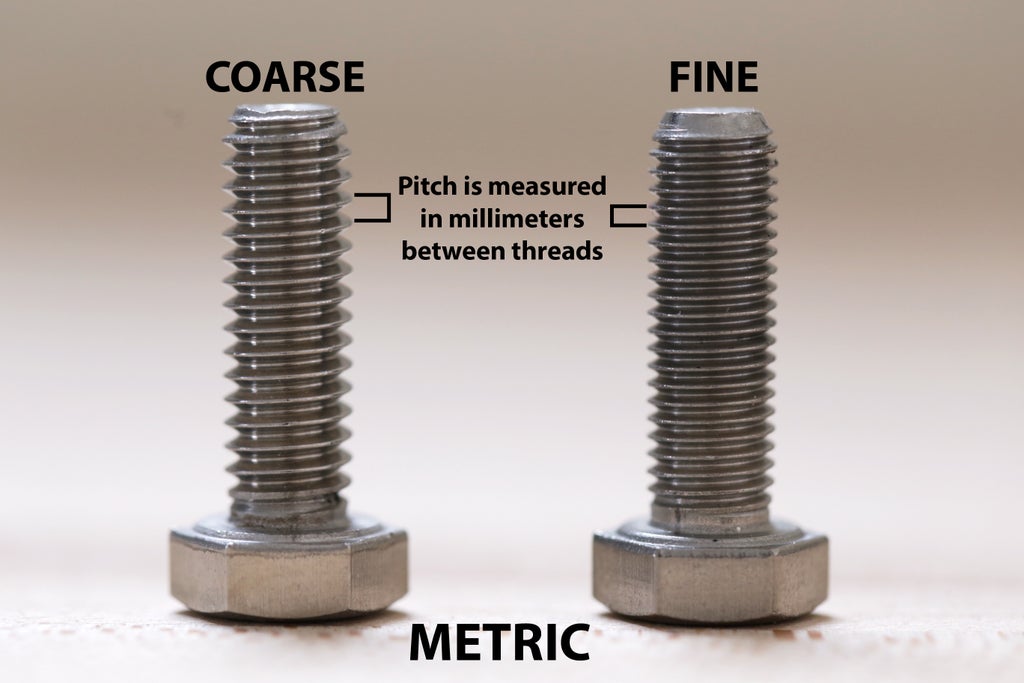
Since the metric system does not use inches, metric bolt threading is obviously not measured in threads per inch. Instead, it is measured purely in millimeters. So, if you have an M6 x 1, it means that the bolt is 6mm wide and the threads have a pitch that is 1mm apart (i.e. 1mm peak to peak). This is opposite imperial in that as the pitch gets higher, the thread coarseness increases. The smaller the number, the greater the pitch. For instance, an M6 x 1 would be a much finer pitch than an M6 x 1.5.
Step 3: Tapping
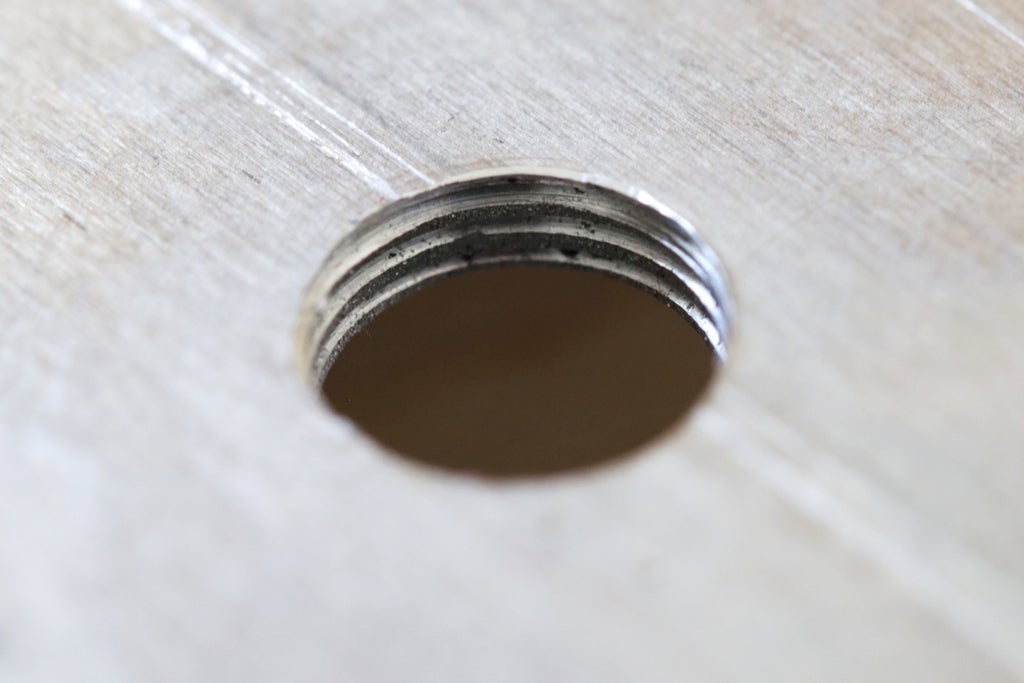
To tap a hole is to use a tap to cut a helical groove or "thread" into it. The purpose of tapping a hole is to make it so that a bolt can be threaded into it. Thus, a tapped hole needs to exactly match the threading of the bolt. Like most concepts in metalworking, tapping a hole can take a few minutes to "get," and a lifetime to master.
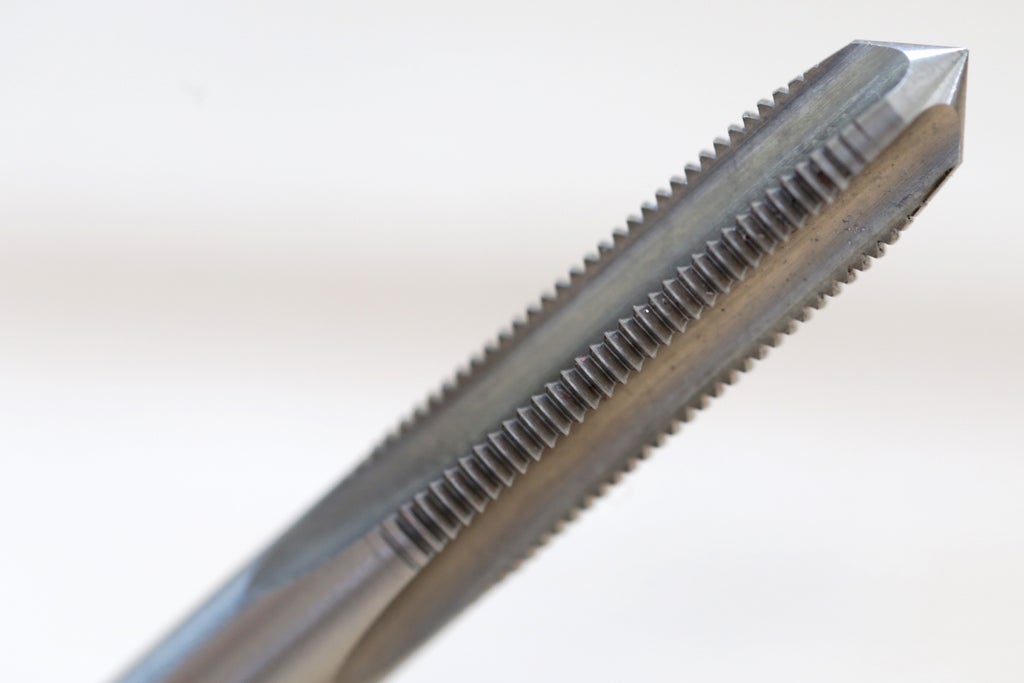
Taps have cutting blades which cut the threads as they are twisted into the hole. The cut material ends up in the flutes cut into the side. Unlike with drill bits which have helical (spiral) flutes, taps have straight flutes.
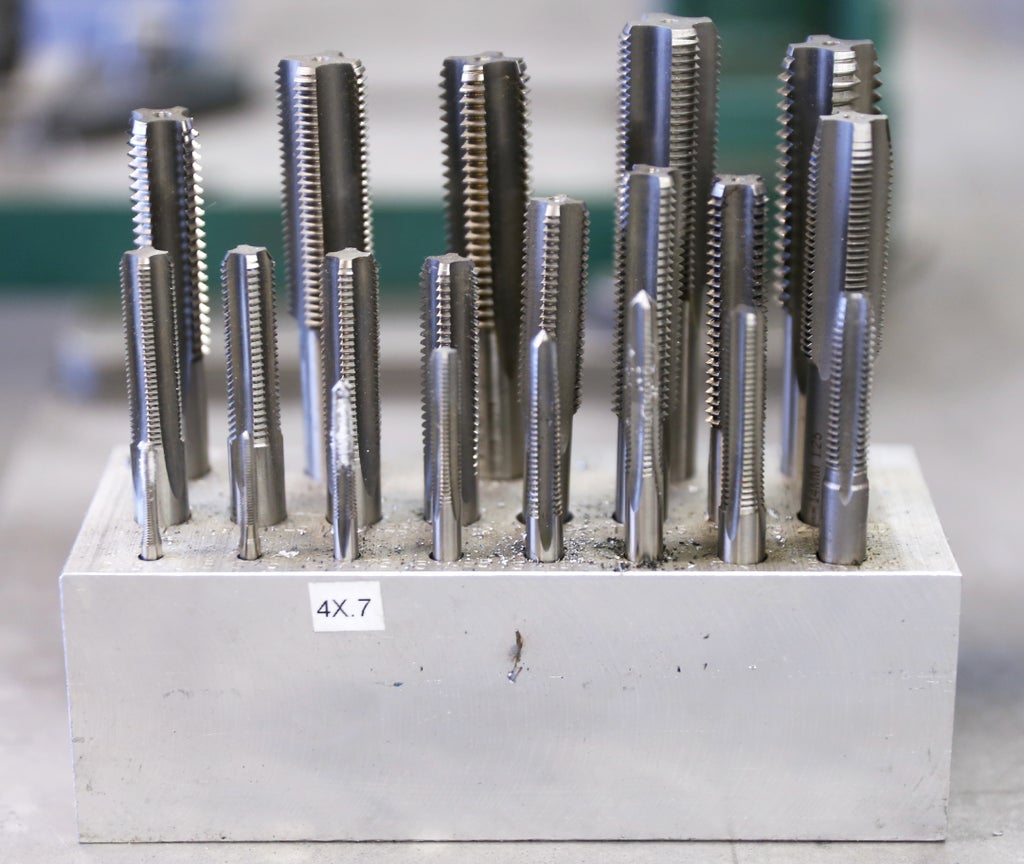
They make taps that match every imaginable bolt size and threading for both imperial and metric bolts. You can always find a tap to meet your needs.
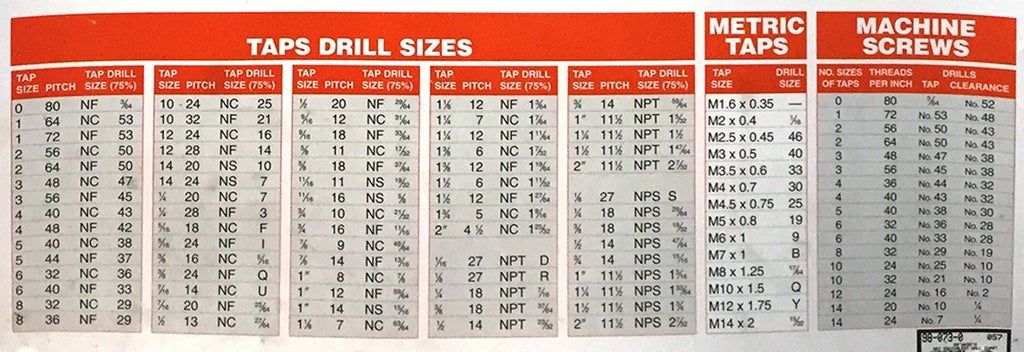
Any hole made in metal can be threaded if drilled to the proper size for a tap. This hole is always slightly smaller than the diameter of the bolt that gets threaded into it. To figure out what size hole needs to be drilled, you should reference a tap chart. You can easily find one online, but if you really get into this, you should print out or buy one to hang on your wall.
Step 4: Set Screws
In this lesson we will be tapping the three holes we previously drilled to insert "set screws" into them. Despite the "screw" in their name, set screws are actually specialized bolts which use tension to hold two objects together. Typically this involves pushing an entrapped part against the wall of the other part which is entrapping it. In our case, we are going to use them to hold the spherical crystal lens to the inside of the tube. As the bolts get tightened, they will be "grabbing" the sphere and holding it in place. If this doesn't make sense now, don't worry. It will make perfect sense in a few lessons when we assemble it.
Step 5: Setup the Tap Handle
The tap handle has a square jaw, which conveniently clamps onto the square shank at the end of the tap.
Firmly clamp the 6-32 tap into the tap handle.
Step 6: Apply Tapping Fluid
Put a few drop of tapping fluid into the hole you will be tapping. This makes it much easier for the tap to cut grooves into the metal by decreasing friction and reducing heat. If you don't believe me, try tapping one of the holes without tapping fluid (although, I do not recommend it).
It also often helps to spread tapping fluid onto the tap itself using a brush, even though it is likely not necessary for such thin metal stock.
Step 7: Thread the Hole
We are going to tap all three of the holes we previously drilled.
Tapping a hole is extremely simple in concept, but exceptionally difficult in practice. With each turn:
- Turn clockwise one half-turn past where you stopped the last time
- Stop, back out three-quarters of the way counterclockwise
- Repeat
Basically, you are cutting one half turn deeper at a time, and then backing off to clear out the cut metal flakes. Since we are tapping all the way through our piece of metal, proceed doing this until the tap is all the way through the hole and you encounter no more resistance.

This sounds easy enough, but is actually difficult. It is important to go slowly and stop when you begin to feel 'too much' resistance. Unfortunately, knowing how much is too much resistance is the type of thing that can only be learned through practice over time. You may even break a few taps. That's okay. We have all been there.
Breaking a tap is one of the most frustrating things you may encounter. If you are lucky, you may be able to recover by grabbing part of it with vise grips and carefully backing it out. However, 95% of the time, the tap is now in there for good and the hole is ruined. If the hole is critical to a larger assembly (and can't be relocated elsewhere), then the entire part is ruined. Thus, it is important to get good at tapping things properly, or you may find a lot of work ending up in the trash.
Step 8: Insert the Screws
Once you have tapped all three holes, test to make sure the threading is good by inserting the set screws.
The first time you do this it may be a little stiff, and you may notice is cleans out some extra cutting fluid and aluminum flakes from the hole. This is normal.
You are now ready to move on to the Polishing Aluminum lesson to give your tube a nice shine.

Did you find this useful, fun, or entertaining?
Follow @madeineuphoria to see my latest projects.


