Introduction: Flowing LED Lights With Arduino Uno R3


In this lesson, we will conduct a simple yet interesting experiment – using LEDs to create flowing LED lights. As the name suggests, these eight LEDs in a row successively light up and dim one after another, just like flowing water.
Step 1: Components
- Arduino Uno board * 1
- USB cable * 1
- Resistor (220Ω) * 8
- LED * 8
- Potentiometer * 1
- Breadboard * 1
- Jumper wires
Step 2: Principle
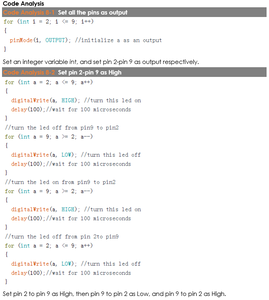
8 LEDs are in a row successively light up and dim one after another. The principle of this experiment is simply to turn on eight LEDs in turn. The eight LEDs are connected to pin 2-pin 9 respectively. Set them as High level and the corresponding LED at the pins will light up. Control the time of each LED brightening and you will see flowing LED lights.
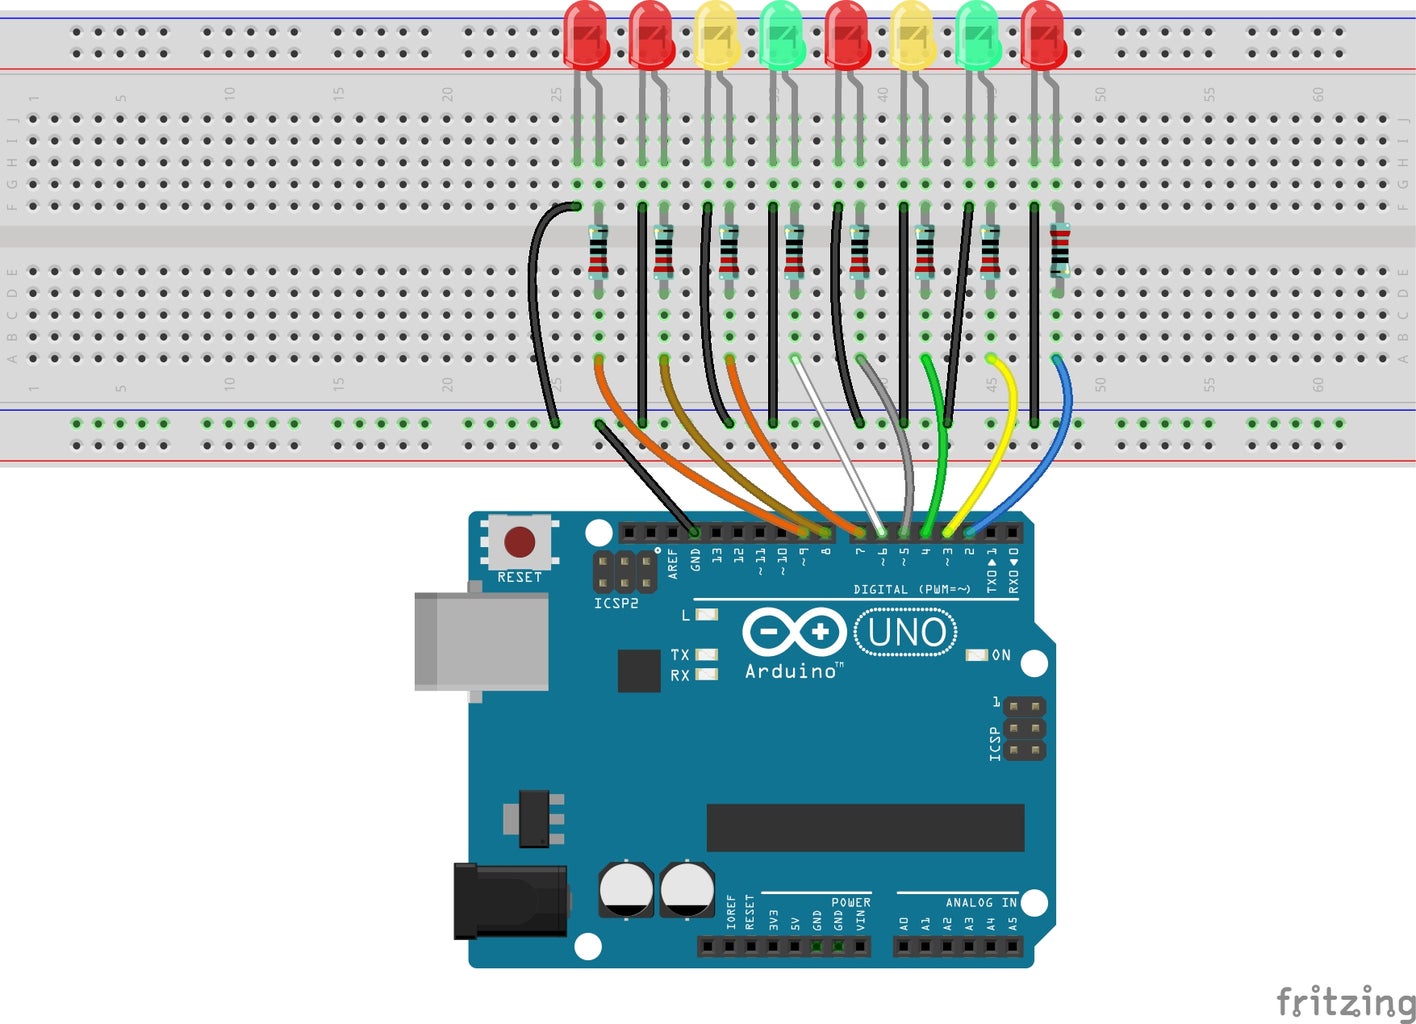
Step 3: The Schematic Diagram

Step 4: Procedures


The principle of this experiment is simply to turn on eight LEDs in turn. The eight LEDs are connected to pin 2-pin 9 respectively. Set them as High level and the corresponding LED at the pins will light up. Control the time of each LED brightening and you will see flowing LED lights.
Step 1:
Build the circuit.
Step 2:
Download the code from https://github.com/primerobotics/Arduino
Step 3:
Upload the sketch to the Arduino Uno board
Click the Upload icon to upload the code to the control board.
If "Done uploading" appears at the bottom of the window, it means the sketch has been successfully uploaded.
Now, you should see eight LEDs brighten one by one from the LED connected to pin 2 to that to pin 9, and then dim in turn from the LED at pin 9 to the one at pin 2. After that, the LEDs will light up from the LED at pin 9 to that at pin 2 and dim from the LED at pin 2 to that at pin 9. This whole process will repeat until the circuit is power off.
Step 5: Code
//Flowing
LED Lights/* Eight LEDs will light up one by one from left to right, and then go out one by one from right to left.
After that, the LEDs will light up one by one from right to left, and then go out one by one from left to right.
This process will repeat indefinitely.*
/Email:info@primerobotics.in
//Website:www.primerobotics.in
/**************************************/
const int lowestPin = 2;//the lowest one attach to
const int highestPin = 9;//the highest one attach to
/**************************************/
void setup()
{
//set pins 2 through 9 as output
for(int thisPin = lowestPin;thisPin <= highestPin;thisPin++)
{
pinMode(thisPin,OUTPUT); //initialize thisPin as an output
}
}
/****************************************/
void loop()
{
//iterate over the pins
//turn the led on from lowest to the highest
for(int thisPin = lowestPin;thisPin <= highestPin;thisPin++)
{
digitalWrite(thisPin,HIGH);//turn this led on
delay(100);//wait for 100 ms
}
//fade from the highest to the lowest
for(int thisPin = highestPin;thisPin>=lowestPin;thisPin--)
{
digitalWrite(thisPin,LOW);//turn this led off
delay(100);//wait for 100 ms
}
for(int thisPin = highestPin;thisPin>=lowestPin;thisPin--)
{
digitalWrite(thisPin,HIGH);//turn this led on
delay(100);//wait for 100 ms
}
for(int thisPin = lowestPin;thisPin <= highestPin;thisPin++)
{
digitalWrite(thisPin,LOW);//turn this led off
delay(100);//wait for 100 ms
}
}
Step 6: Code Analysis