

Introduction: FreeRTOS With Arduino 01 : Setting Up FreeRTOS on Arduino


We will see how to setup the Arduino IDE for FreeRTOS. After setting up the IDE, we will run the first FreeRTOS example on Arduino Uno.
Step 1: Setting Up :

Step 2: Running First Example :

Now run the the IDE and open the first example from File->Examples->FreeRTOS->01-TaskSwitching as shown in above image.
Step 3: Output on Serial Terminal :
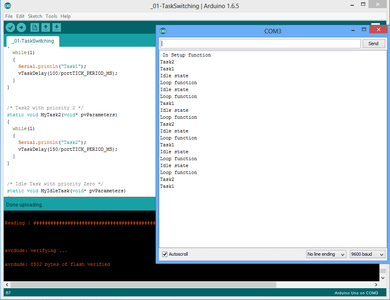
Compile and upload the code. Open the serial monitor to see the output.
Step 4: FreeRtos Configuration :
Please check this tutorial for freeRtos configuration.
Step 5: Heap Settings :
The original free rtos project can be downloaded here . It uses heap_3.c file and memory allocation is done by malloc() and free() functions. Heap size needs to be configured through linker setting and configTOTAL_HEAP_SIZE setting in FreeRTOSConfig.h has no effect.In order to solve this we will be using heap_4.c. Please check this link for more info on freeRtos heap usage.
Step 6: Downloads :
Download the complete project and libraries from here.


