

Introduction: Homemade Scriber


In my opinion, the best scriber is the back of the blade of a craft knife. But the blade gets dull too fast if I use it often. So I decided to make my own scriber from old blades and some popsicle sticks.
Step 1: Materials

Here are the materials you need:
1. 2 popsicle sticks
2. craft knife blade / 1 piece of box cutter blade
3. glue that can be used in metal and wood. Read the back of the glue to make sure it can do the job.
4. pencil / marker
5. craft knife or box cutter
6. rubber band - optional
7. cutting mat - optional
Step 2: Draw Around the Blade

1. Decide which end of the craft blade you want to use. I wanted to use the dull end (the non business end).
2. Position the blade and draw an outline around it.
Step 3: Carve It


Carefully remove the wood enclosed by the outline. Don't cut too deeply. You only want to remove the amount that would make the blade level with the rest of the popsicle.
Always test the fit of the blade to see where you still need to work on.
Step 4: Glue It


1. Put some glue in the slot for the blade.
2. Carefully place the blade then press down.
3. Put some glue to the rest of the popsicle stick.
4. Place a popsicle stick on top.
Step 5: Wait for a Long Time

Put the scriber below a heavy load. This will help hold everything together while the glue dries.
I used a very old transformer for this job.
Wait for 24 hours to be sure that the glue cures.
Step 6: Optional

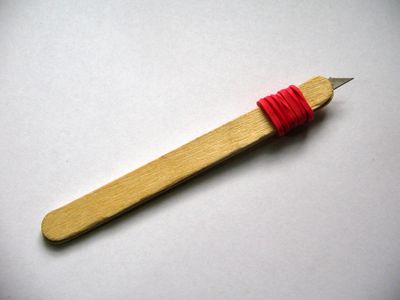
Put a rubber band around it to use as a grip or if you're not sure that everything will hold together.
Suggestions:
1. Maybe you can make a homemade craft knife using this method.
2. Instead of using a craft knife, a needle or pushpin can also be used.


