

Introduction: How to Fold a Paper Crane

Origami, literally meaning 'paper folding,' was invented in China around 100AD. Japan adopted origami in 600AD, and although it originated in China, it is credited to Japan for its popularity in the modern world. Since paper used to be handmade, and was fairly expensive, only those with money were able to practice the art of paper folding. Because of the value of paper, and the difficulty that it took to create a piece, origami was seen as sacred, the pieces created were treasured dearly. Origami holds its significance in ceremonies such as weddings, funerals, and other important ceremonies. The term origami covers the wide range of paper folding types that can be created such as action origami (origami that has movable parts, when pressure is applied a part of it will move, ex: flapping bird), modular origami (origami that requires multiple identical pieces to be put together to be completed), and kirigami (origami that involves paper cutting as well as folding).
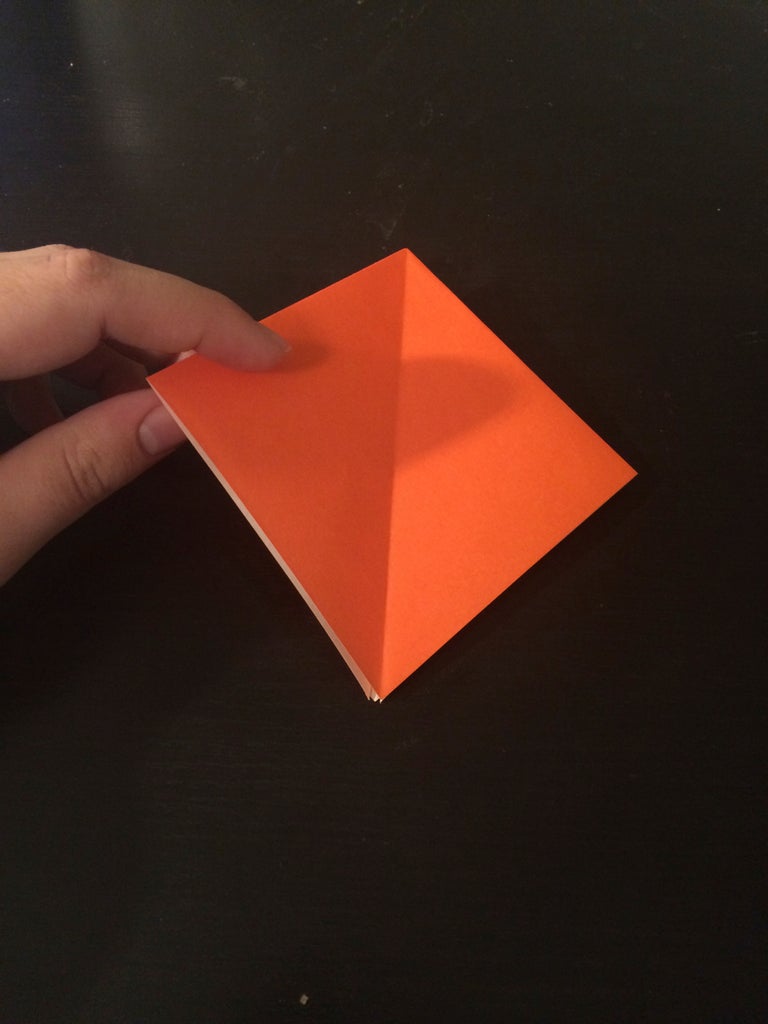
Step 1: Create Base Creases.


Fold opposite corners to each other to make a triangle and make a crease. Do the same to the other set of opposite corners and make a crease. Make sure the color you want the crane to be as a final product is the color that is on the inside when you fold.
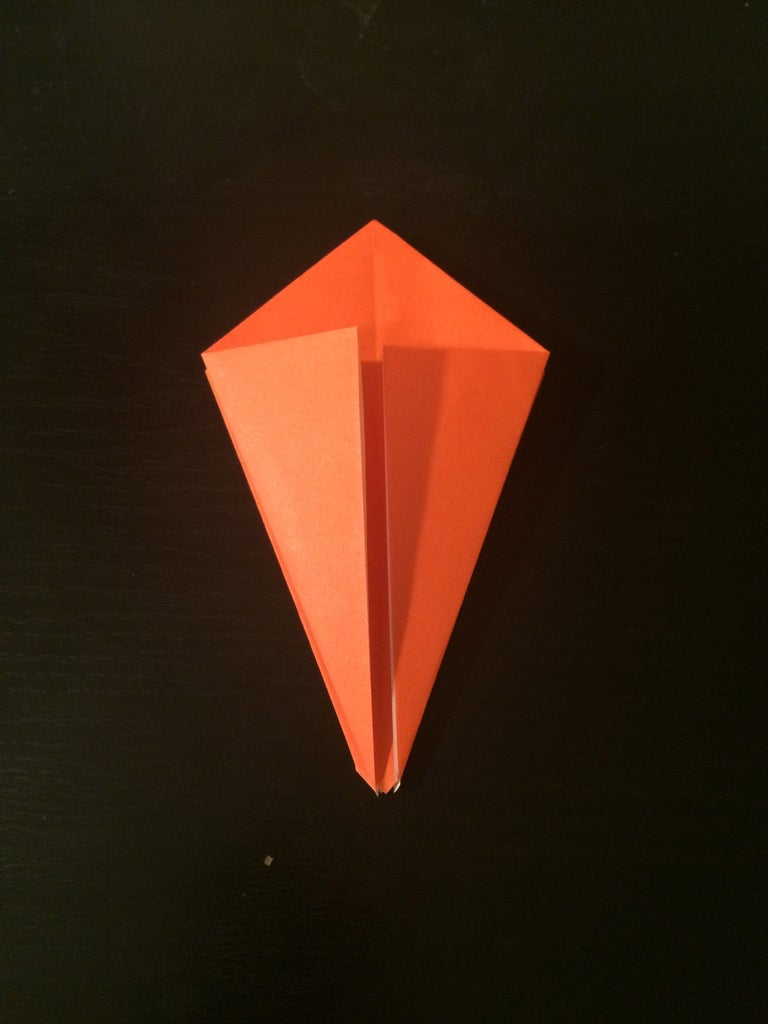
Step 2: Create Base Creases (continued).


This time fold the square in half, the white side will be on the inside this time. Repeat for the other side of the square until your creases look like the picture on the bottom.
Step 3: Use the Creases to Fold Inward Into a Smaller Square.


Here's the tricky part, first tuck in the diagonal folds that are on the same crease all the way across the original square. All of the points of the square should naturally come together at the bottom tip (where my fingers are in the first two pictures).
Step 4: Fold the Edges of the New Square to the Center on Both Sides.


Fold the edges to the center as shown above.
Step 5: Flip Over and Repeat Step 4
Do the same to the other side of the new square. This is what's called a bird base, which is a basic sequence of steps that are the starting steps of many other origami designs. The bird base is accurately named, for it is most often the start of other origami birds.
Step 6: Fold the Top Triangle Down.


Fold the top triangular shaped piece downward to create a new crease across the top of the two previous folds.
Step 7: Open Up and Lift the Top Flap of the First Side.


Basically unfold the previous three folds you made. Pull up the top flap in order to reveal the white underneath.
Step 8: Pull the Corner Up to the Top and Press Flat.

Pull the corner that was at the bottom to the top, because of the creases you had previously made, it should naturally come to this position, creating a narrower triangle.
Step 9: Flip Over and Repeat Steps 6-8.

Flip the piece over and repeat the folding steps 6-8 on this side.
Step 10: Fold Edges of Diamond to the Center.


Recall previous steps, this is very similar to a step that has been done before. Fold the edges to the center as shown in the pictures about. Flip over and REPEAT on the other side.
Step 11: Fold Entire Flap Over.


Fold the flap over one time. Do the same to the other side. Make sure there are two layers of flaps that are parallel to each other.
Step 12: Fold the 'tail' in Half.


Fold one flap in half horizontally. Make sure the bottom tip is now at the top. Flip over and REPEAT on the other side. It should look like the picture on the right.
Step 13: Fold Entire Flap Over (again).


Fold the entire flap over just like in Step 11. Flip over and REPEAT.
Step 14: Pull Out the Inside Pieces and Crease.


Pull out the two pieces between the two outside flaps. Line them up with the bottom and crease or squish them in between the two outside flaps so that they will stay put. Pull them in opposite directions of each other like the picture on the right.
Step 15: Fold the Tip of One Side Down.

Fold the top of one of the pieces that are sticking out downwards to create the head.
Step 16: Fold Wings Down.

Fold the wings downward and make a crease. Flip over and REPEAT.
Step 17: Inflate the Body.


Pull on both of the wings while blowing air into the hole located on the bottom of the body.
Step 18: Congrats!

You're done, that's a fine looking crane! Only 999 more to go.


