

Introduction: How to Make a Customized Remote Control Car


In this tutorial I will show you how to make a customizable remote control car out of pretty much whatever you want. I will be using k-nex and some cardboard but you could also use Legos, 3d printed parts, or a lot of other things.
Step 1: Get Together the Electronics
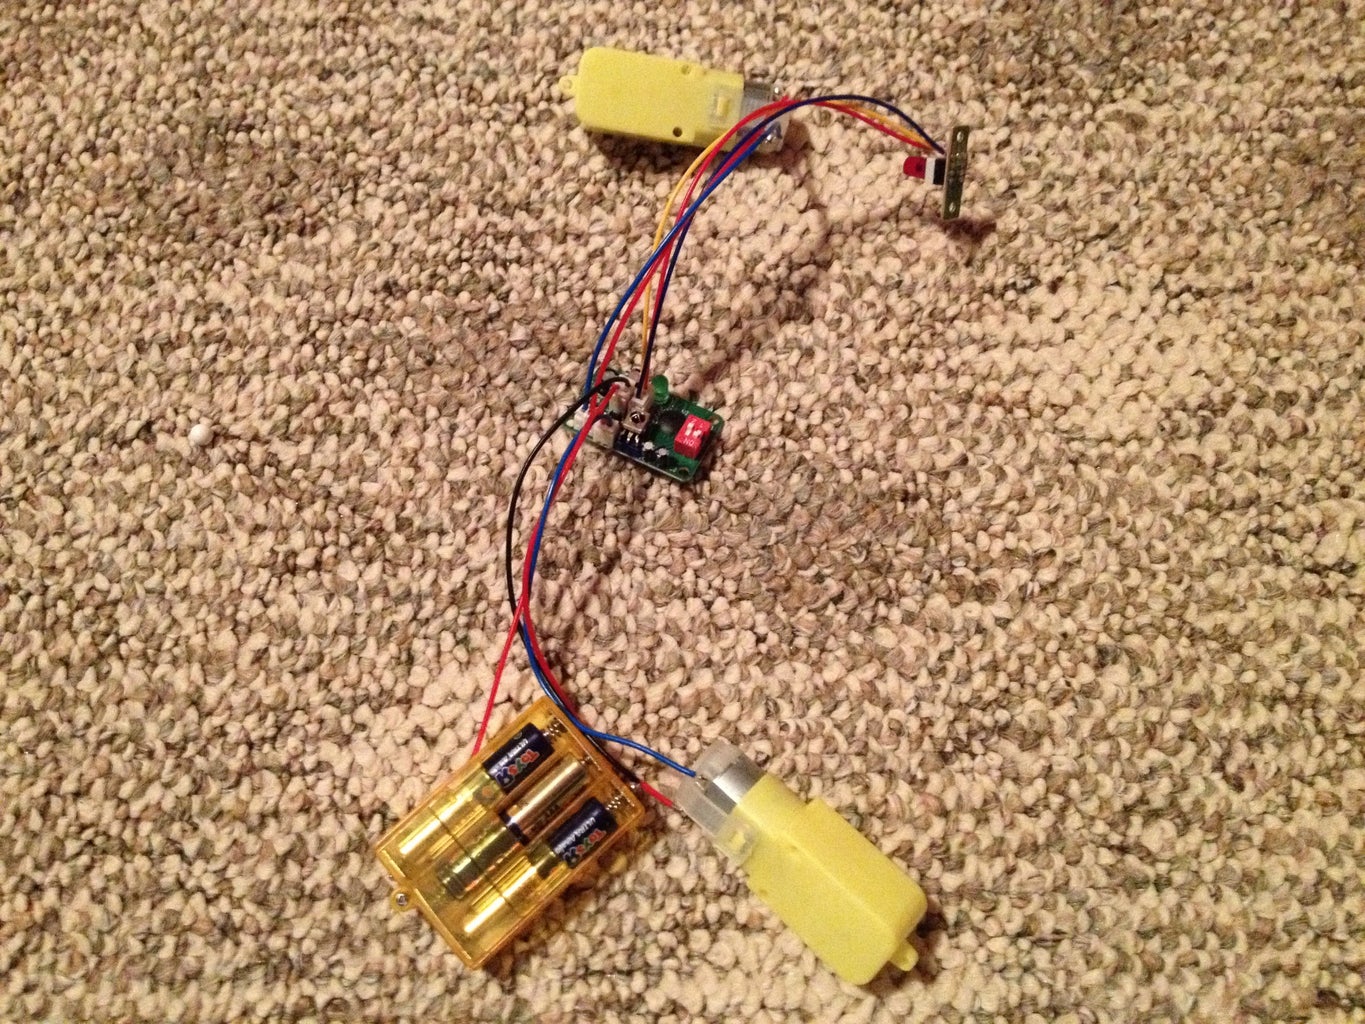
First you need to get the pieces you need for the remote control. I am using the pieces out of a remote control tank from RadioShack because it has a small circuit board, it is easy to use, and it works well.
Step 2: Choose Your Base

Next choose your base. I am using this car built out of k-nex and some cardboard to make it all work.
Step 3: Get the Wheels to Work With Your Motors


Then you need to get the wheels you are using to work with you motors. My initial idea was to use cardboard as the wheels because it is easy to work with, but I think it will work to wrap the ends of my motors in electrical tape to fit snugly in the holes of the wheels.
Step 4: Attach the Motors to You Base
Now you need to get the motors attached to your base. There are a lot of ways you can do this. I am just using cardboard because it is simple and easy to work with.
Step 5: Finish It Up

After that just put in the rest of the circuitry and you are now ready to drive around your customized Remote control toy.

Participated in the
Toy Rods and Connectors Contest

Participated in the
Battery Powered Contest

Participated in the
Remote Control Contest

Participated in the
Epilog Challenge V


