

Introduction: How to Build Your Own Snowboard or Skis
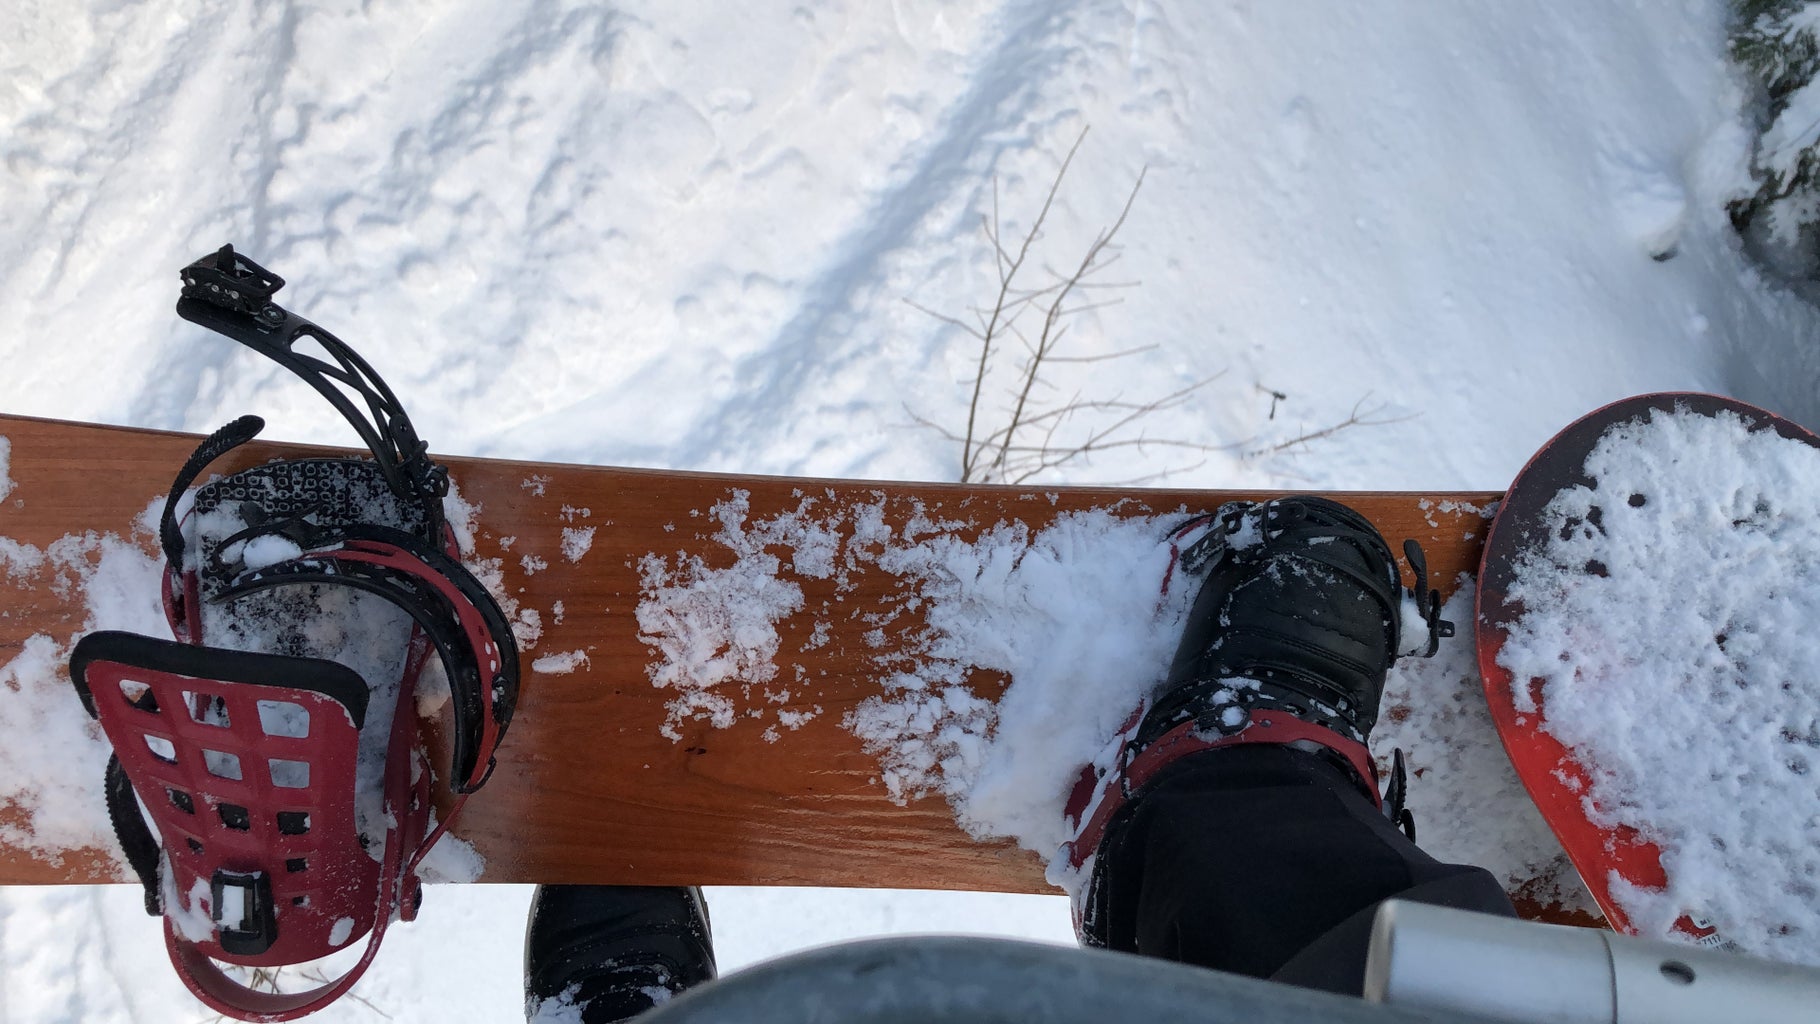

Have you ever wondered how cool it would be to ride your own, completely unique, homebuilt snowboard? Well that is exactly what I did last year after bingewatching all of the Every Third Thursday videos. After a lot of research I finally felt like I knew enough to build one myself, I did and I finally rode it this Christmas break, man is it awesome!
In this Instructable I will be explaining the different steps in building a snowboard or skis. I will be explaining everything for a snowboard but the process for skis is identical. I will explain the different ways things can be done and why I choose the methods I used. It is not a complete guide, I covered mostly the basics and probably forgot some things. However it will be a good starting point for further research into topics you don't fully understand yet. A great place with a lot of knowledge is skibuilders.com. Everything you possibly need to know is on there. It takes quite a while to read most of it but it is really fun and informative.
Below this project I will share some more links on helpful websites and videos. If you have any questions, feel free to ask them and I will try to help you. Not all the pictures used are my own, so kuddos to all the people who made and uploaded those.
I entered the Snow contest with this Instructable, so if you like it please vote for me!
Supplies
There are a lot of options for using materials, I will list the basic materials and tooling you will need here. In each step I will go into more detail about the required tools and materials. I bought all my supplies from skibaumarkt.de, another European supplier is junksupply.com, the biggest supplier in the US is snowboardmaterials.com.
Materials
- Base material
- Steel edges
- Wooden core
- Binding inserts
- Fiberglass
- Epoxy
- Template and fixture wood (I used MDF but almost everything is fine for this)
- Topsheet (not strictly necessary)
Tools
- (Jig)saw
- Sandpaper
- Drill
- Ruler and calipers
- Router (not strictly necessary but makes things 10x easier)
- Some form of press, either using clamps, a vacuum pump or pneumatic press.
Step 1: Snowboard Basics


A Snowboard basically consists of a sandwich of different materials on top of each other, bonded with with epoxy and squished to one solid piece.
The base
The base is the bottom of your snowboard, this is the piece that glides over the snow. It is generally made from UHMW-PE (Ultra High Molacular Weight Polyethylene) also called P-TEX. This is a very though plastic, it is made by one of the following two processes: Sintering or extrusion. A sintered base is tougher, faster, and more expensive, while extruded is slower, easier to cut and is generally found in cheaper boards. You can get base material in a wide variety of colors, including transparent. This means you can paint the other side so you have a nice graphic on your base.
Steel edges
The steel edges are mounted around the edge of your snowboard, they are sharp and cut into the snow, giving you a lot of grip. They go on top of your base, usually with a thin piece of rubber on top of them. This is to increase bonding to the rest of the board, since the epoxy has a hard time properly adhering to the steel. For this reason it is very important to wipe them with alcohol before layup so they are completely free of oil and gunk.
Core
The core is the heart of your board, it defines the stiffness and flex profile. The core is usually made from vertically laminated lightweight wood such as poplar or bamboo. The thickness of your core defines the stiffness and flex profile of your snowboard. The core is the thickest under your bindings and in the middle of the board, around 7 mm and is around 2-2.5 mm in the nose and tail.
To mount your bindings to your board, inserts are added. They are mounted from the bottom side of your core, and because of the wide lip, they can not be pulled through while you're shredding.
The wood in the nose and the tail is a lot of times replaced by a thicker version of base material, called tipfill. It is more flexible than wood so it bends easier into your mold. It also provides some dampening in your board. Additionally it protects the end grain of your core. As you can see it has a lot of advantages, however it adds costs and complexity to your build. So it is a trade off that everyone has to decide on their own whether or not they think it is worth it.
Sidewalls
A lot of boards have sidewalls, these are pieces of hardwood, abs or ptex that protect your core from water and skiers who hit your board waiting in line for the lift. ABS or ptex sidewalls are usually used in commercial available boards. However they are very hard to use in homebuilt boards because they don't adhere well to the core, and are therefore very hard to profile (Making your core to the right thickness). Hardwood is a lot easier since your can glue them to your core with regular wood glue, and they will never ever come off again.
Another way of protecting your core is by using so called cap construction, which can be seen in the 4th picture. Here your intentionally make your core smaller than your board. During pressing the top layer of fiberglass and your topsheet fold over the side, closing of your core. This is a cheap option but it does require a vacuum system and shaping your core very precise. I personally opted for using a hardwood sidewall.
Topsheet
The topsheet of your snowboard is not strictly necessary. It is the final layer of your board, most often a veneer or plastic topsheet is used. A veneer gives a quality look. On a plastic topsheet a graphic can be made using silkscreening or printing. You can order your printed topsheet and base from snowboardmaterials.com.
Press
One of the most important parts of building a snowboard is the press. All your layers are pressed together while they are soaked in epoxy. In the press your snowboard gets its shape. The press consists of a base mold, this holds the camber profile and the shape of your nose and tail. The board is pressed into the mold, this can be done using different techniques. The most common, cheap but good quality way is to use a vacuum system. You put a sheet of plastic over your board, and then tape it to the mold using vacuum tape. When you turn on the vacuum pump, you press with one bar (atmospheric pressure) on top of your board, this doesn't sound like much, but it is like parking your car on top of it.
Another way is using a top mold and clamping it to the bottom mold, this is easy and cheap but it has one mayor downside. When your top mold is not perfectly shaped it has spots where there is almost no pressure because it will not or barely touch the board.
Then there is also the "proper" way. This also includes a bottom mold, but now it is in a very sturdy frame, with usually fire hoses which are inflated using compressed air. I will not discuss this type further here since it is a very expensive press, which is used when you want to build a lot of boards. When this is the case you will surely encounter it during your research.
Step 2: Design

When you build your board, you obviously need a design first. You can just copy everything from a board you have lying around and trace its shape, or you design you own board. Great design tools are SnoCad (free) and the Boardcrafter design (free limited version, 15$ for the full version.) software. You can of course also do it in your cad program of choice. I will not go into all the details about snowboard design since there is a lot of info out there on the internet. My advice is to start with a shape and dimensions of a snowboard you like, all the numbers are often published by manufactures, and adjust them to your own preference from there.
One very important part is the thickness of your core, since this defines the stiffness of you board. I could not find very clear numbers on what to use, so it was a bit of a guess. I used 7.5mm under my bindings, 7mm in the middle tapering down to 2.5mm in the nose and tail, which was also the thickness of my tipspacers. You can simulate your thickness and layup in the junksupply simulator. My board is a bit too stiff, I am however not sure if this is because 7.5 mm is too thick. After profiling my core I discovered that my core was not flat, it was a bit thicker in the middle than on the sides. I did not fix this because I was afraid I would make things worse.
Step 3: Base


The first step is to build the base of your board. First print out your template, if you do not have access to a large printer, you can tape multiple pieces of paper together. It is important to verify that you print at 100% scale and not at 96% or something like that, do this by measuring the total length. Before you start cutting your base material, make sure that you have it laying in a constant environment so it can settle, do this again after cutting to minimize warping. Most suppliers of base material supply the base already flame treated. Flame treating is quickly flaming the surface of the Ptex, this changes the structure and makes the epoxy adhere better. Check with your supplier if your base is flame treated, and if so, if this is on both sides or only one side. The flame treated side should go to the inside of your board.
After you have printed out your template, glue it to a piece of wood, and cut it out very precise. You can cut it out rough and then do the final few mm very careful. If it is not perfect, do it again. It is important that the shape is perfect because it defines your final shape, and 1 piece of wood is not worth an asymmetrical board.
When you have your template ready, you can clamp your base material on top of it. It is best to route it out using a flush cut trim bit on the router. I could not get this to work because my bit was dull. If you don't have a router or can not get it to work, you can use a sharp knife and use the wood as a guide.
I used some spray paint to make some sort of graphic on the base, you have to paint the side that will be on the inside of the board. Make sure to use acrylic, water based paint. This is because any oil or solubles based paint will keep the epoxy from adhering properly.
Step 4: Edges


Next you can bend and mount your edges to the base. It is important that they fit very tight to your base. Bending your edges is a frustrating and hard task that requires patience. Modded pliers such as shown in the second picture are a great help.
When you bend your edges you can temporarily mount them to the base using a lot of small clamps. A few drops of superglue keep them in place until you lay up the board. You don't need a lot of superglue, capillary action will pull it under the tabs and glue the edges in place. Always handle your edges with gloves and make sure you wipe down your edges with alcohol before gluing them down.
Step 5: Core


For me one of the hardest steps was getting the core right. The core is made up of vertically laminated strips of wood. After you have your basic core, you have to saw out the right shape. If your are going for a sandwich construction you can then glue the sidewalls in place. If you are going for a cap construction you don't need any sidewalls. Now you can profile the core, this is getting the core to the right thickness along its entire length, which is as 6-8mm in the middle tapering down to 2-2.5mm in the nose and tail. Of course if you have CNC router, this step will be a lot easier and this is its time to shine.
It is a good idea to mark all the important lines of your board on your core.
- Mark the two lines where your board is the widest, which is the transition from the nose to the middle and from the middle to the tail.
- Both the centerlines along and across your board.
- If your board is not a twin, ie not symmetrical in the nose and tail, put very clear markings to indicate where the front of your board is.
- Very precisely mark the place where your binding inserts will go.
Making the core
You can make the cores yourself by gluing pieces of wood against each other and then sawing it in thin slices (picture 2). You can also buy a ready made core, Snowboardmaterials.com even sells profiled cores. I bought a core from Skibaumarkt that was already laminated but not yet profiled. Most of the cores are made from a lightweight wood like poplar, bamboo or paulownia. Some cores have two strips of tougher wood in the spots where the inserts go, these are called stringers.
Once you have your core, you have to give it the right shape. In your design you should have made a template for your core. Print it out and tape or glue it to your core (picture 3). The sidecut (curve) of your base template and the sidecut of your core is the same. Therefor you can use this as a guide when using the router with a flush trim bit. (Only use the curve as a guide and not the entire template, your core should be smaller then your base.) Dont cut your core to the right length yet, the excess will come in handy when you're profiling.
Now it is time to drill the holes for your inserts. My inserts required a 11 mm hole with a 20 mm countersunk of 2mm. I used a forstner bit to countersunk all the holes. Don't make the same mistake as I did and assume the forstner bit will center itself, it will not. Making this mistake will result in not having all your inserts all exactly where they should be. Start with a small pilot hole, then drill the 20 mm countersunk and finally drill the 11 mm hole all the way through. Make sure to drill the countersunk in what will be the bottom of your core!
Sidewalls
Next up is gluing on the sidewalls. As said in the beginning, I highly advise to use wooden sidewalls instead of ptex or abs. These plastics are very likely to rip off during profiling, possible destroying you or your core. You can use any hardwood you like, I did not have much choice and bought a strip of wood from the local hardware store. The wood I bought was just called hardwood, apparently this is usually (At least in the Netherlands) Meranti wood. This is not super hard and tough but good enough to do the job. You can see the sidewalls being glued on in picture 5. The sidewalls are not glued on past the curve because my tipfill starts there, thus my core will be cut off at that point after profiling.
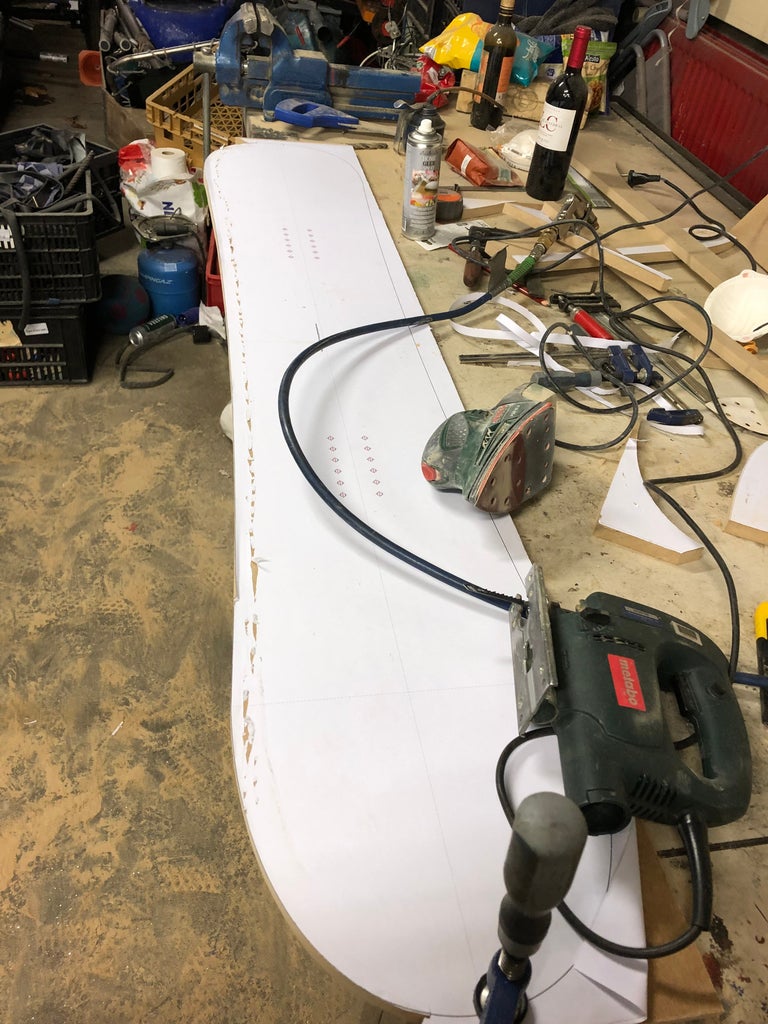
Profiling
Okay so now you have your core and sidewalls, this is where the fun begins. I sadly did not take any pictures here. The basic idea can be seen in the 6th picture, the router slides over two rails on either side of the core. In the middle the rails are higher, so the router is lifted and the core becomes thicker. On the ends it is the other way around, the rails are lower so the router goes deeper into the core and thus makes the core thinner. In the 7th picture you can see the beginning of my setup, the rails still had to be brought to the right height. To keep your core from sliding around you can keep it in place by putting a few dabs of hotglue on the side. You can also use double sided tape under the core.
As I found out it is very important to make sure that your core is laying completely flat on the table. Mine was, as I found out later, curling up on the sides a bit. Because I measured the thickness on the side, my core was a little bit too thick in the middle, making it very stiff.
Another method for profiling the core is using a planer. Here the jig goes under the core, the jig is low in the middle and high at the ends. The planer cuts every part of the combined boards to the same thickness, so where the jig is thicker the core will be thinner and vice versa. An example of such a jig can be seen in the 8th picture.
There are a lot of options for making a profiling jig, It is probably best to look around what the best option is with the tools and materials you have available.
Step 6: Topsheet

The topsheet is the final layer of your board. It is the most visible and you can get very creative with it. You can use veneer, a plastic printed topsheet, cloth or a thin piece of fiberglass. When you don't want to print your graphic on a plastic topsheet you can use the rice paper method. Start with printing your graphic on rice paper, then put it under your clear topsheet or a thin layer of fiberglass. After the layup, the rice paper will be be almost invisible, so you only see the graphic.
If you use veneer as a topsheet, make sure that it is completely flat before pressing. I thought some bubbles and waves would press out but they didn't and they ended up in my final board.
Step 7: Press


One of the most important elements of building a snowboard is your press. You need a press together with a mold to give the snowboard its profile and squish everything together to one solid piece.
Clamping press
The simplest form a of a press consists of two pieces, a top and a bottom mold. Both have the shape of your board, you put the board in between the two and clamp them together. The 4th picture is an example of this type of press (This one is for longboards, not snowboards). The major downside of this method is its uneven pressure distribution. If there is at one point a small wave in your top mold, it will not be touching the board there, so at that point there is no pressure applied at all. I will not explain this type of press in detail here since I did not use one and it is very straightforward.
Vacuum bagging
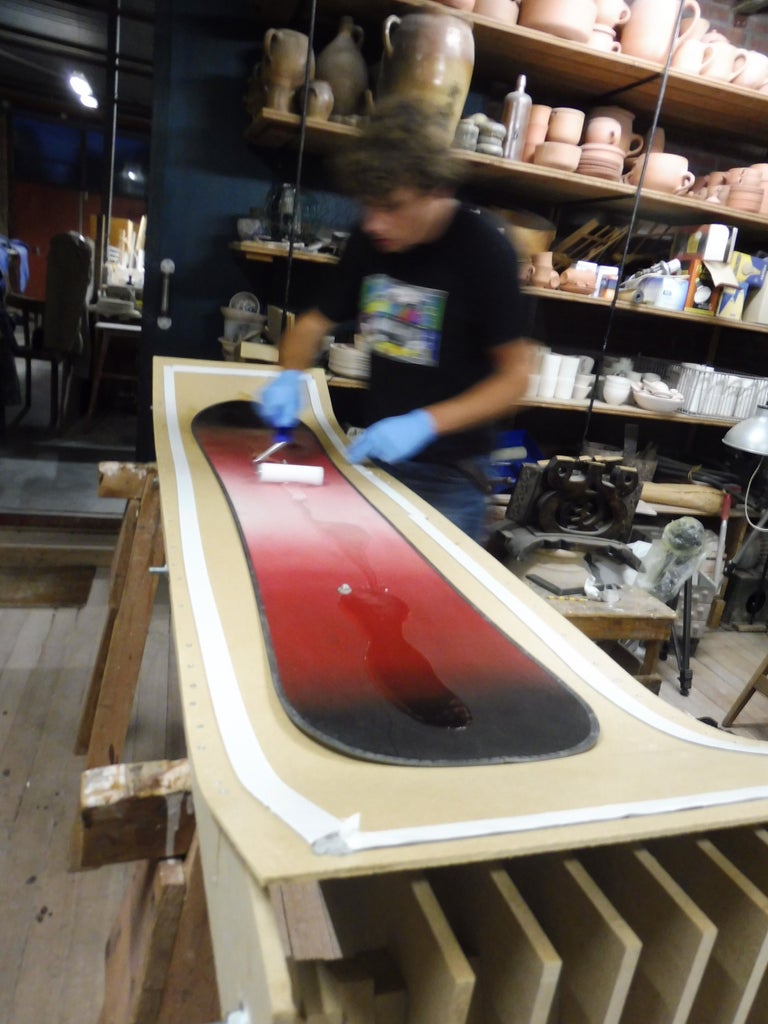
The method I used is called vacuum bagging. You put your mold either inside a vacuum bag or put the vacuum film on top of your mold. When you pull a vacuum using a vacuum pump you are pressing on your board with atmospheric pressure. This does not sound like much but 1 bar on your board is 3 times more pressure than parking your car on top of it.
There are two ways of vacuum bagging your snowboard, either make a stiff mold and put it completely inside a vacuum bag (picture 3). Or making a mold and tape the vacuum film on top of it, over your laminate. This can be seen in the first picture and it is the way I did it.
Both methods have pros and cons. Putting your mold inside your bag requires a very solid and stiff mold. If your mold is not solid or stiff it will deform and that will show up in your board. On the upside, it is very easy to get a good seal using this method, just close the bag and you are done. Putting your vacuum film on top of your mold requires a less rigid mold, since the pressure is only on your board and not on the entire mold. This means It is easier to build and requires less material. It is however harder to get a good seal.
Mold
A typical mold consists of multiple identical ribs, they are clamped together using threaded rod with spacers in between the ribs. On top of that goes a thin sheet of material which will be your working area. You can cut your first rib out using a template from your design. Make sure your mold is significantly wider and longer than your board will be. This is to have enough space for the flashing and vacuumbag. You can then make multiple copies of the first rib using a router. It is best to then clamp them all together without spacers to make sure they are all identical and your mold is even from side to side. If not, sand until everything matches. Note: When you put your mold inside a vacuum bag, don't use spacers, instead just make it a solid mold.
On top of your mold goes your work surface, it is important that this is flat and smooth so it doesn't leave any marks in your board. Most of the time a thin sheet of acrylic or metal, either steel or aluminium, is used. A budget option is using a thin sheet of masonite. I thought that was the same as hardboard. Well, I found out it isn't the hard way. Hardboard is porous so I was not able to draw a full vacuum. Besides that the epoxy bonded very good to it as well, tough that could also be due to the fact I did not use any mold release.
Vacuum setup
For a vacuum setup you need at least the following things:
- A pump
- Hoses and fittings
- Bag connector: Joe woodworking This explains various different options. I used the DIY version (3)
- Vacuum gauge
- Vacuum bag or film (you can buy special vacuum film, PE building plastic from the home improvement store works as well)
You can obviously just buy a pump (they are quite cheap second hand), or you can use an old fridge compressor. While it's not perfect, it works probably good enough to use it once or twice. It is explained further in This Instructable. While a vacuum gauge seems not absolutely necessary, it is vital to know if you are just sucking a bunch of air, or if you are actually pulling a vacuum. Without a gauge this is a pretty wild guess. It is a good idea to position the gauge as close to the vacuum bag as possible, so you measure the pressure inside the bag. While a gauge near the pump is easier, it gives a less accurate result. The best option would be to mount the gauge on the opposite side of the bag using it's own connector. I did however just mount it close to the pump because this was much more convenient.
A good addition to the setup is a vacuum reservoir with auto cycling. A vacuum reservoir is nothing more than a closed pot or pipe included in your system so you have a bigger volume to draw a vacuum from. This means that a small leak has less influence. Together with this you can cycle the pump, so lets say you draw a vacuum until -0.95 bar, stop pumping, and when the pressure is at -0.85 bar you turn the pump back on again. There are a lot of diy mechanisms that do this, I have however not used one so I can not recommend a certain system.
On joewoodworker.com there is a ton of great info about vacuum bagging systems
Setup
When vacuum bagging, you not only need your mold and vacuum pump setup. A few consumables are required as well: release film, breather fabric and vacuum tape. The release film makes sure your breather fabric does not become part of the layup, and your breather fabric makes sure the vacuum gets across your whole mold. A cheap alternative for breather fabric is regular cardboard. The release film goes on top of your topsheet, and on top of that goes your breather fabric.
When you put your whole mold in the bag, you only need to close your bag and you are done. When using the method of putting the vacuum foil on top, you first need to apply vacuum tape (butyl tape) around your mold (the grey stuff in the first picture). Leave the covering paper on until you are going to seal your vacuum film. When you are sealing your vacuum film, start on one side and work your way to the other side. Make sure there are no wrinkles and everything is sealed well.
Step 8: Layup


The most exciting and scary part of the build, the layup! Once you start mixing the epoxy there is no way back, so this is where a good preparation really pays of. The basic process of the layup is putting every layer on top of the previous one with enough epoxy in between. The required layers are:
- Release agent (some kind of wax)
- Base and edges
- vds rubber, this is a thin rubber strip of approximately 10-20 mm wide which improves the bonding of your edges.
- Fiberglass (usually triax 750g/m^2)
- Core and tipfill
- Fiberglass
- Topsheet (when using a veneer, fiberglass or cloth topsheet, it is best to put a light coat of epoxy over it, this is because it will suck up epoxy from underneath anyway. Putting a light coat on top ensures an even finish.)
When using a vacuum press: - Peel ply
- Breather fabric
- Vacuum film or bag.
Preperations
It is a good idea to prepare as much as you possibly can, so you have enough time during the layup
- Glue two inserts to the base to align the core, this keeps the core from shifting out of the center during layup. Do this by putting a small drop of superglue on the bottom of two inserts and put the inserts far away from each other in the core. Now press the core against the base exactly where the core should go. The inserts are now glued to the base. You can see one of the inserts on the base in the first picture.
- Already have your vacuum tape applied to the mold, do not take the cover paper off yet.
- Wear multiple pairs of gloves. Epoxy is very toxic, you can touch it once, but after that there is a high chance you will now be allergic to epoxy. So it is really important to wear nitrile gloves, latex doesn't stop the epoxy. If you wear multiple, you can take of a pair if you feel you need clean dry gloves and you can immediately continue.
- Stack all your needed materials in reverse order, topsheet on the bottom, base on the top. This way you can not forget one part.
Layup
The actual layup is quite straightforward. Start by applying some mold release to the mold. Mix your epoxy, make sure it is very well mixed. Then put your base in and very carefully align it with the mold. You can even put some weak glue such as spray hobby glue between the mold and the base to keep it in place. Put some epoxy on the base and divide it nicely. Now apply some epoxy to the vds rubber and put it on your edges. Than put a layer of fiberglass on and properly wet it with epoxy. Then the core, epoxy, fiberglass, epoxy, topsheet, epoxy, peelply, breather fabric and finally the vacuum film. Make sure that there are no wrinkles or leaks in the vacuum film. If there are, fix them. Now let the vacuum pump run as long as the epoxy manufacturer specified, probably around 24h if no heat is used.
Now wait for the longest 24 hours of your life until you can take your baby out. After 24 hours you can further process it. But don't bend it yet, the Epoxy takes a week to fully cure. If you stress it before it is fully cured you risk braking it.
Step 9: Finishing

Almost there! When the epoxy is cured you can take your board out of the mold. It is probably still a rectangle so you have to cut all the flashing off, you can use the edge of the board as a guide for the jigsaw. The glassfiber is extremely tough on jigsaw blades. First I used a wood blade, which was trashed after about 10cm. A small toothed metal blade worked much better. If you want you can apply a bevel to your sidewalls, you can use a router bit or sanding. I used sanding because I was afraid of damaging the board. I then added a few coats of boat varnish to the veneer. The only thing left to do is bringing it to a shop to get a base grind. This is needed to give the base a structure so it accepts wax. It does require special expensive machines so you can not do this yourself. Now wax it and sharpen your edges, and FINALLY...
Step 10: RIDE IT


First Prize in the
Snow Challenge


