

Introduction: How to Build a Bespoke Summerhouse From Reclaimed Wood and Save Hundreds!


I love being outside and have wanted to build a summerhouse in the garden for ages. Last year I decided to get it together. Of course, as a serial maker, I was never going to just buy a flimsy and usually very expensive shed-like summerhouse from a garden centre, when I could make a much better one myself.
Here's how I built a well-cool chillout space, virtually for free with reclaimed, scrounged and scavenged wood, glass and other stuff. It was a pretty epic build so I had to share it on here in case anyone else wanted some inspiration to go for it themselves. I was kind of on a mission to spend as little as possible and this cost hardly anything.
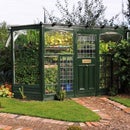
The main picture shows it about 6 months after completion and just starting to settle in with planted flowers coming along nicely. It's really cozy and solid, yet light and airy and looks great. I love it.
Custom-built
I designed this beauty to fit the needs of my specific garden space and aspect. It is a custom built hexagonal timber-framed building for which all the wood used was reclaimed from various sources.
I spent a month or two collecting discarded and waste wood, as well as glass and various other DIY leftovers and other stuff. The actual build took me just about a further two months, working on my own. Pleasingly, the whole project cost about £35 ($50) for the few things like nails and paint that I couldn't scavenge .
This Instructable shows how I did this and some things I learned along the way that you might find handy if you are thinking about building something similar. (and you really should!)
This Instructable covers (amongst other things)...
- Making multiple concept drawings and making models to test designs and make sure your building looks good and fits the space you have.
- Where to get hold of wood for free and how to reclaim wood from things like crates, pallets, old windows and doors, including tips on how to remove planks from pallets with crowbars and cold chisels and coping with old nails
- Using a router to convert rough old pallet planks into decorative moulded-edge facia boards and window beadings on the cheap
- How you can get matching pairs of top-quality safety-glass panes by taking apart PVC sealed units from double-glazed windows
- Planning your build to match the types and quantities of materials available when you are limited by the wood you can find.
- Recycling old wooden doors and windows by cutting them up, altering them and repairing them
No specialist tools required
For this, you will need to have common DIY tools, but nothing really specialist. I used the following. You may not need all of these
- Claw hammer - for general nailing and nail extraction
- Lump hammer and cold chisel - for pulling nailed-on planks off pallets
- Pincers - for pulling nails from old boards
- Nail punch - for punching out nail stumps from boards and punching in glazing nails
- Hand saw - for general wood cutting
- Reciprocating saw - for cutting off timber at a height and for cutting apart double glazing units
- Vice - for holding wood when sawing and planing
- Router - for converting rough planks into cladding and window beading
- Circular saw - for cutting boards
- Electric drill - for general drilling
- Cordless drill - for drilling holes
- Cordless driver - for driving/removing screws
- Brace and bit - for removing screws
- Cramps - for holding wood in place temporarily while fixing panels, etc
- Paint brushes - applying pain to cladding
- Spirit level - for checking that things are level
- Metal squares - for checking corners are true
- Stanley knife - for cutting felt
- Protective eye-wear and ear defenders - so you don't blind/deafen yourself!
I love my summerhouse. If you've ever thought about making an outdoor space, take a look. It really isn't that hard and so satisfying to know you built it yourself!
Step 1: Where I Find Thrown-away Things From Which to Extract Raw Materials


How to find free stuff for reclaiming
In general, people throw out a load of stuff that is useless to them, but contains amazingly high-quality raw materials. Some things contain wood that is ready to use once dismantled, like the incredible good plywood board I got here by taking apart old packing crates for transporting art.
Some has to be crow-barred apart. In this case, I wrenched off a whole load of planks that were attached to pallets when I found them.
Similarly, some wood you find is ready-to-use, like off-cuts of timber. Of course, other found stuff needs a bit of effort to convert into a usable state. For example, the pallet planks used here were first converted into cladding and mouldings before I could use them.
Skips are the best place for finding materials. I have a roof-rack permanently fitted on my car and a couple of ratchet tightening straps in the boot of the car. You can get a lot of stuff on a roof-rack. I took about half a ton of plywood home 35 miles doing this!
TOP TIP: always take stuff as soon as you see it. It goes fast. By the time you come back it can be gone.
You can also get a lot of good stuff from websites like Freecycle, Gumtree and so on. People will quite often advertise stuff they don't want that they are happy to give away, if you can save them the hassle of removing it.
The free reclaimed materials...
Here is what I used and where I got it
Wood
All of the wood was reclaimed from found materials
- Assorted discarded timber baulks
The construction is a mostly a combination of joined timber (lumbar) frames, clad with plywood or lapped boards. This needed a LOT of timber. I obtained ALL of this timber from skips, by cruising about in my car over the course of a month and popping in the roof rack. It is amazing how much gets thrown out. Most of it was 50mm x 50mm (2" x 2") or 100mm x 50mm (4" x 2"), and of lengths section up to 3.5m (10" 6").
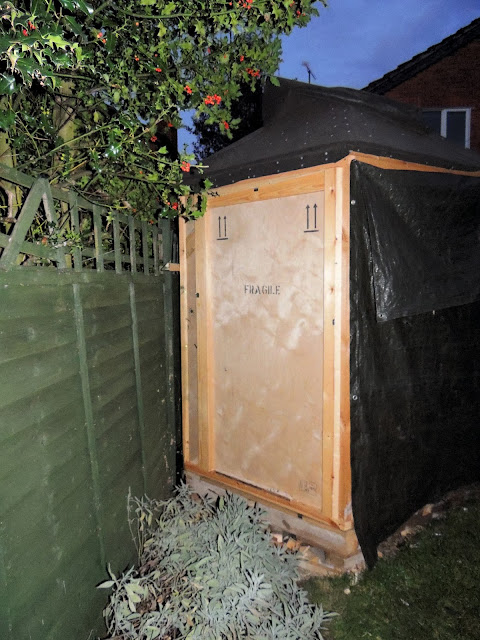
- Plywood packaging sheets from old crates
I was fortunate enough to get access to a large amount of 16mm (5/8") plywood sheets. These were from very strong discarded packing crates, used for transporting artworks. I got many square metres of this which was great. The flooring, roof and back walls were all made from this super strong and tough material. It gives good thermal insulation too. - Planks from pallets
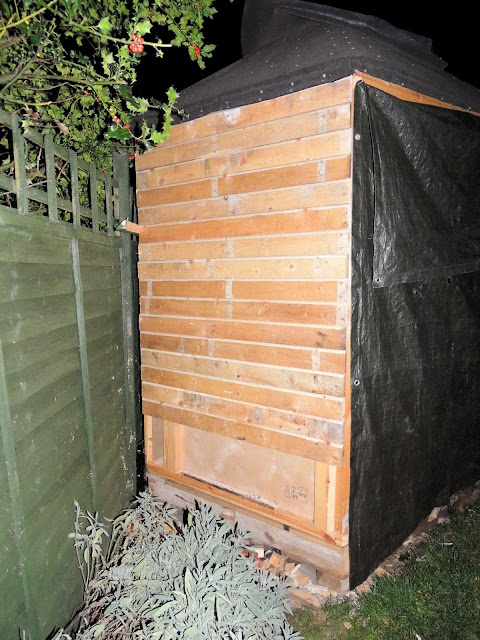
The front-facing walls are clad in the platform planks from pallets, that were made by planing a round edge on them with a router. The best pallets for this are the long ones used to transport builder's plasterboard sheeting. These are surprisingly common. The pallet rails were also used as extra timber baulks.
Glass
All of the windows were reclaimed from found materials
- Discarded wooden window frames
Wooden window frames get thrown out quite a lot, often to be replaced with sealed PVC double-glazed units. The wood is often rotten, but the glass is good if not cracked. Most old wooden windows used unlaminated glass that can be cut with a glass cutter easily. I used these for the opening windows. - Ripping open double glazed units
Ironically, a lot of PVC double glazed units are thrown out to reinstate traditional period wooden windows! The great thing about double glazed windows is that you can cut them in half to get two matching glass panes from each unit. Most of the windows and the two skylights were made from these.
Roofing felt
- Leftovers
The felt was mostly off-cut rolls from a previous shed extension elsewhere in the garden. I did get half a roll from a skip too, which was a bonus.
Fixings
- Recycled hardware
When I was dismantling the plywood crates, I saved all the screws I was unfastening. It is surprising how many you can accumulate. The crates were good ones and I could unscrew and re-use hundreds of decent chromed screws. They also yielded angle brackets, hinges and other stuff.
Doors
- Chucked-out French doors
Sometimes you just get lucky. I found a pair of glazed French doors in a skip, that had been thrown away because they were rotten at the base. These were perfect. They saved me having to build my own. The door opening I needed was smaller than the doors anyway. I just sawed off the rotten wood and rebuilt the base with wood and padding.
Concrete slabs/bricks
- The wooden floor was a timber frame raised off the ground on concrete and brick stilts for protection against damp. I had no trouble at all finding paving slabs and old bricks for this. They are thrown away all the time.
Plastic insulation
- Foamed plastic sheets/blocks
I used this for filling in gaps between boards, as cavity insulation between the inner wall and outer cladding and as damp proofing membrane between the stone/brick footings and the timber-framed floor. This sort of foamy packaging material is really common in bins and skips. A lot of it gets thrown away.
The stuff I had to buy
- Hardware - £20 (~$28)
The main things I couldn't find were nails and screws. I did get a few hundred decent screws from the packing but I had to buy another few hundred more. I also pulled about 100 re-usable nails from the pallets. I had a load of old nails lying about too, but I did need to buy a couple of hundred 4" nails. - Paint - £15 (~$21)
I did need to buy a big pot of external wood preserving paint to paint the outside walls
Step 2: Designing Part 1. Designing a Building That Suits Your Space


Make it yourself and you can have whatever you want!
The great thing about making stuff yourself, is that it can be designed to your specific needs (and tastes). In this build, I had some basic requirements, like being of a decent size, being light and airy and catching the sun. I also had a load of ideas about shapes and the feel of the building being a bit rustic and hand-built.
When I build things, I don't make detailed plans. I like to burn a concept into my mind, then I can build it without a plan, because I can see the end result in my mind. You can do this by drawing it and then try out the ideas by building models.
Here are mine. The main thing is that these are conceptual aides, not plans. I spent a lot of time drawing various shapes. I liked the idea of a turreted entrance to fit down the cozy end of the garden under the trees. I also like having skylights. They can and should be made fast and roughly. I tweaked the shape lots of times, before settling on a hexagonal footprint. This was to allow the building to capture as much sun as possible as it arced across the garden.
3d models show you things drawings don't...
However well you draw something, sometimes you need to build a model to test it will work. As I got closer to the final design, I was leaning towards a gabled porch over the doors. I wasn't sure how this would affect the light, so I built this model to test it.
This video shows how I tested the path of the sun and how well the angled roof would receive sunlight. The "sun" here was a torch moved in the same arc, that the sun takes over my garden.
By doing this, I realised that the porch in this early design was way too big and would cut out all the light. Subsequently, I changed it to the final shape, with skylights:

It is well worth taking the time to prototype designs. The final building is so much better because of this change
Step 3: Designing Part 2: Designing Your Build to Match the Materials Available


TIP: When using reclaimed materials, you have some limitations caused by not being able to choose the exact timber you want. So, once you have designed the building you want to achieve, you then need to work out how to adjust the design to the available reclaimed materials.
Here's what I did
Apportioning the plywood - prioritising where it was critically needed
In this case, I had a load of good plywood sheets, which came from custom-made crates for art works. Unlike timber framing lengths, these boards are very hard to get hold of and need to be used wisely. The boards were the top, bottom and sides of these crates. The boards were not uniform, but each crate did yield 3 pairs of identical boards (top/bottom, front/back, left/right).
To gauge how to ration out the available boards, I first prioritised where I would have to use them. The priorities were:
- Floor - The top priority was boarding the floor which would be the foundation for the timber frame.
- Roof - I also wanted the roof to be very light and airy with no triangular trusses in the centre. This meant, I'd have to use a lot of boards for that.
- Walls - plywood boards make strong walls, so any remaining boards would be used to build up a strong shell. The rear three walls were all made from this board. This gave it a broad light feel and a solid draft-free space.
Deciding how to use the available framing timber
Lengths of construction timber are much easier to get hold of. Leftover pieces can be found all the time. However, most pieces thrown away are off-cuts and very long pieces are much less common. I was lucky to have about four 4-metre lengths of 50mm x 50mm (13" x 2" x 2") and about ten 3-metre lengths (9' 10"). These were the really valuable ones.
These were prioritised thus:
- Roof beams - the main span of the roof needed several good lengths to achieve the design which has a central atrium
- Frame - the main building frame uprights and beams used up most of the good lengths. The remaining shorter lengths were kept to make cross-studs in the frame
- Floor frame - I had a lot of shorter, larger 150mm x 100mm section pieces of wood (6" x 4") that were very strong and great for creating strong floor joists in the hexagonal floor frame.
Wooden windows, wooden glazed doors and PVC windows
I had scrounged a load of old wooden single-pane frames, some modern PVC double-glazed frames and a fabulous pair of glazed French doors. These were assigned thus:
- French doors - the whole design of the front of the build was based around these lovely doors. You can see the frame being sketched out with timber to accommodate the doors
- Wooden windows - these were used where I needed opening windows. I simply sawed the frames to the size needed
- PVC double glazed frames - These provided the rest of the glass. The main advantage of these is that each sealed unit was cut open to provide a pair of identical glass panes. This was good as it allowed pleasing symmetrical windows to be made. You can see that the roof skylights match, as do the windows to the right of the doors at the front and the two windows on the right diagonal front wall.
Step 4: Building a Foundation Base


Like all good buildings, the first thing to do is create a good solid base. For this, I built a simple raised wooden floor from 100mm x 50mm (4" x 2") section timber baulks. These pieces were any miscellaneous off-cuts I could gather. These included some quality planed wooden rails from old wooden bed frames, some old fencing rails and some old door jambs (the upright posts in a door frame).
The frame was rough-sawn and simply fixed with 4" nails, many of which I had recycled from previously reclaimed floorboards.
The footprint of the summerhouse is an elongated hexagon. It is easier to see than describe. This is the base, as drawn out for one of the prototype paper models. (not to scale or exact dimensions).

The base was sized by the availability of materials.
The starting shape was this rectangle of 3.2 metres (10' 6") by 2 metres (6' x 6").

Then triangular end-frames were added. The diagonal end rails are 1.22 metres (4'). This is because that was a common size for available lengths of timber when cutting down standard pieces.
This makes an angle of about 110 degrees.

The corners were braced by nailing on off-cuts of ply. This turns a flimsy frame into a super-strong one.
Note, the brace-plates are shown on the top here, but once they have been added at each corner, the frame is turned upside down so that the brace-plates are on the bottom. Their flat surfaces became feet to rest on the underlying bricks.

Here, you can see the finished frame with cross-joists spaced evenly and with regularly spaced brick supports.
The designs for these supports are shown in the step pictures. Note the layer of foamed plastic sheet acting as a damp proof course.

Once, the frame was complete, it was boarded with ply. This was screwed on to give a final super-strong base

Step 5: Building the Main Frame Carcase


Body frame first
The main building frame sits on top of the base. It started a simple stud frame with six posts, with hexagonal roof rails screwed on top. This started off being pretty flimsy. The three back walls were pre-fabricated separately from ply boards, then screwed into the frame. This immediately gave it strength by preventing the frame shearing into a rhomboid.
Roof frame next
The triangulated roof supports were built up at each end. The roof has only two horizontal joists which run parallel above the edges of the central rectangular atrium. Three rafters were added to form a strong triangular bracing structure at each end. Finally a single ridge beam was put in place connecting the two apexes.
TIP: It is necessary to use temporary triangulation braces as you build up frames. This keeps the frames square .
Setting the door frame
The other main consideration was that the frame had to match the width of the double French doors I had acquired. The doors were temporarily fixed in place with cramps, so the exact final position of the doors could be marked. Two more upright posts were added to create the door jambs, then the doors were removed.
After the main frame had been built, the rest of the build was about creating window frames that matched the size of available frames, then filling in the gaps in the walls with plywood.
Step 6: Building the Roof


Building the roof was one of the most challenging tasks in this project. Although the central part of the roof was a relatively straightforward apex, the hexagonal design meant the ends were quite fiddly to do.
As described in the last step, the basic shape of the roof was created with two triangulated end frames and a central 100mm x 50mm (4" x 2") beam spanning 3.2 metres (9' 10") between them. This may seem quite a wide span for a piece of fairly small section.. However, the beam is not there to support any real load. It is there to attach the roof boards to. The 16mm (5/8") plywood boards are more than strong enough to form a roof apex without a central beam. The beam is really there as a solid anchor to allow them to be fixed.
This is the same for the triangular end boards. The frame just makes it easier to build. In theory, the boards alone would support the roof as a monocoque shell . Of course to do that would require really accurately cut boards, which is very difficult.
Here is the start of the roof with closed boards on the back and ends. The front was left open, because rafters needed to be created to match the skylight glass. As discussed before, the size was restricted to the size of available reclaimed panes.

Two matching skylights were extracted from a single sealed double-glazed window unit, by sawing the unit apart. This is not the actual unit used for the skylights, but you can see the technique. I should be wearing eye protection too!

Here is one of the two panes that were used for the skylights just after separating from the double-glazed sealed unit.

And here it is in situ, positioned in the groove routed into the rafter. It is a bit tricky to see in this picture. The glass is almost flush with the rafter. To its left is a roof board that is higher. The black gunk is roof sealant.
The felt was then lapped over so that rain would flow off the felt and onto the skylight and run off.

From inside the join is invisible

This shot shows the skylight as being a slightly dipped panel and how the rain from it sheets off, onto more felt.

Another angle

Of course, living in the UK, being tight against rain is essential. Here is a dark wet afternoon...

Applying the rest of the felt was relatively easy. It is just a lot of tacking. I had a load of The galvanised felt nails left from a previous shed repair job.
Of course, apply the lower felt sheets first and then overlap to allow rain to pour off. You can see this in this pic.

Step 7: Building Windows


Wooden-framed windows for opening windows
I found a large wooden-framed window which I used to create a pair of opening windows on one of the diagonal end windows. Originally it was one tall vertical window. I sawed it in half to create two window frames, added hinges and created these...

PVC windows for all the rest...
The rest of the windows were taken from PVC sealed double-glazed units. These are great . They are really common and you find them thrown out all the time. They are usually laminated safety glass too. Best of all is that each double-glazed sealed unit can be sawn in half to yield two identical panes. This made it easy to make symmetrical windows.
Here is one such window...

Using a painter's spreader/pallet knife, dig out the plastic beading strips (only found on one side)...

Once free, pull it right off...

Once all are removed, the sealed double-glazed unit can be popped out easily...

This is the cool bit.
The panes in these units are separated with spacers, which are bonded to the glass. Using a reciprocating saw (or jigsaw), saw the separator in half all the way round.
They come apart like this!

Do NOT remove the remains of the bonded separator. You can use these to screw/nail through, to fix the panes into their frames. They are usually aluminium, so they are really soft and easy to nail through.

Building frames round the panes
As already mentioned, the size of the windows is dictated by the panes available from the reclaimed window units.
I had been lucky to obtain a large PVC frame which had two separate double-glazed units in it which were the same width, though different heights. Once the units had been split up, I had two pairs of matching windows, all of the same width. These were perfect for the windows either side of the doors.
Here you can see the two different sized panes on the left of the door opening. Later the other two matching panes would be used on the right side.
The glass has been gaffer-taped to protect the edges, then held in place with small nails tacked into the frame to hold the glass in place (NOT through the glass obviously!!). The weight of the bottom pane is supported by the frame bar below. The top pane rests on the bottom pane. The right hand side of the door opening shows the frame before glass is fitted.

The side windows were fitted in the same way

This is the frame being built for the pair of opening windows on the other front side of the building.

This method may seem to hold the glass rather precariously, but the glass gets held in more securely later when the cladding and window beading is added (see step 10).
Step 8: Repairing Discarded Partially Rotten French Doors


These doors were such a great find. I had already decided to have French doors, but had assumed I'd have to make them, which is quite a tricky thing. Then I found these in a skip in my own road - what are the odds on that?!
I didn't get very good pictures here, but you can get the gist.
When I found them, the doors were pretty solid except the very bottom edges were rotten. On one door, I could just saw the edge off. The other door, needed to be rebuilt. I did this, with a combination of wooden edge strips, screwed on, then filled in the gaps with hot glue, using saw dust as a filler for.strength.
I added deflector rails at the bottom of the doors, to run rain off.
Step 9: Making Cladding From Pallets


Pallets, ah pallets. These are like the bread and butter of reclaimed wood. They are so common that you hardly need to store them up. If you need some rough wood, you can find them all over the place. There are two common types. Most are standard-sized pallets which measure about 1200mm x 1000mm (4' x 3' 3") but there is also a longer type, used for plaster board. These are 2400mm by 1200mm usually (8' x 4') with planks usually about 100mm wide (4") and these are great for making cladding.
In both cases, the thicker rails can also be used for general purpose construction timber like studs in building frames.
How to remove planks from pallets
Pallet planks are nailed onto their rails, usually with 2 nails, but sometimes only one. The fewer nails the easier it is to remove the planks. I usually use a cold chisel to do this. You bash the nails from the edge like this and it either cuts through them or pulls them of the rail. Sometimes the head is ripped through the plank too.
Using a cold chisel is better than using a crowbar, because it puts no pressure on the wood, so avoiding cracking the planks

Once the plank is lifted if it isn't coming of easily, you can use crowbars to ease it off. I always use two, to apply the force evenly on each side of the plank edges. If you use one crowbar it put strain on the plank and it can split, especially near the ends of the plank.

Eventually, you end up with a load of planks and a load of rails.

The plank nails will need removing. If you are lucky, they will be plain nails like this. Some nails have grip rings, which make them hard to remove. The cold chisel usually cuts through grip-ring nails, leaving metal in the plank.

Whack them back through with a hammer, then claw them out from the other side.

You sometimes need a punch if nails have sheared off when hit with the cold chisel (like grip-ring nails)

How to transform planks into cladding
Converting planks into cladding is failrly easy using a round-edge bit in a router.
USE PROTECTIVE EAR DEFENDERS AND GOGGLES
Tip: Make sure you do not have any nails in the edge when you rout the edge. It can break your router bit. It can also fire out pieces of metal (nail fragments and router bit fragments)
Here is a pallet plank in a vice. Note the horse supporting the other end.

Seen from the other end.

Routing. Note this photo is staged for illustration. Use eye protection!

Here are the finished boards, ready to be used as cladding.

Step 10: Cladding and Finishing the Window Frames With Mouldings


The final process for finishing the build was to clad the exterior for all the wall-areas that weren't windows or doors.
This was easy on the end-walls with no windows. Here is one prior to cladding. You can see the inside wall made from the packaging crate plywood.
And here it is with the rounded edge cladding made earlier being applied. This is easy you just nail it on.
Here it is, nearly complete.
The front three sides are much more tricky, as they have a range of fixed and opening doors and windows. In this shot you can see that the fixed windows on the front side left wall have their mitred-corner beadings in place, but the rest of the walls are still exposed, ready for cladding.

Here is the same view with most of the cladding in place. Note the sill of the opening windows, which has felt tacked on as a water run-off.

This is the same left front wall with the cladding applied. This is also after the cladding having been painted. You can see the felt protection on the sill more clearly here.
The right-hand side wall needed a lot of very short length cladding pieces. Here it is in progress.

Diagonal wall making cutting more tricky. In this detail, you can see the vertical mitering needed to get the cladding to butt up where these diagonal walls meet.

Step 11: Enjoying the Fruits of Your Labours


Here are some pics 6 months after the build. It is a great sun trap and the tomatoes love it. You can also dry clothes in it as it gets very hot.

Here is some lounging in action...

The lovely leather sofa was another freebie off Gumtree.

I also made the leather-topped footstool shown here especially for this summerhouse, also from reclaimed wood. That build was also really satisfying. Luckily, there is a separate Instructable about that!
Instructable: Louche Foot-stool. Lounging Comfy-ness From Found/recycled Stuff


And finally...
Betty pug endorses lounging about on the sofa...


Grand Prize in the
Outdoor Structures Contest

Grand Prize in the
Reclaimed Wood Contest 2016


