

Introduction: How to Build a Robot From Scratch


Have you already though about building a robot that can be remotely controlled using your smartphone?
If yes, this short intractable is for you! I will show you the step by step method that you can use for any of your projects to be able to start from an idea and create a complete robot or system by yourself.
For this project, we will use the Arduino/Genuino 101 board to create our Robot. It is part of an online course available on Udemy.
So, let's just Make it!
Step 1: Watch the Video
Step 2: Create the Sketch
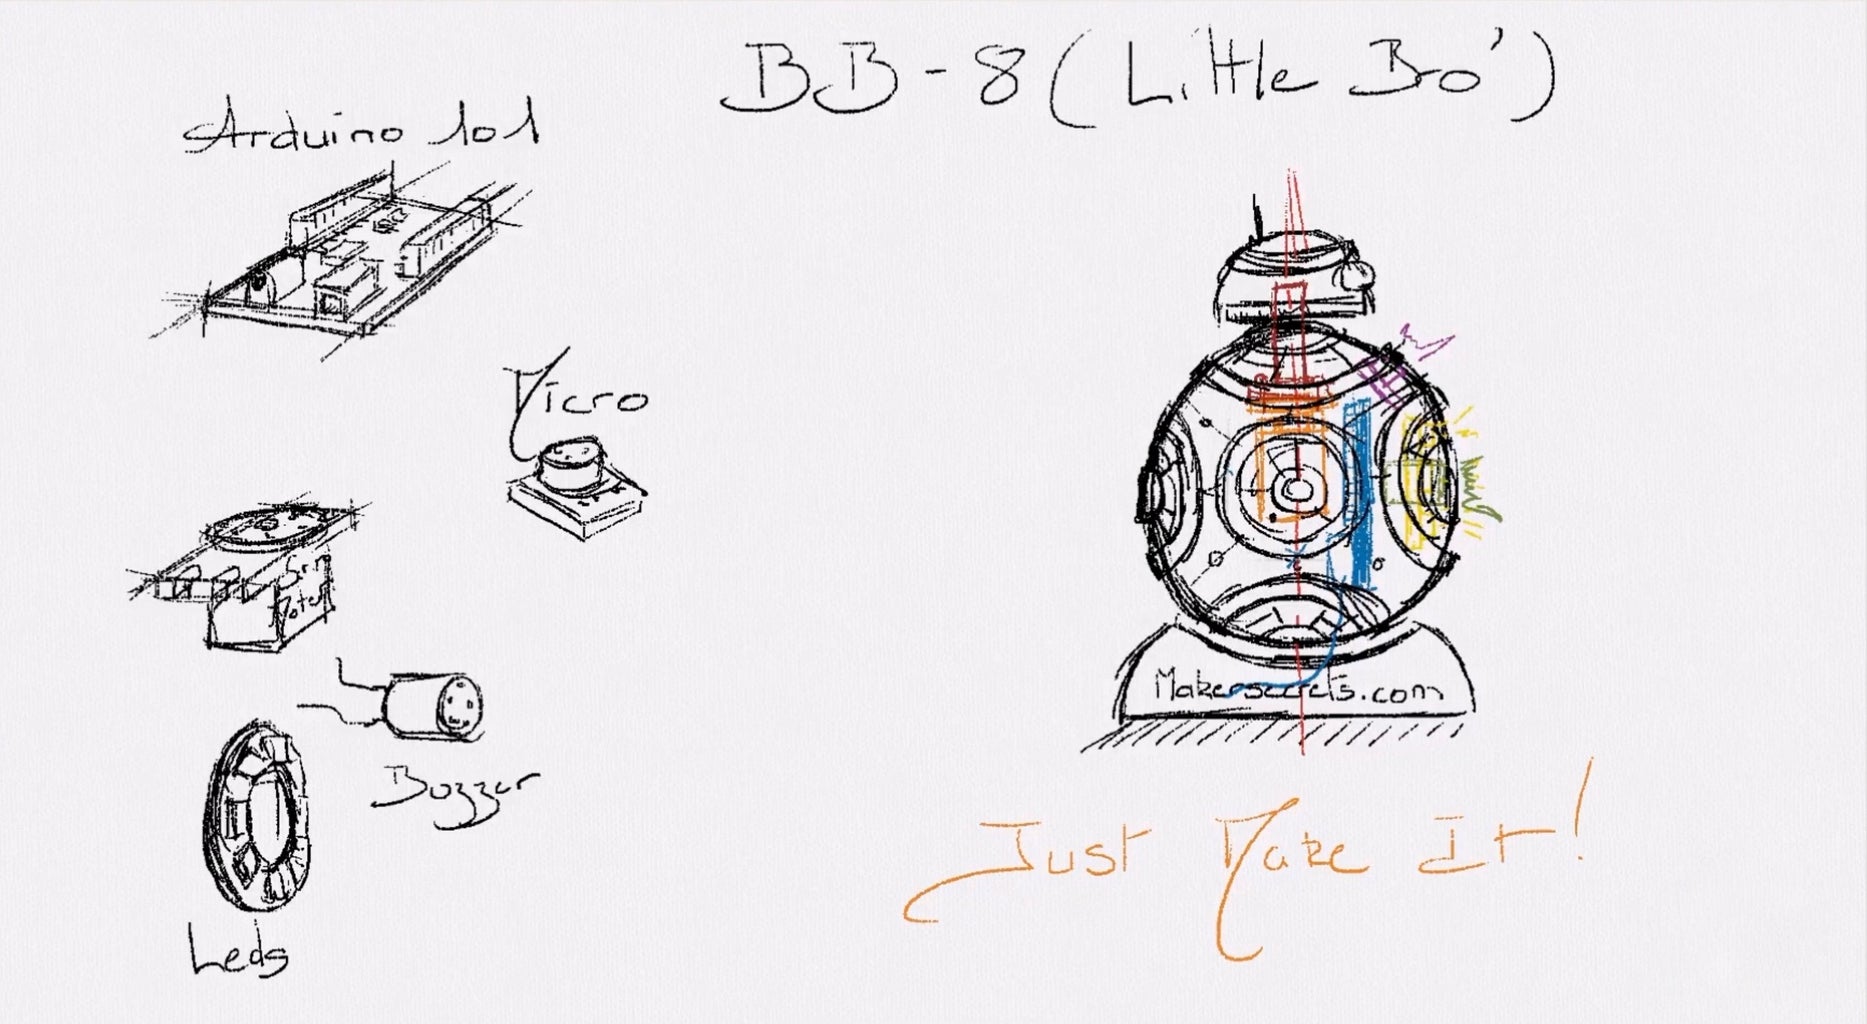
First of all, we will need to have an idea on how our robot will look like. We will first need to create the sketch of our Robot with all the electronic components that we will integrate in the body of the Robot. By doing that we have a first estimate of the shape of the robot, but also the placement of all the electronic components.
This step is the most important one as all the following steps will be based on it!
Step 3: Create the 3D Models
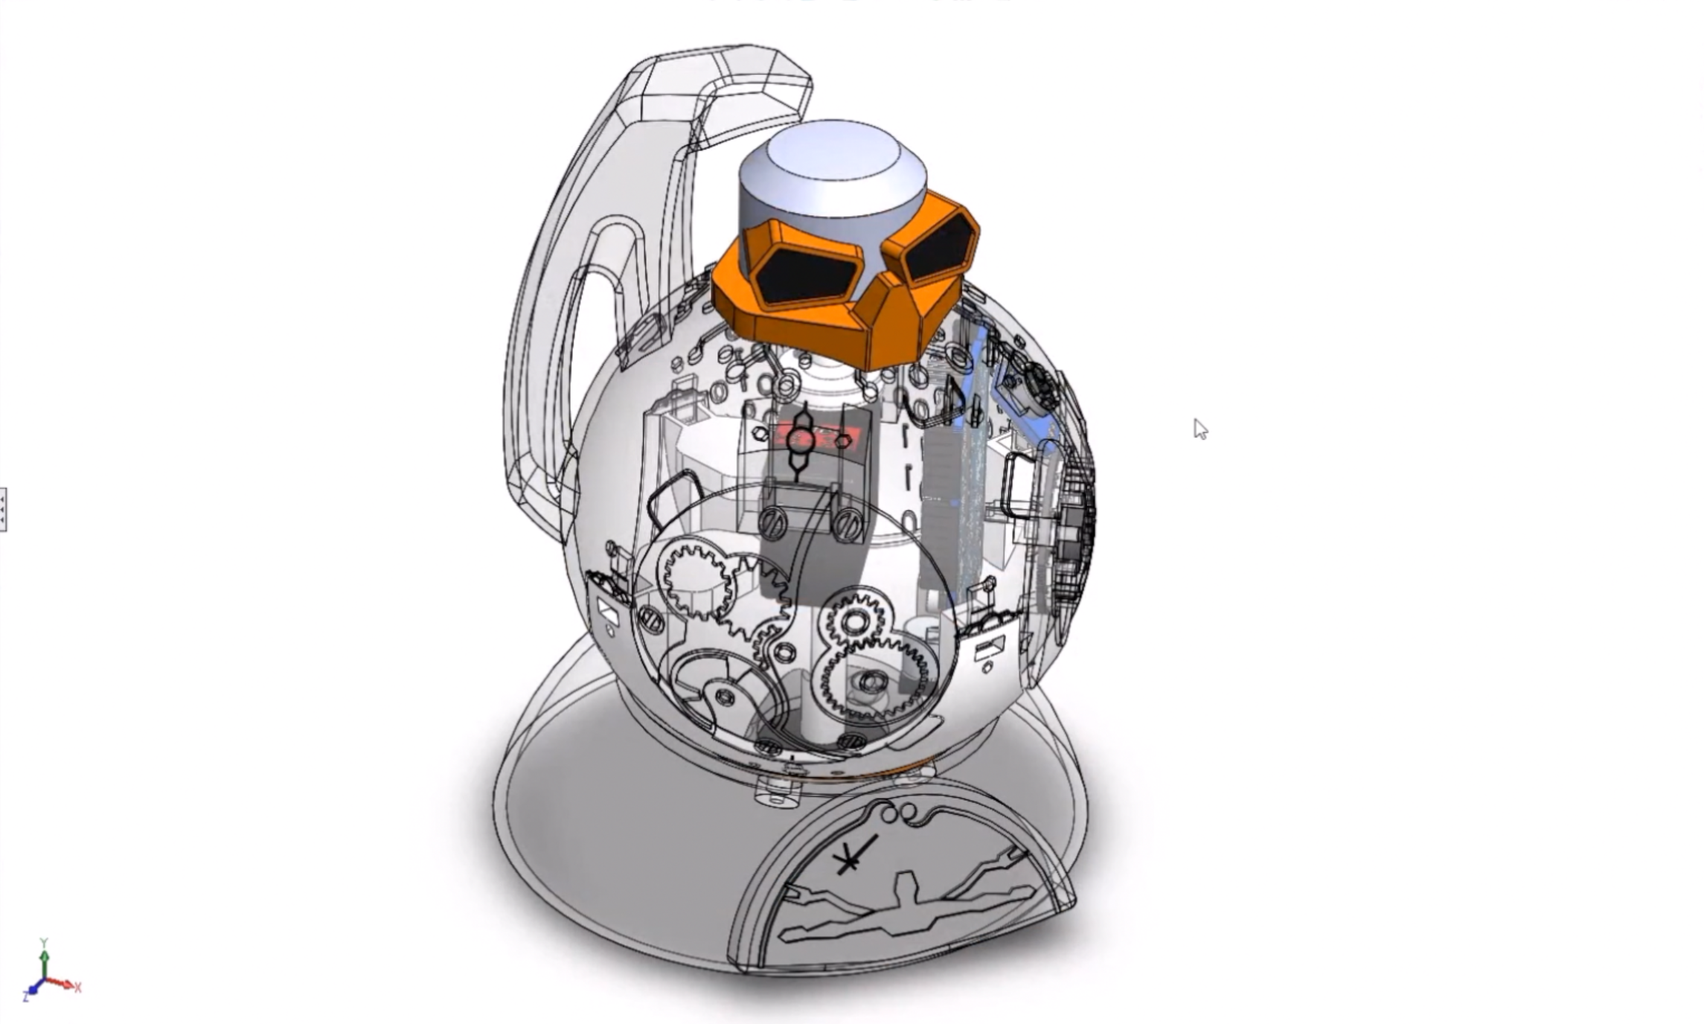
Next, by using a 3D CAD software, we can create the complete 3D model of the Robot. They are plenty of CAD software that you could use, but we decided to use Solidworks for our project as it has all the features that we need.
The image above shows the complete 3D model of the robot with all the electronic components integrated in the Upper Body.
Step 4: Manufacture the 3D Parts
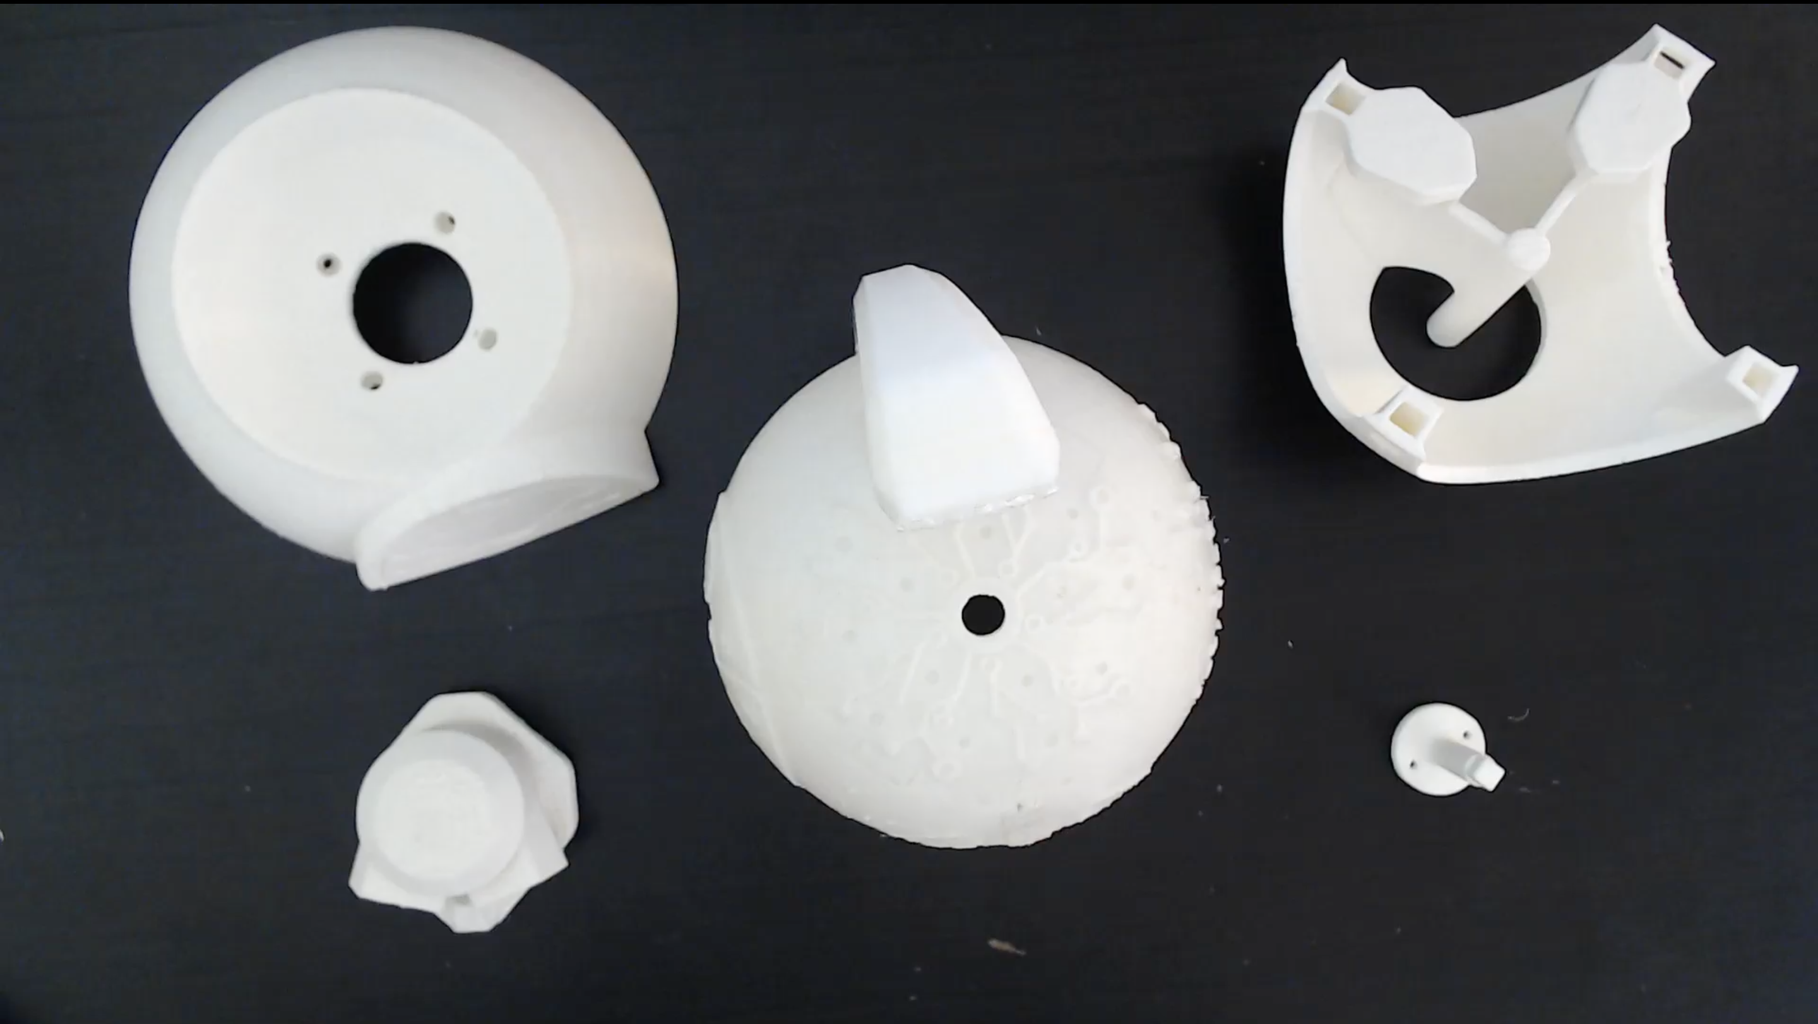
Now that we have created all the parts of the robot, it is time to use a 3D printer to get the physical parts in our hands. Below you can download the STL files of the robot.
BBot's 3D STL Parts:
Step 5: Order the Electronic Components

For the electronic components, we will need:
Amazon.com
- 1X Arduino/Genuino 101
- 1X Neopixel Ring 12 pixels
- 1X Electret Microphone
- 1X Servomotor
- 1X Breadboard jumper wires
- 1X 100 Ohm Resistor
- 1X 16V 470uF Capacitor
Amazon.co.uk
Step 6: Assemble Everything Together

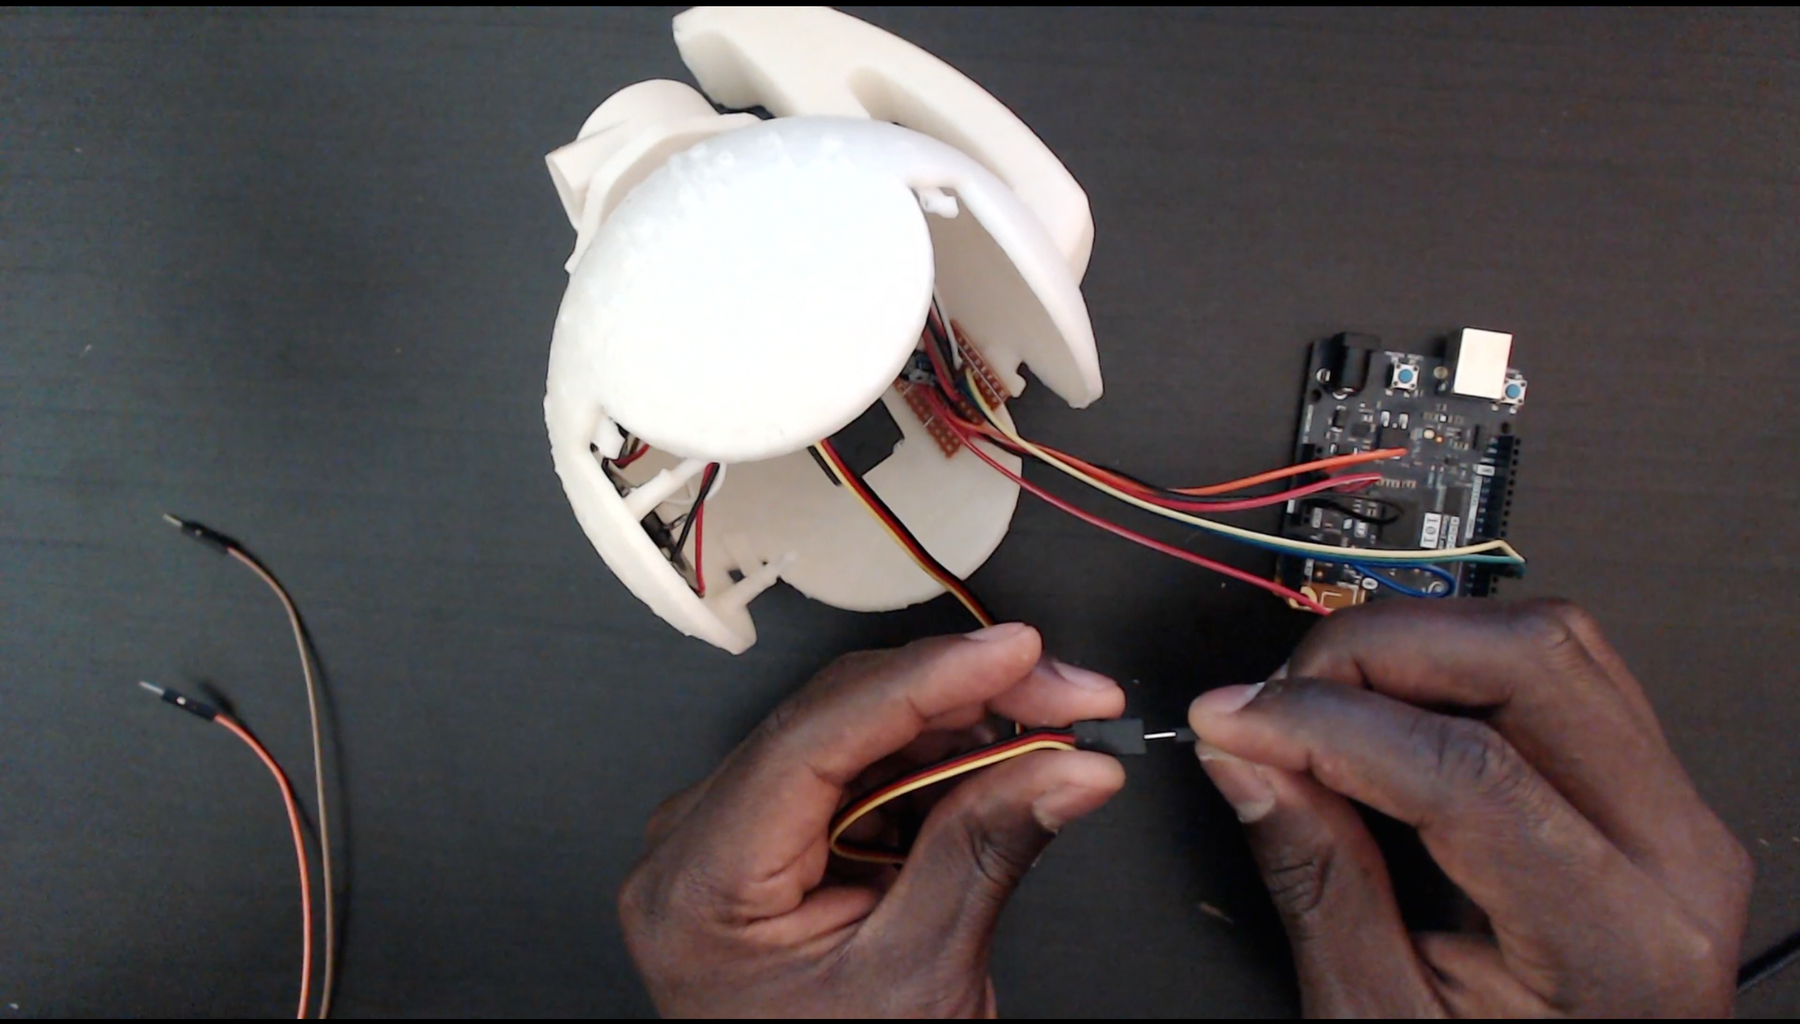

Now, it is time to create the electronic circuit and assemble our Robot. This step is quite straightforward!
Because we have previously created the 3D model of the Robot with the electronics already integrated in the upper body, we know exactly where each electronic component goes. We just now have to create the complete electronic circuit by connecting the sensors/actuators to our Arduino/Genuino 101 board and then place the board and components in the upper body of our robot.
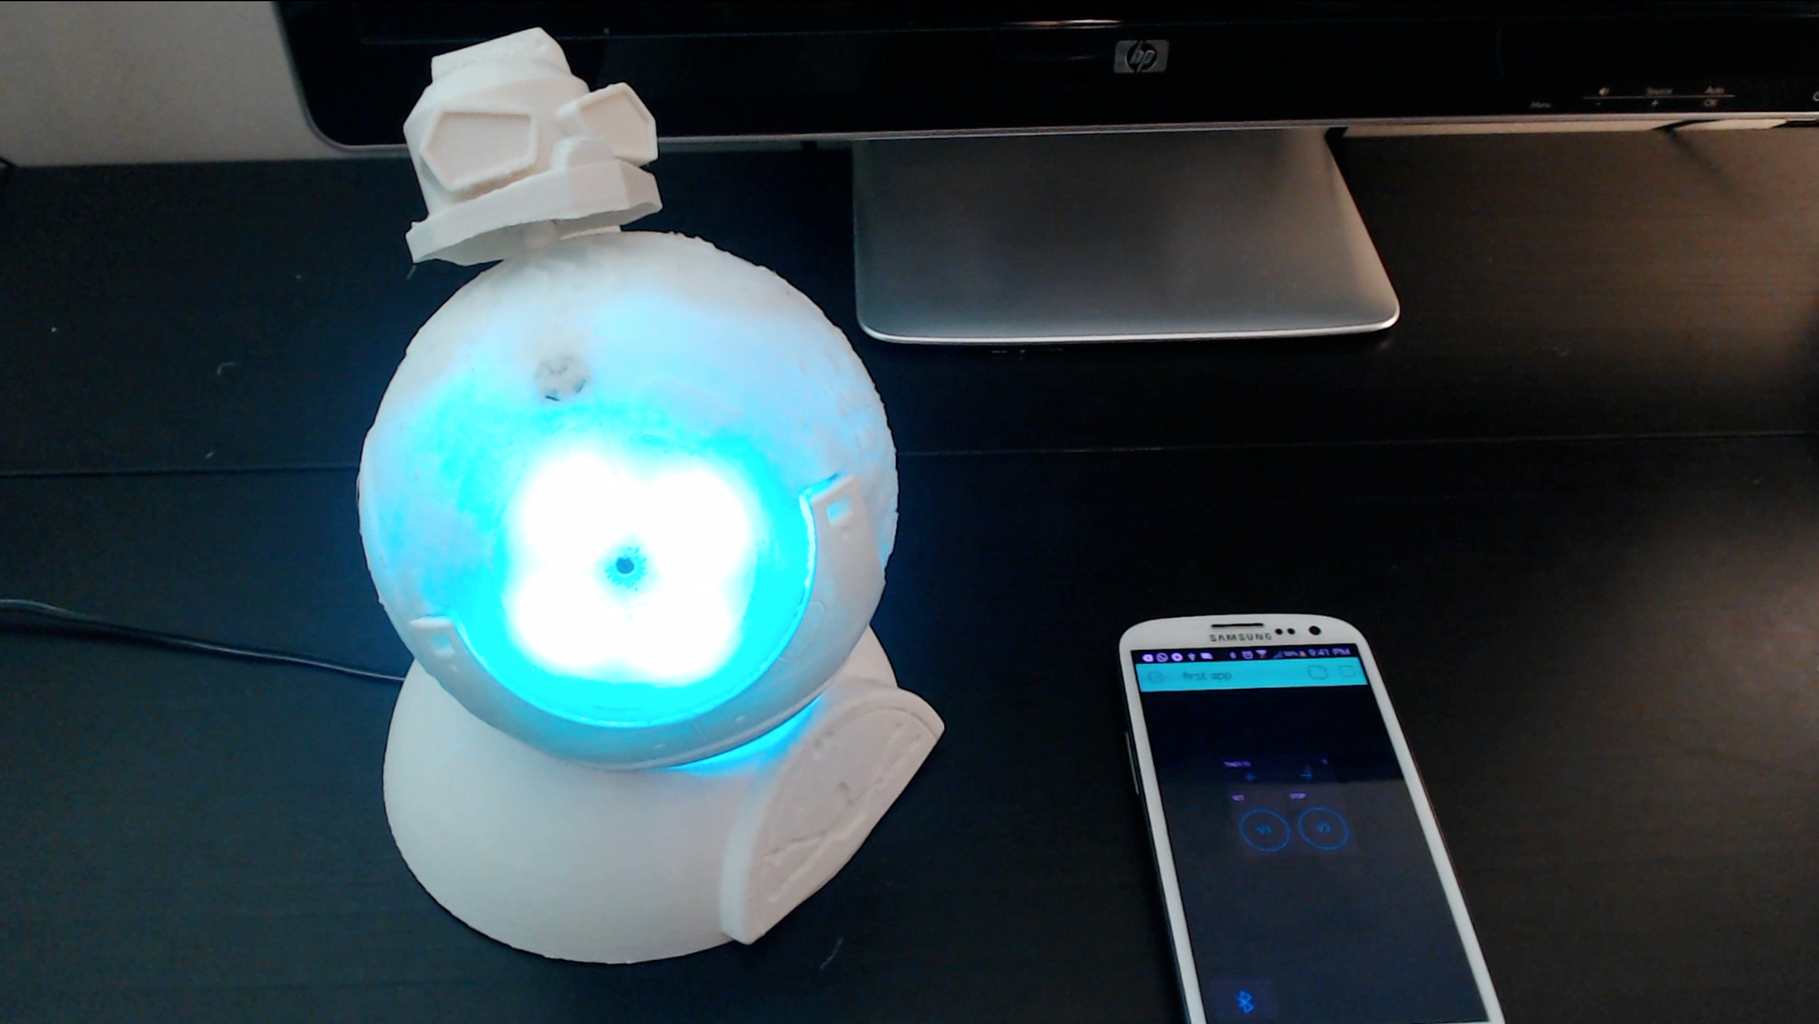
Step 7: Upload the Code
Almost done!! You can now upload the code to the Arduino/Genuino 101 board to start seeing the magic!
Here is a starter code that we have created that uses the BBot robot as an smart alarm clock.
Step 8: Congratulation!
That's it! You should now have your robot up and running!
I like the look of the Neopixel ring on the "chest" of the robot with nice colors and behaviour patterns that can be created. I also like the robot to be used as an ambiance light that can generate music (Because there is a piezo electric buzzer in the font of the upper body, you can also generate tones with the robot).
To Learn More, feel free to check our Complete Course on Udemy:
Our Website:
Stay awesome and Just Make it!


