

Introduction: Playable Drum Set With Arduino and Cola Cans


The drum set is a part of the standard rhythm section used in many music styles. The most usual type includes a bass drum, a floor tom, two tom-tom drums, also one or two ride cymbal, and a hi-hat.
With some useless beverage cans at hand, let’s make mini drum set.
Step 1: Preparation

Multi-Control Board - http://bit.ly/2sTJYxx
USB Cable
10 x Beverage Can
9 x Alligator clip cable (included in Multi-Control kit)
Some iron wires
Some wires
Pencil
Ruler
Larger size scissors
Smaller scissors
Needle-nose pliers
Wire stripper
Glue Gun - http://bit.ly/2twpx8w
Step 2: Prepare Pop-tops and Bottoms

Cut out the cans’ pop-tops and bottoms. Do not cut the body part into pieces, because they will be used in later parts
Some body part still remain on the tops, so cut with the small scissors and tear them off.
Note: when you tear the remaining parts, use a cloth to protect your hand from getting hurt by the sharp edge.
Cut off the remain body part on the bottom, then polish the edge of the bottoms with sand paper
Keep the can body parts for next step.
Step 3: Trim Can Bodies

Cut five unbroken can body parts to get five in different width. Roll them and align with the pop-tops, then paste with glue gun to get five cylinders.
Step 4: Make Different Drums


Two can pop-tops and one can body will make a drum, combine them together with glue gun. Make five drums in different size in this way.
Note: To conduct the drums in later parts, you should connect a wire to each drum’s pop top by wrapping the lead on the pop tab, and fasten with glue gun.
Step 5: Make Cymbals


The can bottoms can be used as cymbals. Pierce through the bottom center with a pointed tool, and cross the hole with a proper nail, connect a wire to the nail by wrapping the lead on it, and fasten it to the stand with glue gun. Now a cymbal is done. Here we should make three in total.
Step 6: Make Stands


Combine the Bass Drum and two Tom-Tom Drums with iron wire and glue gun.
Prick on drum to get four holes, and cross with iron wire, and shape the wire to stand with the pliers. Then fasten the stand by glue gun.
Make a triangle stands for the floor tom.
Step 7: Wires Connection
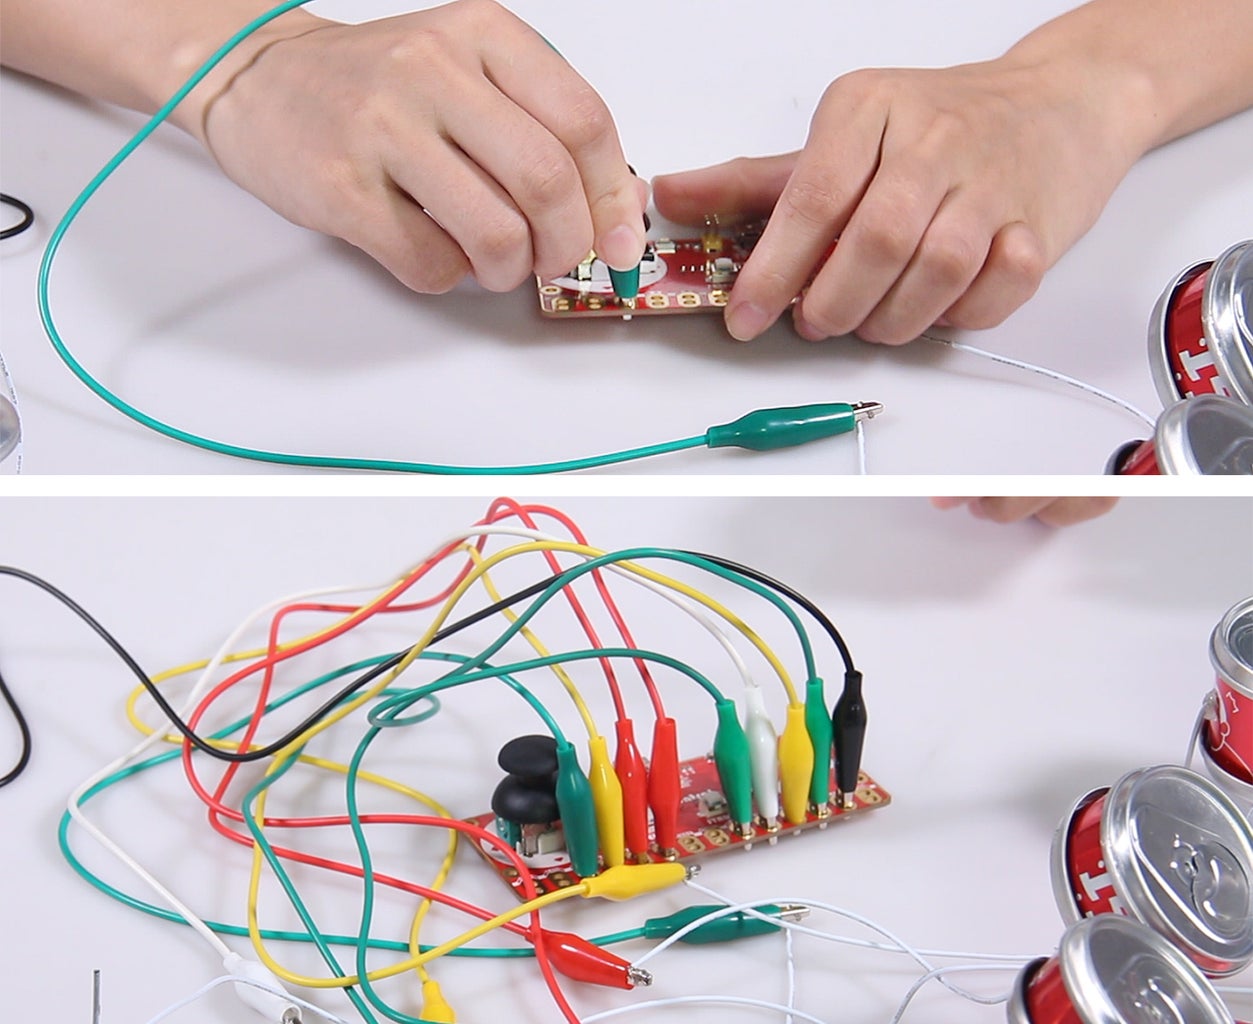
Then connect the drums and cymbals to Multi-Control with alligator clip cables.
Step 8: Download the Code

Visit the WiKi Page of Multi-Control, you can see the related resources.
Then go to Github Page and download the code.
Step 9: Modify the Code


Download a Drum Set MIDI software on your computer, and test by tapping the drum or cymbal to see which key it is corresponding to.
Then open multi-control-keyboard.ino, and check keymap.h to modify the key values in line 7 – line 14
After modifying, select the right board (Leonardo) and port, then click Upload.
Now, let’s play the mini cute drum sets!


