Introduction: How to Make a Worktable Lighting
Hello
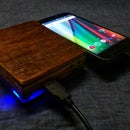
In this instructables I will show you how you can make a small but effective focus LED lighting for your work-space. I made this for my mother's Sewing Machine which helps to see the fabrics and stitches better without straining the eyes.
This is very simple to make and you can use the same steps to scale up according to requirement.
I Invite you to checkout my video for easy understanding!
Step 1: List of Materials
Tranformer (230v/12v)
Fuse
AC to DC Full Bridge Rectifier Module
LED Strip
Wires
Switch
2-Pin Plug
Electrical Tape
Soldering Kit ( Iron, Solder, Flux)
Step 2: Wiring the High Voltage Side
Warning: High Voltage! improper handling of high Voltage Electricity Leads to Serious injury and risk of death.
Open the 2-pin Plug adapter and Connect the wires to phase and neutral Terminals.
Connect the Fuse In series with the Supply. It is not shown here because my extension cord has builtin fuse and I am going to mount everything on wood.
The SPDT Switch is connected to the plug and the other end of the switch is connected to the High Voltage side of transformer.
The Transformer HV and LV sides can be identified by referring the data sheet. Usually the RED wires in transformers is HV side. Other method is to measure the coil resistance of the transformer. The Side with Higher resistance is High Voltage Side.
Do Not reverse the Transformer HV and LV terminals. It will Damage the transformer. Refer the circuit diagram for details. Insulate all the terminals using Electrical Insulation Tape.
Step 3: Wiring the Rectifier and LED
The Low Voltage side of Transformer is connected to the AC input side of Bridge rectifier module.
Bridge rectifier DC output is connected to the LED. A Long extension wire is connected to the LED so that it can be placed anywhere you want.
As I had mentioned earlier I am planning to use this lighting on a Sewing machine table. So I planned for the exact placement to get maximum brightness on the work area.
The Circuit converts high voltage AC to DC using the bridge rectifier and connecting the led. The stripe LED comes with builtin Current limiting resistor. The Voltage regulator regulates the voltage level to 12v. It is important to note that cannot be used for High power Load (LED here).
Step 4: Fixing the Circuit on the Worktable
The circuit board and the wiring goes under the table. I Marked the place for transformer. circuit board and then I drilled a couple of holes using my Drilling machine and fixed the circuit board using some wood screws.
Then I passed the extension wire to the top of the table and attached the LED using a little dab of hot glue.
I Connect the plug to the 220v power socket and when ever the machine is turned On the LED lights up!
I have attached the images of the light in action. My mother says its really very helpful while stitching clothes.
This is been it! a short instructables.
Thank you
H S Sandesh Hegde
The Technocrat Youtube Channel

Participated in the
Make it Glow Contest 2018


