

Introduction: Introduction to 5-Axis Milling


In this third and final lesson, we will take our first look at 5-axis milling in PowerMill. This lesson will serve as a introduction to 5-axis simultaneous and 3+2 milling in PowerMill, as well as a review of the topics covered in the previous two lessons. As always, we will use PowerMill's fundamental workflow to help guide us through the programming of this part.
Step 1: Setup
- Open
PowerMill, and drag and drop model file into the graphics area
- Model file will need to convert
We need a new workplane to help us machine this part.
- Box select the entire model
- Select
the Create Workplane drop down menu from the home tab
- Select the Top of Selection Workplane
- Activate the new workplane and name it Top
We need to create a block to machine our part from.
- Select
the block option from the home tab
- Calculate the block size
- Coordinate
System: Named Workplane
- Top
- Accept the dialog box
Let’s calculate the safe area for our tooling.
- Open
the toolpath connections dialog from the home tab
- Select calculate on the right-hand side of the dialog box in the safe tab
- Apply the changes and close the dialog

Now that our setup is complete, we are ready to begin creating tools and toolpaths to program our model!

Step 2: Basics Review
Now we need a tool rough our model with.
- Create
an tip radiused tool
- Diameter: 20 mm
- Tip radius: 1 mm
- Length: 40 mm
- Add appropriate shank
We need to add a holder because this model will involve 5 axis processes
- Holder
tab, add holder
- Upper diameter: 30 mm
- Lower diameter: 25 mm
- Length: 10 mm
- Overhang: 50 mm
- Add
another holder:
- Lower/Upper diameter: 30 mm
- Length: 30 mm
- Name the tool D20TR1 and close the tool dialog
Let’s add the necessary toolpath.
- In
the 3D Area Clearance tab, select Model Area Clearance
- Name: D20TR1-RGH
- Offset Model
- Tolerance: 0.1 mm
- Radial thickness: 1 mm
- Axial thickness: 0 mm
- Stepover: 5 mm
- Stepdown: 5 mm
- Lead in/out: Ramp
- Calculate the toolpath
Let’s verify the toolpath because this will be necessary when we have the tool at orientations other than vertical.
- Right
click on the toolpath and select verify then toolpath
- Check for gouges first, select apply
- If no gouges, select collisions
- Holder clearance: 2 mm
- Shank clearance: 1 mm
If no gouges or collisions occur, the symbol next to the toolpath in the explorer should now appear as a blue checkmark.

Now we can move onto the finishing strategy for the top pocket. First, we’ll need to create a pocket feature.
- Use the detect feature to create a pocket feature and name it ‘TopPocket.’
Let’s create a tool to finish our top pocket.
- Create
an end mill
- Diameter: 10
- Length: 40
- Add appropriate shank and holder
- Name the tool EM.5 and close the tool dialog
Now we can choose our finishing strategy.
- Select
a Feature Pocket Profile strategy and name the strategy EM10-FIN-TopPocket
- Tolerance: 0.01 mm
- Thickness: 0 mm
- Stepdown: 7 mm
- Lead
in/out: surface normal arc
- Angle: 90
- Radius: 5 mm
- Calculate the toolpath
- Verify the toolpath as we did before, then run a ViewMill simulation.

Step 3: Swarf Finishing
Swarf finishing maintains contact between the cutting portion of a tool and any continuous surfaces that need to be finished. We will perform this strategy on the wall of the boss feature and the sloped surface.
For the tooling for our swarf strategies, we will use the EM10 tool that we already created.
- Activate EM10
With our tool selected, now we can create our Swarf Finishing toolpath
- Select the Swarf Finishing strategy from the Toolpath Strategy Dialog
- Give the toolpath a descriptive name like EM10-SWARF-wall
- Leave all options as default.
- Select the surfaces that make up the wall around the boss.
- Calculate the toolpath.
- Verify the swarfing toolpath and run a ViewMill simulation.
NOTE: slow the simulation down, as swarfing toolpaths are often very short.
Repeat the same strategy as above for the sloped surface of the boss and name the toolpath EM.5-SWARF-slope. Once we attempt to simulate, we will immediately get a warning popup due to a possible rapiding of the tool into the part. We can revise this by editing the settings of our new swarf toolpath.
- Open the toolpath settings for
EM10-SWARF-slope
- Rapid Moves:
- Type: Sphere
- Center: (0,0,-28.575)
- Calculate

- Swarf Finishing
- Position
- Offset: -1.25 mm
- Position
After recalculating the toolpath, we can verify and simulate the second swarfing strategy. As you can see, the tool axis is automatically adjusted to swarf the necessary surfaces.

Now that our swarfing processes are finished, we can move onto programming the pockets.
Step 4: 3+2 Machining
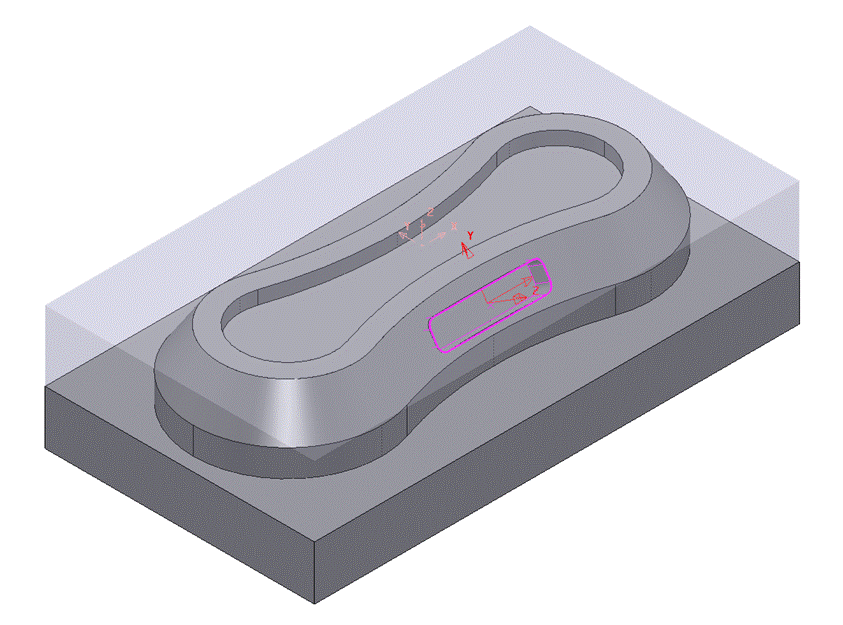
This is where we will need to incorporate techniques for 3+2 programming. From an ISO 1 view, we will program the pocket that is visible first. We won’t be able to machine the entire pocket with a vertical tool axis, so we need to create a new workplane that has its z-axis perpendicular to the floor of the pocket.
- Create
a new workplane using the Workplane Aligned to Geometry option
- Pin
the workplane to the bottom of the pocket
- Location isn’t important as long as the z-axis is perpendicular to the bottom
- Name the workplane Pocket1
- Pin
the workplane to the bottom of the pocket
- Create a pocket feature for the first pocket that we’ll be programming using the same process from previous videos and name it SidePocket1.
Because we have a new workplane, we need to change our safe area or we could gouge the model.
- Go into the toolpath connections, and recalculate the safe area after changing the workplane to Pocket1.
Create a stock model representing all of our previous toolpaths
- Create a stock model by right clicking stock model and
selecting create stock model.
- Accept the default values for the stock model
- Drag all toolpaths into the stock model then right click the stock model and calculate
- Edit the view of the stock model
- Right click and select drawing options
- Shaded
- Show rest material
- Right click and select drawing options
Create a tool for roughing out the pocket.
- Create
an end mill
- Diameter: 6 mm
- Add
appropriate shank and holder
- This is especially important for this process as it isn’t a vertical tool axis
- Name the tool EM6 and close the tool dialog
Create a roughing strategy for the pocket.
- Select
the Feature Pocket Rest Area Clearance strategy and name it EM6-RGH-Pocket1
- Offset Model
- Tolerance: 0.1 mm
- Radial thickness: 1 mm
- Axial thickness: 0 mm
- Stepover: 2 mm
- Stepdown: 3 mm
- Go into the workplane section and select Pocket1
- Rest:
Stock model
- 1
- EM10-SWARF-slope
- 1
- Lead in/out: ramp with height of 2.5 mm
- Calculate the toolpath.
- Verify the roughing strategy and then perform a ViewMill simulation. Once everything appears in order, let’s move onto finishing the pocket.
We will use the EM6 tool again for our finishing pass.
Create an appropriate toolpath for the finishing strategy.
- Select
a Feature Pocket Profile strategy and name it EM6-FIN-Pocket1
- Tolerance: 0.01 mm (ignore the warning)
- Radial and Axial thickness: 0 mm
- Stepdown: 10 mm
- Lead
in/out: Vertical arc
- Angle: 90
- Radius: 5 mm
- Calculate the toolpath
Verify that our finishing pass will be error free and then perform the appropriate simulation. If everything looks good, try to program the second pocket on your own. If you ever get stuck, simply review that process used for the first pocket.

Once the second pocket has been finished, we can move onto the NC code.
Step 5: NC Code
Our toolpaths have been simulated and appear successful, so now it’s time for us to generate the NC code.
- Right
click on NC programs in the explorer and select Create NC Program
- Give the program an appropriate name
- Right
click on NC programs in the explorer and select Preferences
- Select the desired postprocessor for our NC code
- Drag all toolpaths into the program and run a full
simulation.
- Right click on the program
- Simulate from Start
- Generate NC code by simply right clicking on the program and selecting Write.
Note: This exercise is for educational purposes. While this exercise outlines the process of generating your NC Code, no actual code is to be generated as a part of this class.


