

Introduction: IoT Based Weather Reporting System Using Arduino


Now get to know what’s the weather in Australia, India, France, or the UK in real-time by sitting in the comfort of your home and without having to depend on the weather agencies. Come in the IoT based weather station project! With the help of this weather monitoring system, you will be able to get the real-time values of the temperature, humidity, wind speed, and visibility of any place on this planet! All you need to do is provide the coordinates of the place you want to know about!
Beginning weather monitoring in 3, 2, 1… now!
Step 1: Components Needed
Step 2: Setting the Time
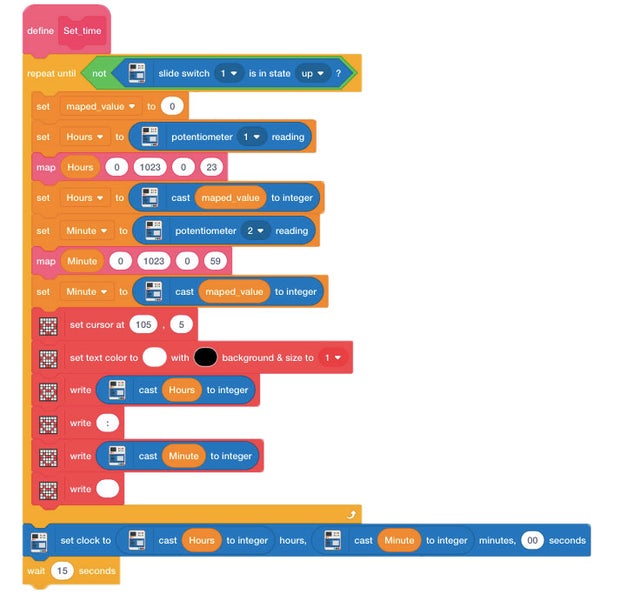
We need to change the displayed time on the screen.
Thus, we will use the Real-Time Clock block.
As we will change the time using Potentiometers.
We will be creating a Map Function Block for the same. This function will map the value given by potentiometer 1 to 0 to 23 for hours and the value of potentiometer 2 to 0 to 59 for minutes.

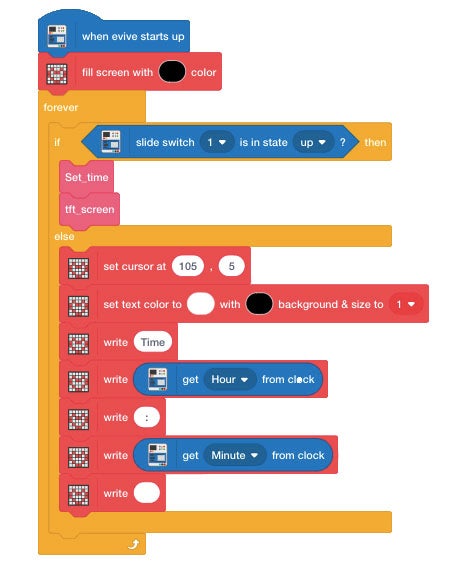
We will slide the slide switch upwards to change the time and slide the slide switch to the centre to save the changed time.
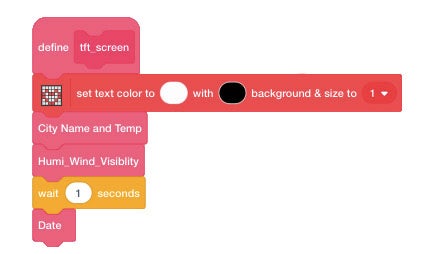
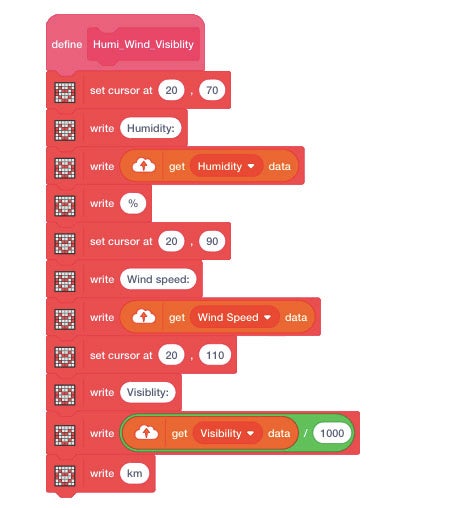
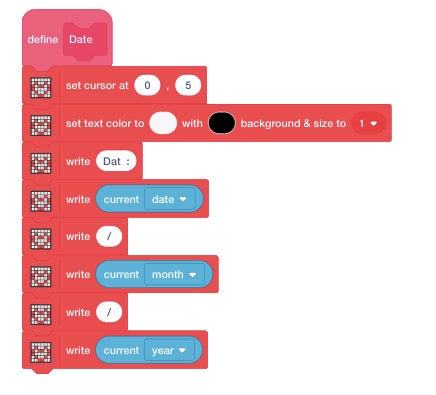
Step 3: Displaying All the Data on the TFT Screen
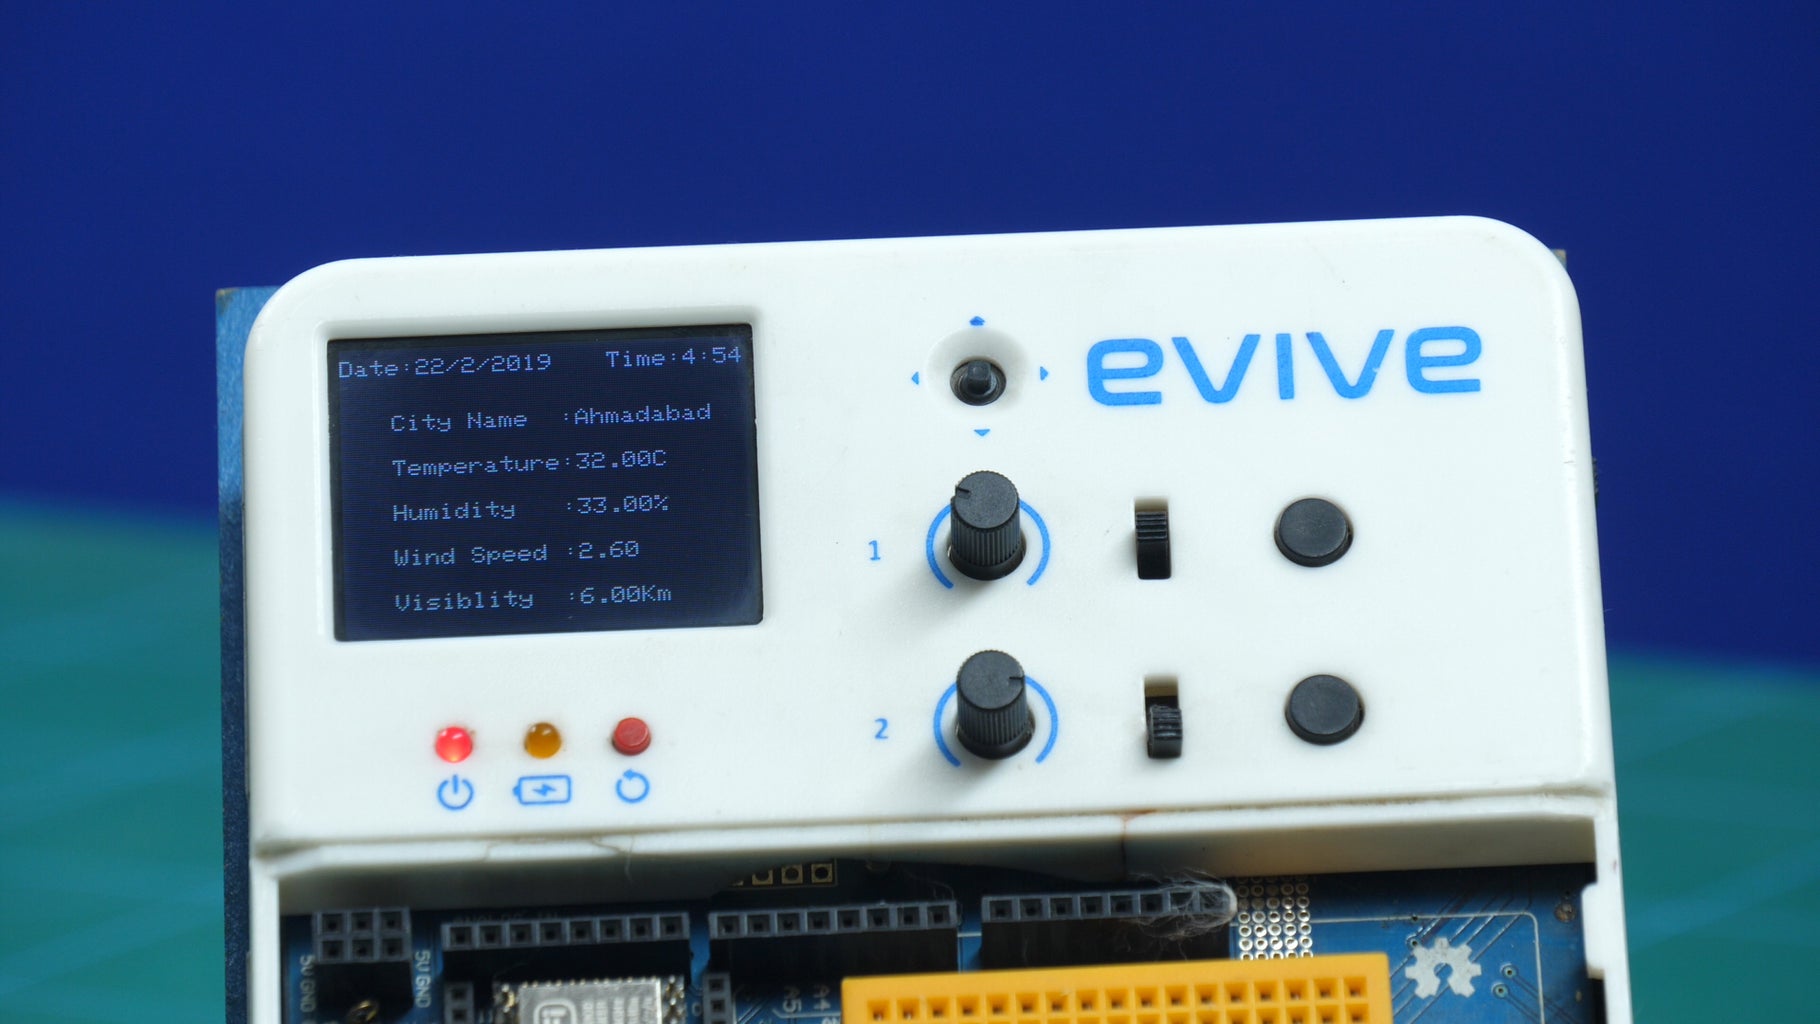
We will now display the real-time weather report of the given location on the TFT Display of the evive.
The content displayed will be:
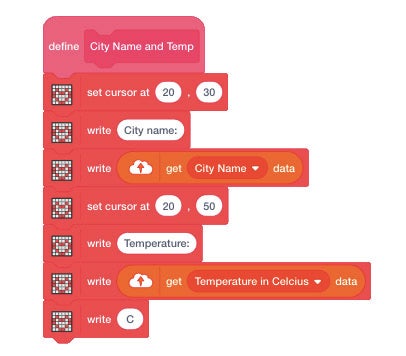
- Name of the city
- Time
- Temperature
- Humidity
- Wind Speed
- Visibility
Notes:You can display other details as well on the Screen.
Write the given code for the same.
Step 4: Completing the Script
Now, let’s write the main code - the code which will be triggering the entire event. It will begin with the evive startup hat.
We will use the connect to Wifi to connect evive to the WiFi module from IoT extension. Enter the WiFi name and the password into this block. We need the latitude and longitude of a given location to get the weather reports. For that, we will use the get weather data for block. You will find a section where we need to enter the API.
You can get the API from openweathermap.org. Write the complete script as shown below or can download the script.
Upload the code to evive and you’re all set!
Attachments

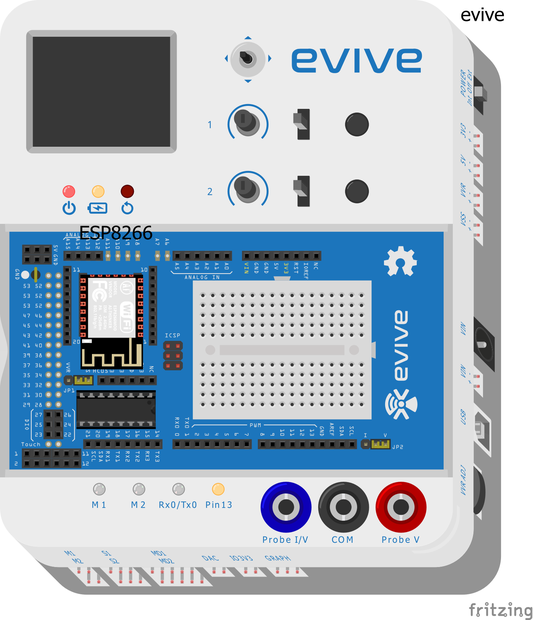
Step 5: Making the Connection
Make the connection as shown in the figure:
Step 6: Conclusion
With this, your IoT based weather station is now all set to show what it’s like in another part of the world in a jiffy!
PS. Did you see our amazing campaign with super cool stuff that DIYers all across the globe are loving so much? If not, go ahead and visit HERE to have a look!


