

Introduction: IoT Gas Detector With Arduino and Raspberry Pi

In this instructable you will learn how to build an IoT gas detector using an Arduino, a Raspberry Pi, and an MQ-5 gas sensor. In addition to these parts you will need three wires to connect the Arduino to the gas sensor. Once that's done you will be able to write code for the Arduino and Raspberry Pi to get the current gas level in the room, be it natural gas, alcohol, or even your breath. Let's get started!
Step 1: Connect the Gas Sensor to the Arduino
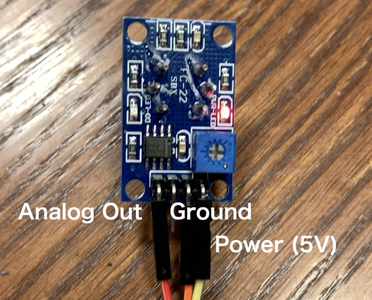
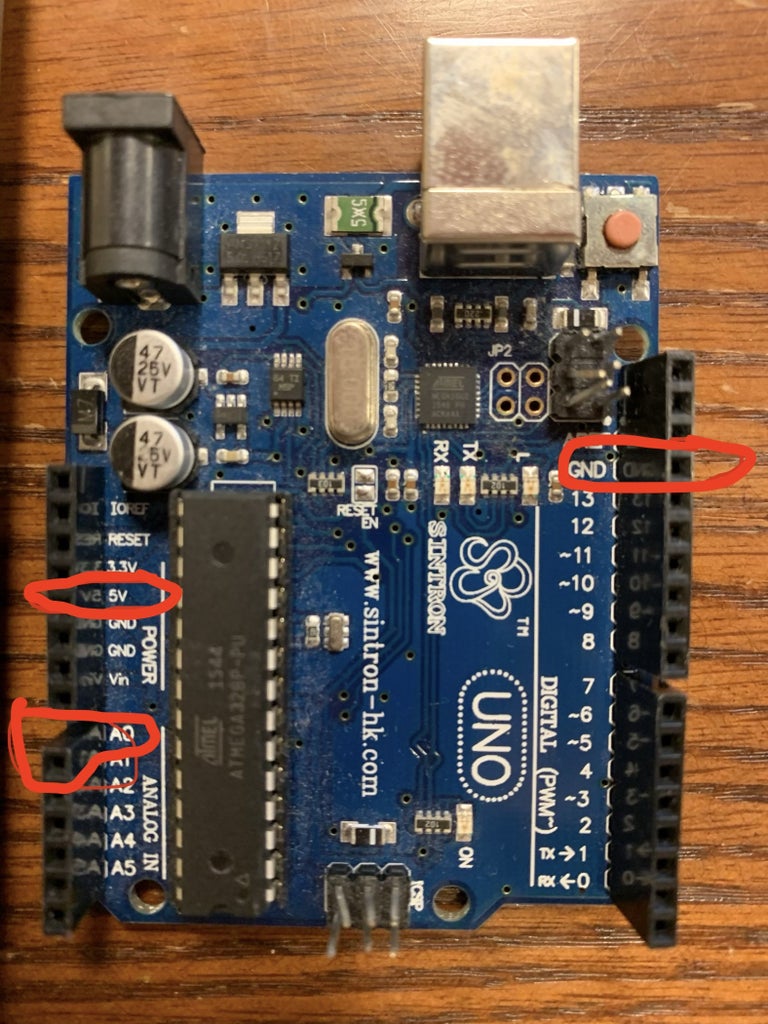
You'll need three wires to connect the gas sensor to the Arduino:
-One from the sensor's A0 (analog out) to an analog input pin on the Arduino
-One from the sensor's GND (ground pin) to a ground pin on the Arduino
-One from the sensor's VCC (power input) to a 5v pin on the Arduino
Once that is done, turn on the Arduino. You should see a red light on the gas sensor.
Step 2: Connect the Arduino to the Raspberry Pi

You'll need to plug the Arduino into the Raspberry Pi to verify that it is powered through the Pi's USB port. You will also use this connection for communication via the Arduino's serial.println() function, which will be received by the Raspberry Pi.
Step 3: Write Some Code for the Arduino

Now that the Arduino is connected it must be able to take a reading from the gas sensor and transmit it to the Raspberry Pi. To do this, a few lines of code are required: the Arduino must take the analog input from the sensor and then write it to the serial connection, which will allow the Pi to read it. An example of how to do this is included in the picture.
Step 4: Write Some Code for the Raspberry Pi

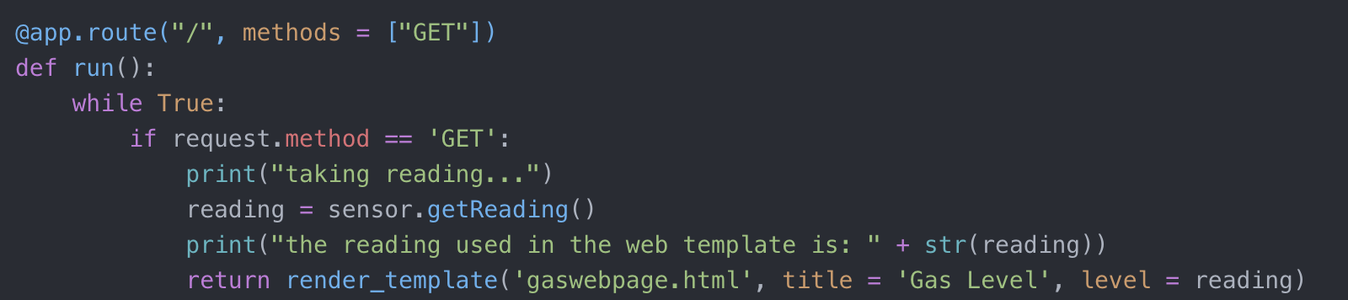

Now you'll need some code on the other end to "catch" the data coming from the Arduino and display it over the internet. To do this we'll use Python in our example along with Flask, which will let us serve a webpage with the sensor data along with an average of the sensor's past readings. You'll need to import the modules shown in the picture for the web server and serial port communication to work.
Next, you'll want to start a new serial connection and write a sensor class that will take read from the Arduino and pass that data along to our Flask route, which is shown in the second picture. Finally, you will want to make a webpage in HTML so we can actually view our data. An example of how you could do this is included here.
Step 5: Build a Case and Try It Out!

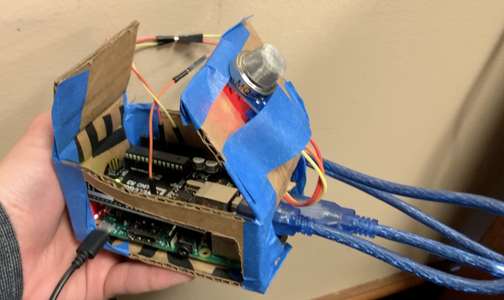

Finally, once you've tested your sensor, you can build a case for it and test it out! You could make a case with a 3D printer (pre-made cases for the Pi and Arduino already exist) or even build one out of cardboard. An example of both is included above. We got our cases from Thingiverse (here and here). Ultimately, the choice is up to you! Happy building!


