

Introduction: Jaw for Animatronic


You may not think about it but Halloween is very close. If you are a crafter or DIY decorator that is. Every year I want to make cool decorations however I start the week before Halloween and run out of time. This project is part of a bigger visualization of multiple animatronics singing together. This jaw can be outfitted with a servo controlled by any means you see fit
Step 1: Equipment Materials Etc.


I used pretty common stuff here. A drill, an air powered grinder however a dremel will work. A pop rivet gun that you can get at most automotive repair shops. Auto zone, o'reilly etc. and some scrap metal laying around the shop.
Step 2: Bottom Jaw Strip


Cut a strip of metal to your desired length and shape it in a bow shape for the bottom jaw.
Step 3: Bottom Jaw Hinge


1) cut two small pieces of metal.
2) drill 2 rivet holes in each.
3) match drill the rivet holes into the jaws with the small pieces of metal near the back of the jaw.
4) rivet the small pieces to the bottom jaw.
5) round the corners of the hinge pieces.
Step 4: Bottom Jaw Hanger Support


1) cut another strip of metal of sufficient length to allow it to be bent and nested in the hinges of the bottom jaw.
2) match drill the bottom jaw hinges to the hanger support.
3) trim off any material that may interfere with operation.
Step 5: Final Assembly


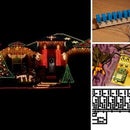
Attach the bottom jaw to the hanger using your choice of hardware. Do not fully tighten the hardware if you will be using a servo. The jaw should swing freely in order for a servo to move it. The last two pictures demonstrate open and closed position.
Step 6: Add a Servo
My next instructable will be a servo mount and a way to attach the jaw to the servo horn.


