

Introduction: Labview Meet Arduino ! Control AC Dimmer Lamp


Labview is one of the best software to Control and monitor sensors, motors,files,and any project parameters.
One of most interesting thing that you can control arduino using labview without writing any code line !
and in this tutorial we will see how to build a control panel and control AC lamp using Labview and arduino.
So let's see what we need for this tutorial (Hardware and software).
Step 1: Software


You need to download Labview software on your computer, labview works on Windows and Mac as well ., I used Labview 2010 Version
Then you need to download Arduino Kit tool, to do so you need something calledLIFA (or Here)and then download arduino labview package from there.
download NI-Visa driver to allow you labview software to connect with any serial instruments.
and you need arduino IDE , and then upload this code to arduino board,i recommend you to download arduino 1.5.5 version.
and then upload a firmware to arduino board,you can find this firmware after you download the arduino tool kit in your computer.
you can return to this articalfor more info.
Step 2: Hardware and Connection


you don't need a lot of components, all what we need are:
- Arduino Board(Uno,Mega,Nano).
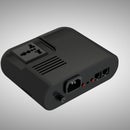
- Sugar device (to control AC Lamp).
- AC lamp with socket
- RJ12 cable
- RJ breakout
- AC power cable C14
- Bread board
- jumper
you can replace the lamp by any AC device you want to control
and here is the connection you need, very simple ,isn't it?
and connect the RJ12 cable between arduino and sugar device to control the AC Lamp
Step 3: Labview Program and ON - OFF Switch


first code we did is to control the Lamp ON OFF using switch button on Labview.
we offer the EXE code for this experiment in attachment , if you would like the project code , we will offer it to our backers on indiegogo ,support us if you want to see more tutorials like this.
Select the Serial com port for your arduino board and press the Run button in the top to execute the program
and this video to show you how this exe application runs
If you don't have labview real time engine so you can download it from here to run this application
Attachments

Step 4: You Love Sugar Device ? We Need Your Help


Sugar is a startup project , designed and Manufactured the Prototypes in Taipei - Taiwan and Now sugar need your help to become a real product in the market and bring a simple tools to control AC voltage.
Sugar comes in 2 different type:
- Sugar300 : can Handle Up to 300 W
- Sugar1000 : can Handle Up to 1000 W
and both type support AC output voltage control "For Dimmer applications" Hope you support us and become our backer Now on Indiegogo Campaign you can visit our campaign page https://igg.me/at/sugdev/x .
Keep in touch with us on:
Facebook: https://www.facebook.com/SugarWorld.net/
Twitter: https://www.facebook.com/SugarWorld.net/
Instagram: https://www.instagram.com/sugardevice/
Youtube official accounts: https://www.youtube.com/channel/UCDthbcEGR-r0NB49...
Visit Our website to see all features and tutorial and see the story behind sugar
Step 5: Labview Program and Dimmer Application


Second code we did is to control the Lamp as a dimmer on Labview.
we offer the EXE code for this experiment in attachment , if you would like the project code , we will offer it to our backers on indiegogo .
support us if you want to see more tutorials like this.
Select the Serial com port for your arduino board and press the Run button in the top to execute the program, move the wheel to control the brightness from 0 - 100%
this video to show you how this exe application runs
If you don't have labview real time engine so you can download itfrom here to run this application


