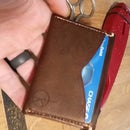
Introduction: Leather Tooling: a Beginner's Beginnings...
What you're getting here is my take on something I have only been doing for a couple of weeks. I hope you can get something out of it, because I have found that I really like doing this. But this will truly be a beginner's guide by a beginner (with a little bit of early experimentation thrown in). There is so much potential in tooling leather: cosplay, profit, or hobby. Please enjoy.
Step 1: What You'll Need...and a Few Extras.
I started my journey on Youtube like most makers probably do. And continued it on Amazon...so I could get started right away. A couple of days later I hadn't spent that much money and I ended up with a couple drawers of cheap Chinese tools (you can get just about everything in those two drawers, or at least enough go get started, for about fifty bucks). But what I saw in my research was that people were using these large pieces of marble cut-offs to do their tooling. I didn't have that so I tried just some spare 3/4'' oak that I had. It bounced...a lot. And it was really annoying because the energy from the mallet was being sent through the piece and getting absorbed into the wood. There just wasn't any mass to it.
'Marble' table:
Since I could find (or likely afford) a chunk of marble I came up with what you see in the photos...for about seven dollars...I went to my local home improvement center and got a single 12''x12'' concrete paver stone, a thick marble tile, and a small bag of morter mix. There were all a little over a couple dollars each. and assembled them as you see.
**Notes on slab: Be sure to wet the paver stone before you apply the morter. Make your morter bed pretty thick and butter both the paver stone and the tile. Set the tile and line up all four sides. Press any excess mortor into the gap between the tile and the paver. Make sure to let it set up for a day ( I waited two). When you give it a little tap with your knuckle you can really hear how solid it is. It should not sound hollow. And it will be heavy.
The other optional tool photographed in this step is a couple of laser cut acrylic designs I cut on my Glowforge laser cutter. More on that later.
Step 2: Transfer Pattern and Get Tooling.
Transfer:
There are a couple of ways you can transfer the pattern. Dampen the veg. tan leather with a wet paper towel or a sponge. It doesn't need to be soaking. Just a little damp(the color of the leather will darken just a little. A couple of things I did was print a pattern onto paper, lay it on the leather where you want it, and trace it with a stylus(or dull pencil)...But I think there is a loss in the design that way. So what I tried was making a design with the laser cutter/engraver.
Use your new 'marble' table:
I carefully hammered it the pattern into the design and traced the parts of the design with a swivel knife. Then I used a boarder tool and hammered down the outline right along the cut from the bevel knife. The rest is really just experimentation! Play with the tools you got and see what pattern they make. Come up with other designs and play around, it's so fun.
Step 3: A Week's Work of Practice.
Just keep going. Keep researching. I did all this off and on for a week and it was super satisfying. I hope this helps. Steps after this are dying the leather and slicking the edges(maybe some assembly if your design calls for it), but I'm not going into that here. Just follow the manufacture's instructions and check out some Youtube guys. The fellas at Tandy Leather seem to have a few very helpful videos, just a quick search away!

Participated in the
Leather Contest 2017


