

Introduction: Lightsaber Using Intel Edison


On this Instructable, I'll share how I built my own Lightsaber using an Intel Edison board, a cheap Jedi Lightsaber toy and a set of addressable RGB leds.
This was part of a challenge that Pacman Pereira launched to all Brazilian IoT community on the beginning of the month (December, 2015), challenging people to built their own lightsabers using Intel Edison before launch of the latest Star Wars movie.
Step 1: Parts
For this instructable, you'll need:
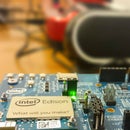
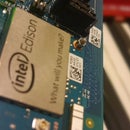
- An Intel Edison module;
- A Xadow Wearable Kit for Intel Edison (this one);
- 10 RGB Addressable LEDs (like those);
- A cheap Jedi Lighsaber (like this one), or an acrylic tube to host your LED strip.
The lightsaber I used here costed around US$ 10. It has an acrylic tube as the blade, and inside of that, a small hose with some leds.
Step 2: Assembling the Light Blade

This was the part the took me must of the time to finish, and after several tries, I found a way to get everything in place with the best possible final result.
Cut the small hose from the acrylic blade in a way that you can place the 10 LEDs filling all the acrylic blade (from base to top). I used the small hose pieces to host a LED on each side, all pointing to the top of the blade. I placed them all together using transparent scotch tape and doing some small cuts on the sides of each piece to allow the wires to pass from one LED to the next one.
Those LEDs has on each side of the board the pins to GND, VCC and Data In and Data Out. Please take care on soldering those, and make sure that you are connecting the Data Out pins on Data In pins and so on.
Step 3: Connecting the Light Blade to the Xadow

I decided to use the accelerometer board from the Xadow kit, because despite of the accelerometer that I'll use in the next version of the project, the board also has some GPIO pins that we'll use on the project.
As shown on the picture, I used a removable connector to connect the LEDs to the board, using GND, VCC and the Data pin connected to the MISO pin.
I also used one additional push button that was already on the toy lightsaber, to turn on and off the board. I connected this push button to VCC and to the MOSI pin on the shadow board. I also connected the MOSI pin to GND using an 10 Kohms resistor. With this configuration, we will read HIGH on this button when the push button is pressed (and LOW when it isn't).
On the Arduino sketch, the MOSI pin is the digital pin 11 and the MOSI pin is the digital pin 12.
Step 4: Setting Up Bluetooth on the Intel Edison Board

To chose the color of the lightsaber we will use an Android smartphone connected to the Edison board using Bluetooth.
The Bluetooth will establish a Serial connection between the board and the smartphone, and this serial connection will be available to our Arduino Sketch using a named pipe on Linux.
The tutorial to implement this serial communication pipe between Edison and Arduino sketch can be found here.
We developed a patch to the Arduino libraries, because we needed a non-blocking way of getting commands, and there was a condition where the sketch was starting before the named pipe was created, so one patch adds Intel_Edison_BT_SPP::wait() and Intel_Edison_BT_SPP::ready(), while the other makes Intel_Edison_BT_SPP::open() block until it shows up.
The patches can be found here. Please apply those to your Arduino lib before using the lightsaber Sketch.
Step 5: Setting Up the Android App

I used the BlueTooth Serial Controller App on Android to send the serial command to the Arduino sketch.
Configure the app to send the following commands to your lighsaber (ASCII):
Y - Yoda (Green Lightsaber)
O - Obi Wan (Blue Lightsaber)
W - Mace Windu (Purple Lightsaber)
V - Lord Vader (Red Lighsaber)
You can use this app to easily send another additional commands to your board, so fell free to expand the color set to anything you want.
Step 6: Arduino Sketch
Finally, use the following Arduino sketch to put everything together.
The color of the lightsaber will only change when you turn off and on the saber. It will light up with the color that was previously set by the app (the default color is blue).
#include <wire.h>
#include <intel_edison_bt_spp.h>
#include "Seeed_ws2812.h"</intel_edison_bt_spp.h></wire.h>

Intel_Edison_BT_SPP spp = Intel_Edison_BT_SPP();

#define SIG_PIN 12
#define LEN_NUM 10

WS2812 strip = WS2812(LEN_NUM, SIG_PIN);
int tempo = 20;
int x,y;
int r = 0;
int g = 0;
int b = 255;
int botao = 11;
char cor = 'O';
bool liga;

void setup() {
  strip.begin();
  Serial.begin(115200);
  liga = true;
  pinMode(11, INPUT);
  for(x=0; x<11; x++){
    strip.WS2812SetRGB(x, r, g, b);
    delay(tempo);
    strip.WS2812Send();
  }

  spp.open();
}

void loop() {

  switch (cor){

    case 'Y':
      r = 0;
      g = 255;
      b = 0;
      break;

    case 'O':
      r = 0;
      g = 0;
      b = 255;
      break;

    case 'W':
      r = 182;
      g = 66;
      b = 255;
      break;

    case 'V':
      r = 255;
      g = 0;
      b = 0;
      break;

    default:
      r = 0;
      g = 255;
      b = 0;
      break;
  }

  //Serial.println(digitalRead(botao));
  if(digitalRead(botao)){
    liga = !liga;

    if(liga){
        for(x=0; x<11; x++){
          strip.WS2812SetRGB(x, r, g, b);
          delay(tempo);
          strip.WS2812Send();
        }
      }
      else{
        for(y=11; y>=0; y--){
          strip.WS2812SetRGB(y, 0, 0, 0);
          delay(tempo);
          strip.WS2812Send();
        }
      }
    }

    int rc = spp.wait();
    if(rc > 0 && spp.ready()) {
      ssize_t size = spp.read();
       if (size != -1) {
                cor = *spp.getBuf();
		Serial.println(cor);
	}
    }
  delay(100);
}
Step 7: Demo and Next Steps
On this video you can see the lightsaber working (in Portuguese only).
We also managed to generate a sound to an external Bluetooth speaker every time the saber turns on/off and also when it moves. We had some issues with the latest firmware of the board to have everything running in parallel, so we decided to launch the project as is and work on the sound effects after a new release of the firmware is launched.
Enjoy your lightsaber!
Special thanks to Fabio Kalaf that worked with me on the software part of the project, and to Pacman Pereira and Cesar Gimenes that helped with the electronics.


