

Introduction: Mayan Rubik's Treasure Box


In this Instructable I'm going show you how to turn a plastic Treasure Chest Rubik's Cube into a wooden one.
This cube reveals its inside once it is solved. Just hide your secret message and a fragile glass vial with a poisonous gas which will be released, should someone decide to break the cube out of frustration instead of solving it (Please, please don't poison anybody, I'm just kidding ;-)).
Step 1: What You Need

What you need:
• at least 25 two millimeter cubes (22 for the Rubik's cube and three to make a rig, but you should get a few more, in case you mess up)
• Oskar’s Treasure Chest (from Mefferts)
• Wood stain
• Clear finish
Tools:
• Hot glue gun
• Strong two component glue
• Phillips screwdriver
• Dremel (114 High Speed Cutter, a Sanding Drum and a 3 mm drill)
• Saw
• Compass
• Optional: laser cutter, but the graphics are easy enough, so you can just paint them on.
Step 2: Make the Edge Pieces


Start by building a rig as shown in the first picture of this step. It will make your life a whole lot easier. We will start by making the edge pieces. Remember which piece goes where.
Take the edge pieces apart, they consist of three pieces. Glue two of those pieces together as shown in the second picture. Use a compass to mark a circle with a 3 cm radius, where you will have to cut later. Use the sanding drum of the Dremel, to remove all the excess plastic, until the pieces look as shown in the third picture. Now mark the same radius on the small wooden cubes as shown in the fourth picture. Make sure everything fits, than use hot glue to glue them together.
Step 3: Make the Corner Pieces


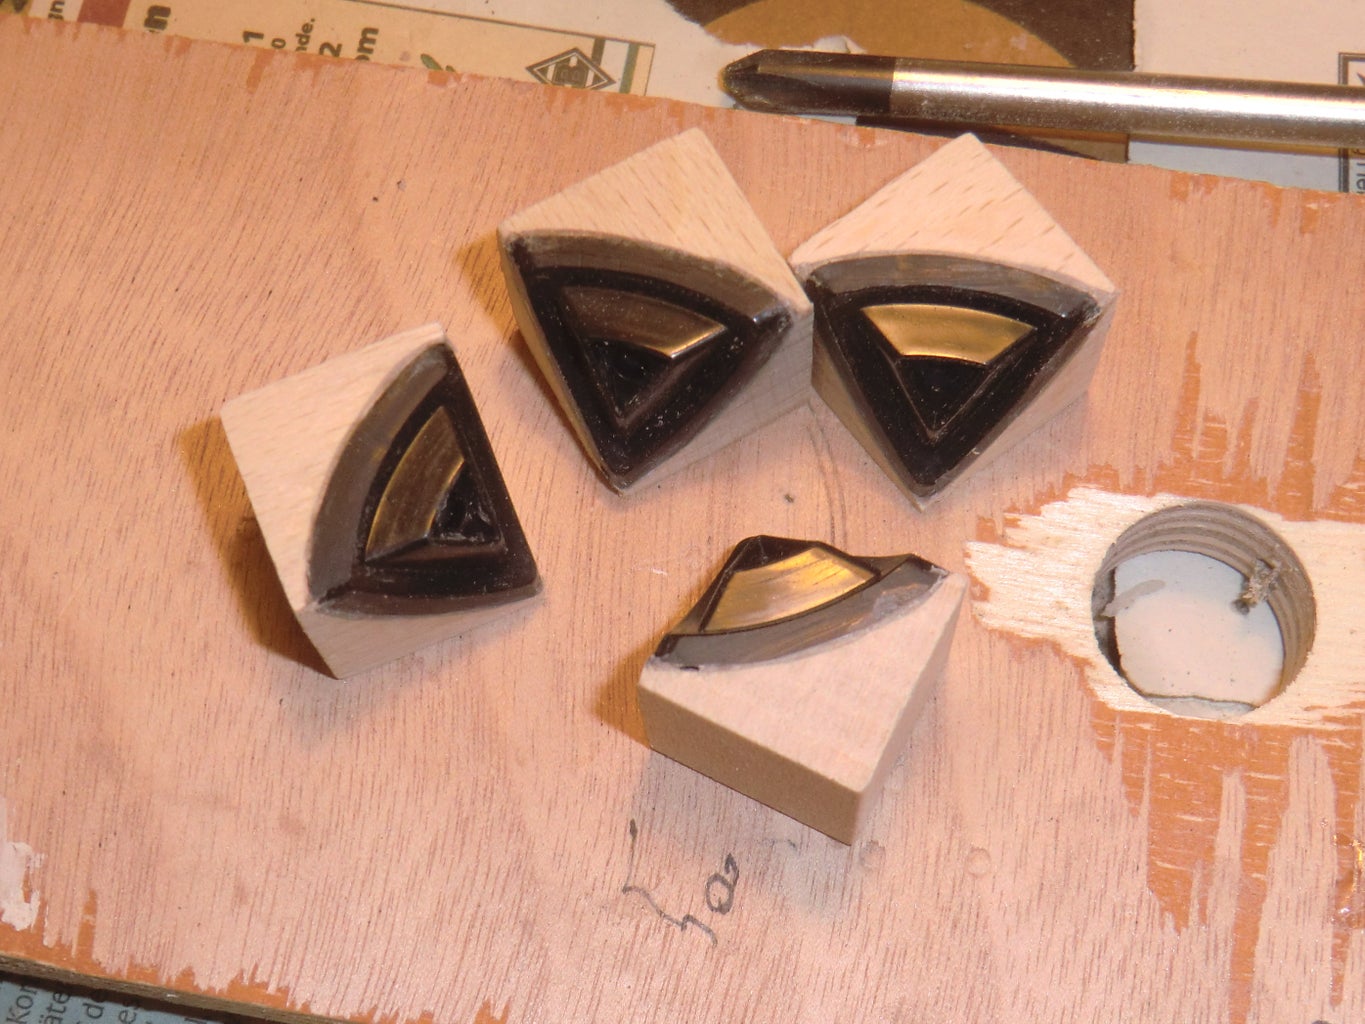

Next we will make the corner pieces. Start by taking them apart, then sand and grind the piece that was in the middle down, as shown in the second picture.
Then once again use the compass to mark the circle on the wooden cube, as shown in the third picture. Sand them down and make sure that everything fits and glue the pieces with hot glue together.
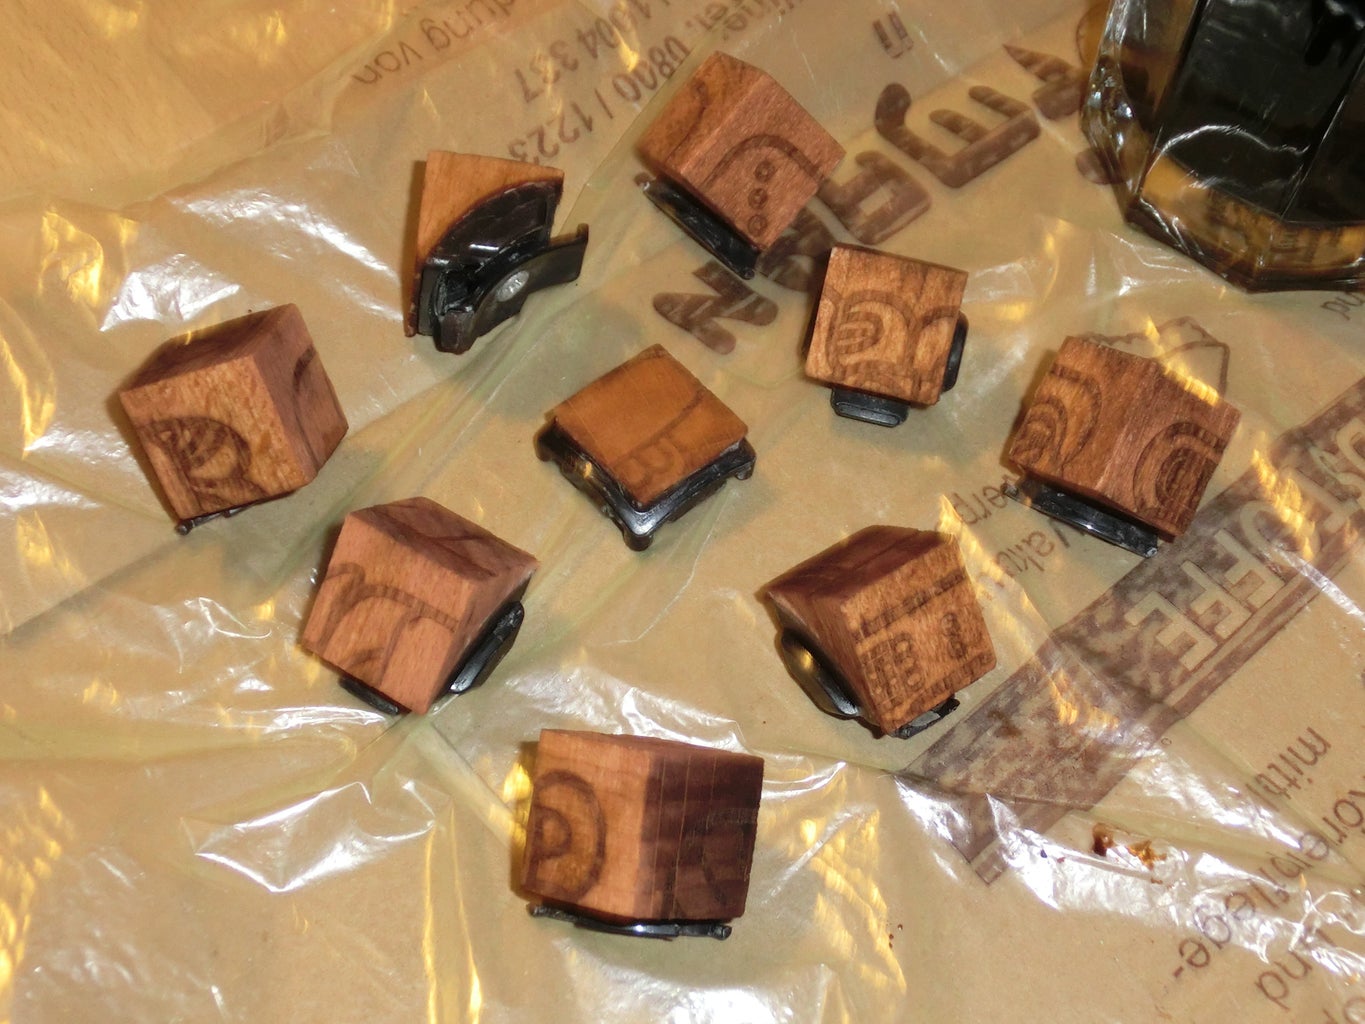
Step 4: Make the Center Pieces


It's time for the assembly and adding the center pieces. To give the cube some extra stability, drill holes and glue the screws back in, as shown in the first picture.
Sand the middle pieces down as shown in the second picture. Saw four about two millimeter thin slides of a cube and glue one to each middle. Let the glue set, and if you want/have to, sand the whole cube once it is assembled.
As you can see, I marked the side with a pencil, the writing can easily be removed later.
Now you are basically done. You can of course "decorate" your cube in any way you want, if you would like to go with the mayan theme check out the next step.
Step 5: Decorate


If you don't like the Maya theme you can of course go with whatever you want. I chose mayan glyphs, that match a Rubik's Cube, you can see them in the first picture, of this step. If you would like to choose your own glyphs, check out this site.
If you would like to rather use stickers, check out my other Rubik's Wood Cube ible. I engraved the glyphs with a laser cutter. Once I was done I noticed, that the cube looked far to polished and new. So I decided to use wood stain and matte finish. When you are using wood stain be careful, that there are no more glue residues on your cube, because they will mess up your results.
Hint: depending on the direction of the wood grain the sides of your cube will soak the stain in differently. To prevent an uneven look, test the stain on a small spare cube. Then go back to your Rubik's Cube, stain a small cube and use a cloth to get rid of the of the stain first from the sides, that tend to get darker. You will end up with a nice and even result.
Whatever you are deciding to do, enjoy your new cube.

First Prize in the
Cabot Woodcare Contest

Participated in the
3rd Annual Make It Stick Contest


