

Introduction: Miniature Pencils and Colored Pencils
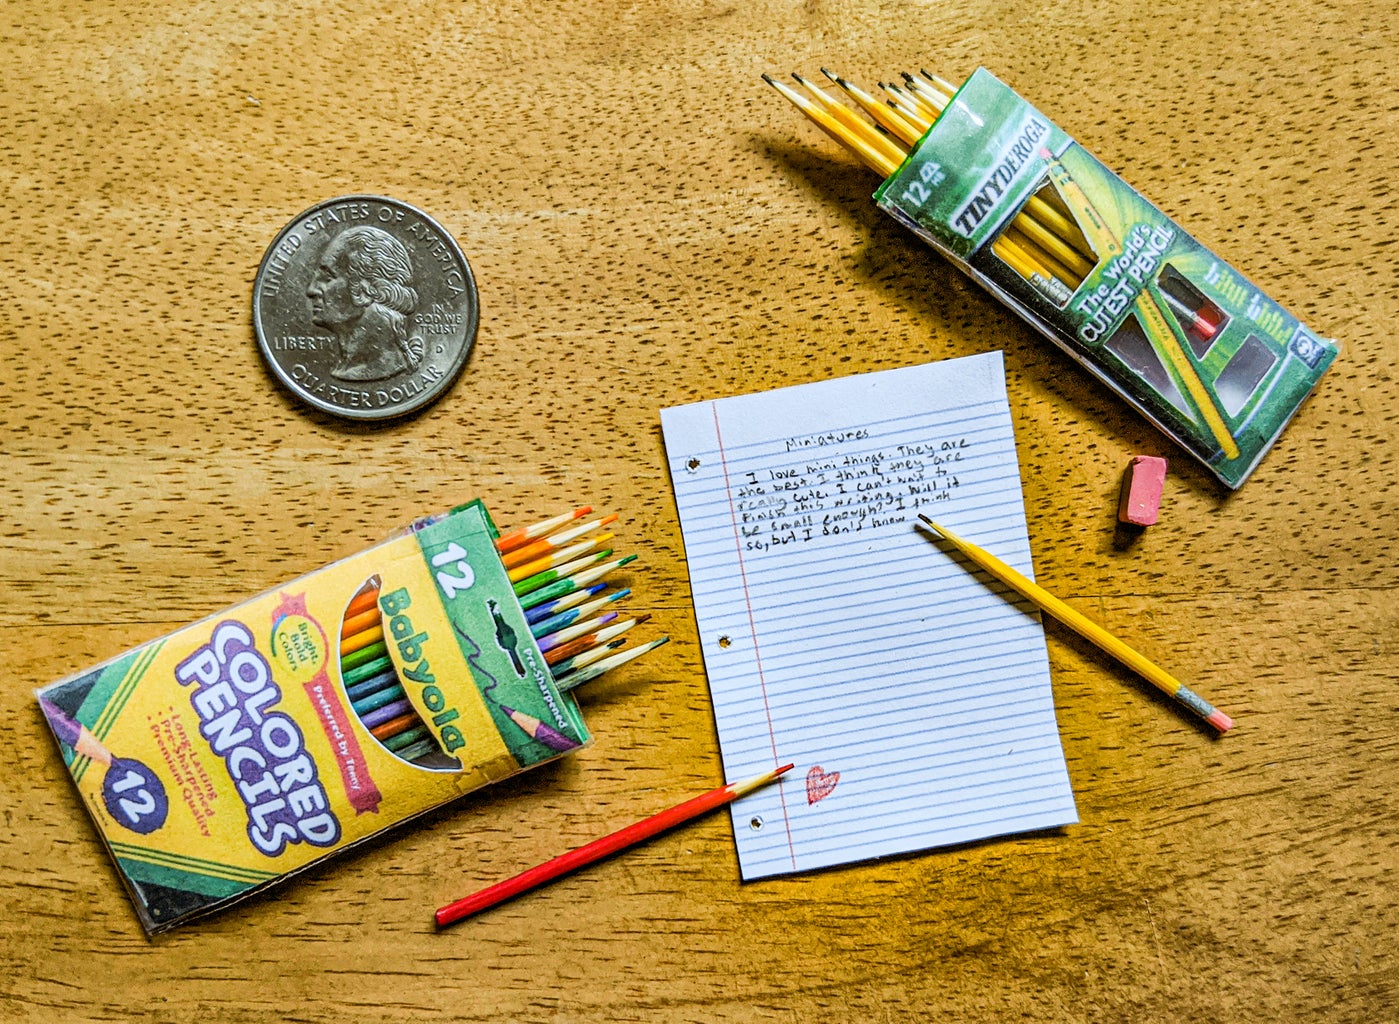


I've always marveled at the charm of taking something ordinary like pencils and making them tiny. This project is perfect for miniature displays, dollhouses, amusement, and more. Look closely at the miniatures for some puns!
Step 1: Supplies

Tools:
- scissors
- ruler
X-Acto knife
Pencils:
- regular, wooden toothpicks (12 count)
- black marker
- yellow marker
- silver marker
- pink marker
Colored pencils:
- regular, wooden toothpicks (12 count)
- 12 markers of different colors
Pencil box/Colored pencil box:
- print-out (Attached: pencilboxes.pdf)
- clear tape
- small zip-lock bag
Attachments

Step 2: Cut the Toothpicks
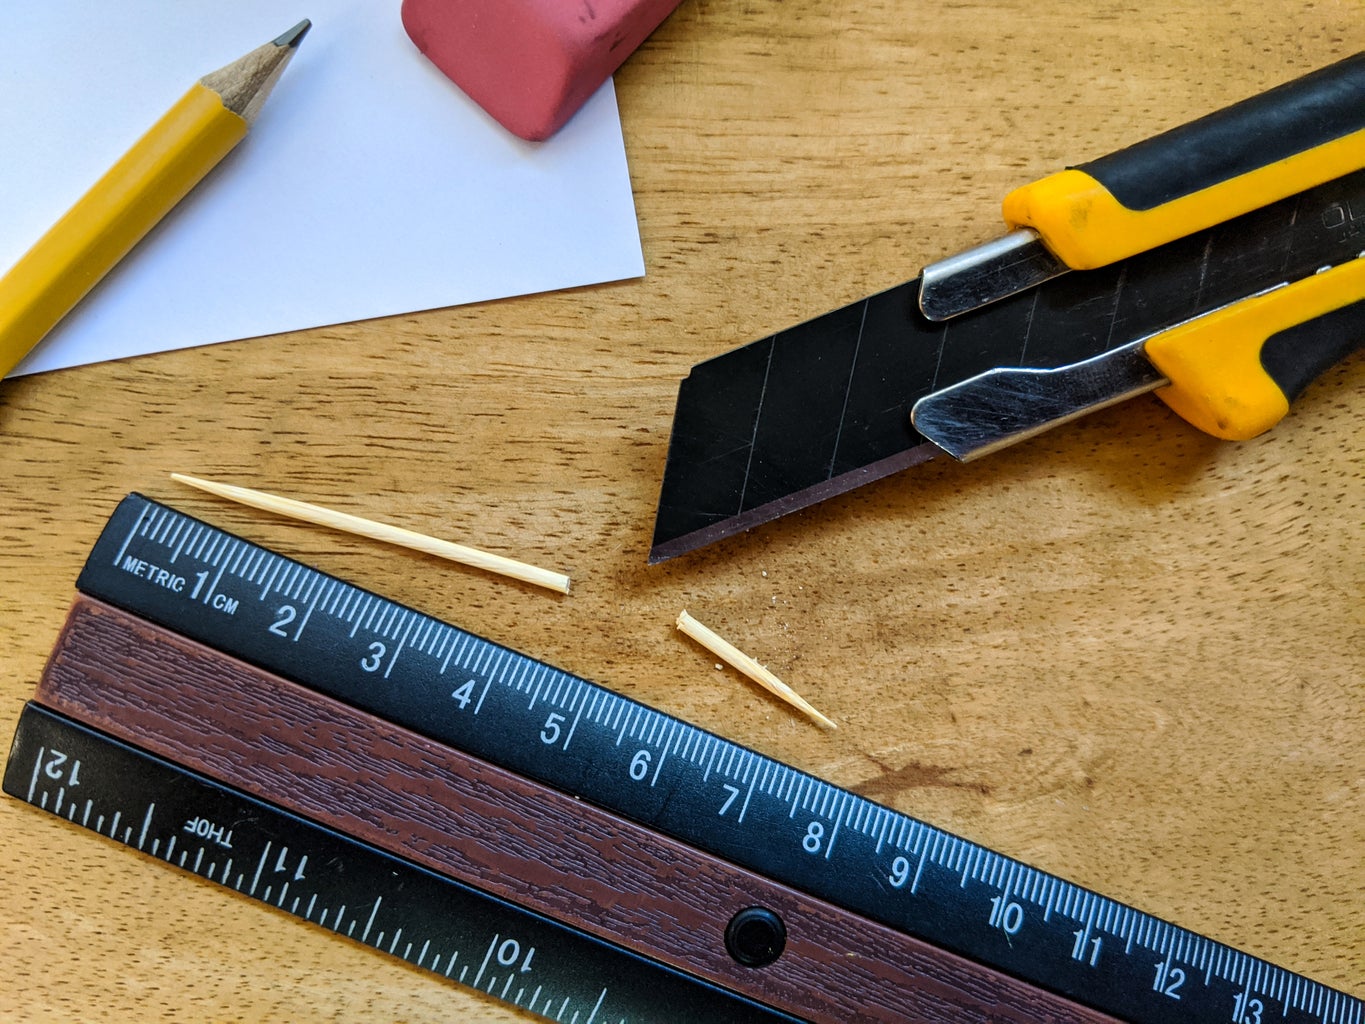
Each pencil will be approximately 4.3 cm. Using the X-Acto knife, cut all the toothpicks to size. Cutting round objects is a challenge so be careful! The X-Acto knife will make a cleaner cut with less splintering, but scissors will work as well and are a bit easier to use.
Step 3: Color in the Pencils


Test your colors first to be sure you like them! At the flat end of the toothpick, color in about 0.3 cm of pink, the eraser. Above that, color in about 0.4 cm with the silver marker. And above that, color in about 3 cm of yellow. Make the end of the yellow color a bit uneven to mimick the jaggedness of sharpening. At the sharp tip of the toothpick, use a black marker to make the graphite.
Using the X-Acto knife, make light incisions all over the silver part, which will give it a rough metallic look. Visually separate the eraser from the metal and the metal from the yellow wood by making a clear, shallow incision all the way around the toothpick where the colors meet.
Step 4: Color in the Colored Pencils

Again, test your colors first. From the flat end up, color about 3.5 cm of the remaining toothpicks with different colored markers. Color about 0.2 cm of the tip of the toothpick.
Step 5: Make the Pencil Boxes


Using the X-Acto knife, cut out the white parts inside the box covers. Then, cut out all the fronts and backs from the paper.
Take one of the paper fronts and line it up on top of a zip-lock bag with the long side meeting the edge of the zip-lock and the top reaching a tiny bit above the zipper. Ensure that there is enough room to fit the pencil/colored pencil in the bag. Trace and cut out the marked zip-lock with scissors. There should be about 4.5 cm of clear plastic under the zipper.
Tape the front and back to the ziplock cut out, ensuring all the sides except the top are sealed by tape. The taping might be a bit tricky so be patient.
Step 6: Finish!


Put the pencils/colored pencils in the boxes. You can cut out the mini paper found on the print-out (pencilboxes.pdf) for more teeny props. If you like, cut an eraser into a tiny eraser (about 0.7 cm x 0.3 cm x 0.3 cm).
Have fun!

Participated in the
Tiny Speed Challenge


