

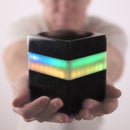
Introduction: Modular Wall Garden From a Single Plywood Sheet


I made a Modular Wall Garden with Plant-Grow LED Strip Lights, and White LED Lighting, from a single sheet of plywood. Each planter is modular, in that it attaches with magnets, and has magnets on two sides, allowing it to be flipped 90 degrees and re-attached as a cubby hole in the same location.
This might seem a bit unusual as a project, but I think it is a cool way to get plants into areas that you otherwise couldn’t, and to provide some flexibility to change the setup to provide more or less storage. It would work great to add greenery. Storage, and lighting behind a desk, in an office, or in an entryway / foyer (where I will be using it).
The white LEDs are SK6812 WWA LEDs, and are controlled with an inexpensive controller, which allows them to be switched between warm white / cool white / amber colors, and to do some fun chasing animations.
PARTS USED IN PROJECT:
Aluminum LED Profile w/ Frosted Cover (YW shape): http://amzn.to/2x29vId
Plant Grow LED Strip Lights: http://amzn.to/2xMYnh6
SK6812 warm white / cool white / amber LEDs: http://s.click.aliexpress.com/e/QJqBIai
Controller & remote for SK6812 LEDs: http://amzn.to/2yeaiq2
5V to 12V step-up power converter: http://bit.ly/2jYc4VL
Fuze-It (an amazing adhesive!): http://amzn.to/2x2wvaa
High Strength Magnets: http://s.click.aliexpress.com/e/6muFmaQ
On/Off Toggle Switches: http://amzn.to/2xIRHPD
Waterlox Wood Finish: http://amzn.to/2xJkuUf
TOOLS USED IN PROJECT:
Kreg Accu-cut: http://amzn.to/2yeReYy
Kreg Pocket Hole Jig: http://amzn.to/2ydSKu9
1.5” Bottom Cleaning Router Bit: http://amzn.to/2fFOiN4
Dewalt 2 ¼ hp Router: http://amzn.to/2x3kcKM
Bosch Router Table: http://amzn.to/2xIJcUE
Ridgid Cordless Router: http://amzn.to/2x29LqN
Bosch Cordless Circular Saw: http://amzn.to/2x3YhhT
Dewalt Jigsaw: http://amzn.to/2yzpcmC
Dewalt Table Saw: http://amzn.to/2x4igNg
Bosch Drill and Impact Driver: http://amzn.to/2x4duEa
3.5” Hole Saw: http://amzn.to/2xIO1gO
Step 1: Cut the Parts


Backboard – I cut a 30”x24” piece to be the backboard (but later expanded it to 30”x26.5”, when I realized I needed more space between the lights and plants)
Planters and Lower Shelf -- Each planter is made from a 4.5” cube of stacked plywood, so you’ll need six 4.5” squares to make each planter. The shelf was 4.5”x4.5”x24”, so you need 24 more 4.5” squares for the shelf. I had 7 planters, so 42 + 32 = 74 total 4.5” squares. So I needed to cut 4.5” strips having a length of about 340” total. I cut these 4.5” strips on the table saw, then used a miter saw to cut the strips into 4.5” squares. (Use a stop block on the miter saw, so the squares are equal in size.)
Upper Lighting Block -- The long block for the LED lighting is 3”x4.5”x30”, so I cut forty (40) 3”x4.5” rectangles from the ¾” plywood, using the table saw and miter saw, in same way as I cut the squares for the planters.
Step 2: Make the Planters / Cubby Holes


(a) Glue stacks of five 4.5” squares together, clamp, and let them dry at least a few hours.
(b) Use a 3.5” hole saw to cut out a cylindrical core. The depth of my hole saw is 2”, so I used a drill press to cut from the top, flipped it over, cut from the bottom, and then hammered out the cylinder. Use a stop on your drill press table, so the top and bottom cuts into the plywood stack are close to lined up. (Mine weren’t perfect, but were close enough I could knock the cylinder core out with a hammer.)
(c) Glue the sixth 4.5” square to make the bottom of each planter.
(d) (optional) use a drum sander on a drill press to sand the inside of the planter
(e) use a miter saw (or table saw) to trim sides of each planter even. Or you could use a belt sander to sand the sides flat.
(f) Use a roundover bit on a router table to round over all the edges of each planter.nm
Step 3: Make the Lower Shelf


(a) Glue up the 30 4.5” squares, clamp, and let the glue cure.
(b) Use a belt sander to flatten the sides, or what I did, was to use a table saw, making two passes on each side (see the video, easier to show than explain).
(c) Use a bottom cleaning bit on the router table, set to take out about 1/8”, to route out a tray on top of the shelf.
(d) Use the bottom cleaning router bit to gradually route out a square shape from the front of the piece, going as deep as you safely can. (Again see the video, easier to see than to explain in words.)
Step 4: Make the Lighting Unit


(a) Glue up the 42 4.5” squares, clamp, and let the glue cure.
(b) Same process as for the shelf. Use a belt sander to flatten the sides, or what I did, was to use a table saw, making two passes on each side.
(c) Set the table saw at 30 degrees, and cut an angled piece off the front of the rectangular piece. This creates a portion of the underside that is angled outward, so that the white LEDs can cast a white light into the room. Make the cut so that you have at least 2” of the bottom left flat, so you can cut a recessed channel for the grow lights to point straight down on the plants.
(d) Use a ¾” router bit to cut a ¾” wide by ½” deep channel on the angled face, where the aluminum LED profile will go.
(e) Use a ¾” router bit to cut a ¾” wide by 1” deep channel on the flat bottom portion, where the LED grow lights will go. I choose not to use an aluminum profile since I didn’t want to use a diffuser, and instead cut the channel deeper so you wouldn’t see the “dots” of the plant grow LEDs.
Step 5: Install Magnets


(a) Lay out the planters, shelf, and lighting unit on your backboard, get everything aligned using a straight edge, right angle tool, and ruler. Then use a pencil to mark on the backboard where every piece goes (draw an outline all the way around each planter).
(b) Make a drill jig with a leftover 4.5” plywood square. Cut four ½” holes in the jig piece, one at each corner.
(c) Use the jig to drill four holes on the bottom, and on the back, of each planter. (Mark your drill bit with painter’s tape so the depth is the same as the depth of your magnets.) I used a ½” drill bit, since I was using 12mm magnets.
(d) Use the jig to drill four holes on the backboard in the outline of each planter you drew earlier.
(e) Apply some Fuze-it adhesive in each hole, then press the magnet into the hole. Make sure you have the polarities of magnets on the planters lined up with polarities of magnets on backboard, so they attract instead of repel, before you adhere the magnets in the front and the back of each planter. After you insert the magnets, have a wet rag and a dry rag handy to clean up overflow Fuze-it. First use the wet rag to clean most of it, then make final pass with dry rag to get rid of the last of the Fuze-it. Let the Fuze-it cure for at least 6 hours.
Step 6: Prep the Backboard


(a) Cut mating pieces for a French cleat from plywood, about 24” long. Use screws and glue to attach the upper part of the French cleat to the top edge of the back of the backboard. Use a countersink bit before screwing to ensure the piece will sit flush against the wall.
(b) Attach two strips of ¾” plywood along both sides with screws, flush with sides of piece. This will make the whole planter sit flat, when attached with the French cleat. Again, use a countersink bit before screwing to ensure the piece will sit flush against the wall.
(c) Route out a square recession for electronics (size dependent on your electronics)
(d) Route out a .5” deep by 4” tall recession with the 1.5” bottom cleaning bit, on the back, wherever you want your on/off switches for the lights to go.
(e) (optional) Paint the front of the backboard your color of choice.
Step 7: Finish the Exposed Wood


I used two coats of Waterlox to finish all parts of the plywood that remained exposed after painting. You can of course choose whatever finish you like. I also added an extra thick layer of polycrylic to the inner surface of the planters to protect them from moisture.
Step 8: Install the Lower Shelf and Lighting Block


(a) I just used screws to attach the lower shelf and lighting blocks from the back.
(b) Use a 5/8” drill bit to drill through from the back, into the channels for both the white LED strip and the plant-grow LED strip, so you can run your wires to the back and hide them.
Step 9: Electronics


I used a 5V SK6812 WWA strip for the white LEDs, and a 12V plant grow LED strip, and powered them both from a 5V power supply. To do this I had to use a 5V->12V step up converter for the 12V LEDs. I noticed the step-up converter was getting hot, so I added a small 12V fan to cool off the step-up converter. I recommend making this WAY simpler, by just using two 12V LED strips, so you don't need the step-up converter. I used a cheap $10 RF LED controller that does solid colors and chasing patterns, to control the white LEDs (which are actually warm white, cool white, and amber clusters, that function how RGB clusters typically do in standard individually addressable RGB strips like WS2812 strips). I also wired in an on/off toggle switch as a relay to each LED strip, so I could separately turn on and off the plant-grow LEDs and white LEDs. There is a more detailed explanation of the wiring in this part of the video. However, if this part makes your head spin, then just use two 12V strips, or you could do away with the white LEDs altogether and just use the plant grow LEDs.
Step 10: Hang Up the Wall Garden


Attach the mating side of the french cleat to the wall with the 45 degree edge on top, and angling up and out from the wall, and make sure it is perfectly level. So long as you attached the mating piece level, the wall garden will be perfectly level when you hang it on the wall. There are lots of instructables and videos out there showing french cleat systems, so I won't go into a lot of detail, but you can see how I install a french cleat system in one of my other videos. After hanging it, just plug it in and fire it up!


