

Introduction: NES Computer


I decided to make one of these after seeing the one made by hatsuli (rest in peace). So here is my version of an NES PC. For what it is, it was a beast of a build. This is my first computer build. Consequently, this is also my first Instructable.
Step 1: Getting the Gear


First you'll have to get all the gear. For the NES I got just what I need from here fast shipping, reasonable pricing. They were great. As for the rest, the motherboard I got is a mini board. 6.7in by 6.7in I got this board since it comes with a laptop style power source. Which saves a ton of room for the rest of the stuff. I got that idea from nemaster203.
NES and power switch $ 30
Motherboard: Zotac IONITX T-U 199
RAM whatever your board supports. Mine was 24
Hard Drive: Western Digital Scorpio Black 160 Gb 75
USB Hubs 20
CD Drive Slim line preferred 30
Velcro or like substance 4
Rubber Feet 2
CPU Fan I cannibalized one from another comp 0
Total $384
Step 2: Making the Cut


Next thing you're going to have to do is make the first cuts. The only posts you need to not cut are the four posts in the corners all the rest can go. SAVE THE POSTS!!!! In hindsight I should have done the same. You can use the posts you cut off to make posts you screw the motherboard into. I did not.
Sand down the part of the post that you were unable to completely cut off. This will give you a nice flat surface to work with.
Place your hard drive in one of the two back corners to see which one works best for you. Hook up the cables, mark where you'll need to cut through the bottom, cut only what is necessary for the cords to fit into.
Next comes the cartridge compartment. Place your CD Drive where the cartridge would go. You NEED to place it on top to leave as much space for the motherboard as possible. Mark where you need to cut. As you can see I wanted to cut as little as possible so I only cut one side.
Step 3: Cutting the Back

Remember to Measure Twice Cut Once
Now here comes the moment of no turning back. Cutting the back. What I did was to place the motherboard where I wanted it. Then I marked the width on the back. I knew that the motherboard would be sitting above the power and reset switch. I measured where the top of those switches stopped then made my marks.
Now cut the back. Once you have it all cut you can set the motherboard in and measure how high the back plug ins go past the dark grey portion. Mark it on the light grey portion. Make your cut. You can see where I marked where I needed to cut. You can also see I didn't cut for the back plate but only what I needed. That way the fan will have a place to blow out all that hot air.
Hard parts over. Get a beverage of your choice and celebrate. Mine is a Vanilla Porter I brewed up.
Step 4: Controller Ports


This is where the USB hubs come into play. I got two of these powered USB hubs for the front controller ports. You are going to have to take the black case off. Its pretty easy. Wedge whatever you can fit in the seam on the side and pry it open.
Take them and wedge them into the ports.
You can see that I have the white rubber feet on the back side of them. Those are there to prevent you from pushing out the USB hub you just wedged in. You'll also see that I have the rubber feet on top of them also. That is there to prevent them from coming out as you pull out whatever you have plugged in.
The plug for those go right through the back and plug into the ports in the back of the motherboard.
I suggest making a couple of the NES USB controllers found on this very link. For nostalgia reasons of course.
Step 5: Power, Reset, and LED

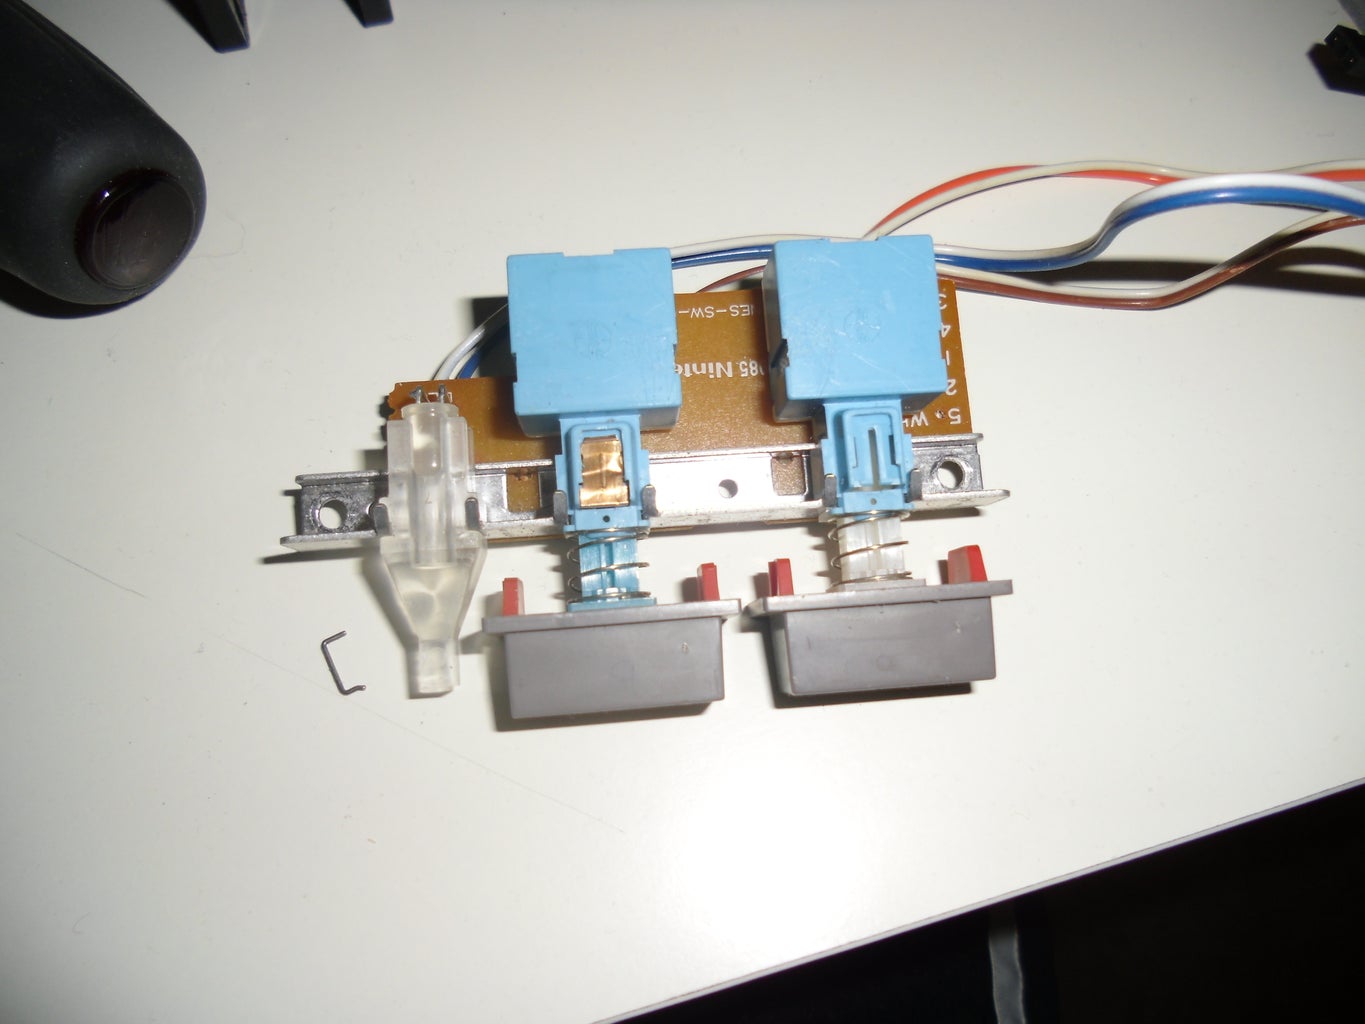
Time to Solder. If you don't already know how to, here you go.
You need to solder the power switch, reset switch, and LED to the adjoining wires to hook up to your motherboard. I salvaged mine from a cannibalized mini PC. You can find yours at a computer supply website or store of your liking.
You'll also have to take the piece off that holds the power switch in. This way your computer isn't always turning on. I know its way cooler to have the button stay in, but my motherboard wouldn't turn on and stay on until I took that off.
Screw it back into place. That's it until you plug everything in.
Step 6: Putting It All Together


Now is that wonderful time you've been waiting for. Time to put it all together, close it up, and turn it on.
First Hard Drive.
Put some velcro, or whatever you used on the bottom of the NES and on the hard drive. Plug in the cords.
Second Motherboard.
If you kept the posts hot glue them into position where you can screw your mother board in place. I did not so I just have it "floating" in there.
Third Disc Drive.
Place velcro on the top case and the disc drive. Slide it in the cartridge slot. Attach the appropriate cables.
Forth Connect everything.
Attach the fan. Plug everything else in.
Step 7: Closing the Case
I know it seems like there is a lot of stuff in such a small space. There is! It all fits, you just have to move the cables around so the case will close. It will be a bit snug. That's good. Things won't move around. You may need to squeeze the case shut. It should only be a little.
Hold it like a sandwich, flip it over. Continue to hold the case shut while you are screwing the case closed.
Step 8: You're Done!!


Plug everything in. Pat yourself on the back for a job well done. Show off to your friends that you have a NES computer that, if you've gotten a NES Emulator, you can play all your old favorites again..... with out winding yourself by blowing inside the thing.


