

Introduction: One Sheet Plywood Boat
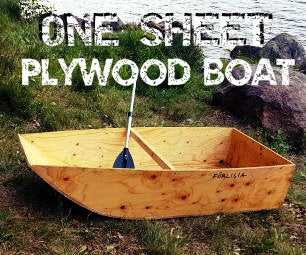


I have always wanted to build myself a boat. This was maybe not the one I had in mind. But I have to start somewhere I guess.:-)
It's a pretty simple and quick build. The boat is made from just one sheet of cheap construction plywood.
I made a little video of the build if you want to see the process in moving pictures too.
Video of the one sheet plywood boat
Tools used
- circular saw
- jig saw (optional)
- drill (with a drill and countersink bit)
- impact screw driver
- long ruler/straight edge
- Sanding block
- Pen and tape meassure
Other things used
- Silicone (wetroom FA180)
- Screws (drywall screws)
- A paddle
- Linseed oil for protection of the wood
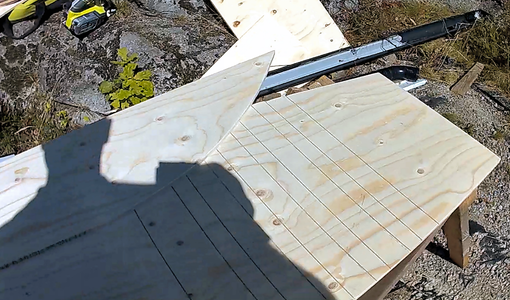
Step 1: Meassuring and Marking
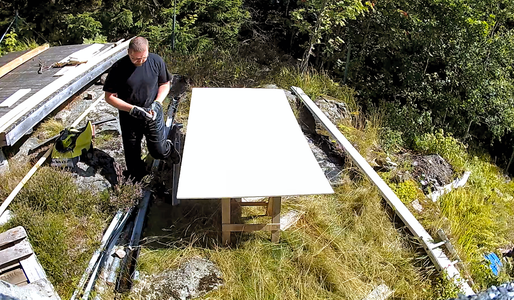


Here is my layout of the sheet.
I made my boat a bit shorther than it needed to be. I cut off about 40 cm (the top of the sheet in the second picture). Why? Several reasons. :-)
- I wanted it to fit inside our car
- I wanted it to be easy to carry
- I was unsure if I needed to reinforce any part, so I needed to save some plywood for later.
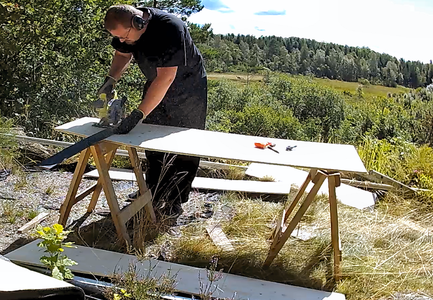
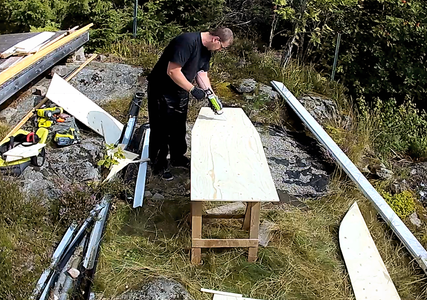
Step 2: Cutting the Parts
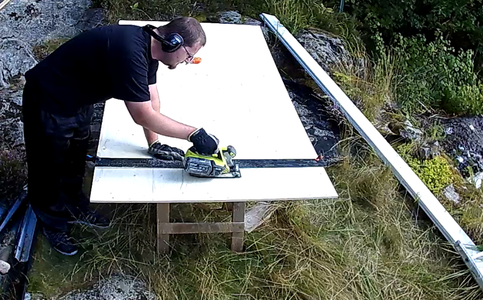


I used a circular saw to cut the parts.
The boat will be constructed out of four parts in total. A bottom and three sides.
Step 3: Bending the Boat


I have seen other design where the bottom is cut to make a angle in the front of the boat. I wanted to have a bent bottom instead.
As you see in the pictures (hopefully) this is when the sides gets it final length and angle (in the for). I hold one site up to the bottom and trace the curve. the I use that side as a template to trace on the other piece to make them the same size. If you cannot hold the pieces by hand, use some clamps.
The thickness of this plywood is 1,2 cm. I set the depth on my circular saw to 5 mm and cut lines where I wanted to bend the plywood.
I will later put silicone in the cut-lines so the structure will be rigid.
When I can see that the plywood bottom bends right, I hand sand the parts before putting it all together.
Step 4: Parts

Here is the parts. You can also se the lines in the front of the bottom that makes the plywood being able to bend.
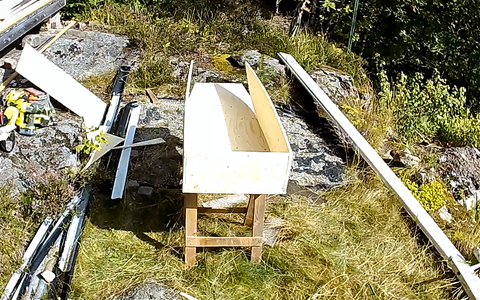
Step 5: The Assembly


I put silicone around the bottom and use a small nail gun, just for speeding the process up. I use as few nails as I can. Then I put the left side on, the back and then the right side.
I put a few screws in for support.
Remember to pre-drill and counter sink all the screw holes.
I actually put silicone in each screw hole and on top of every screw too.
Step 6: The Bottom


When the sides is mounted, and bend the front to the sides and put in screws. Then I add more screws from the bottom side.
Remeber to seal everything with silicone.
Step 7: The Result
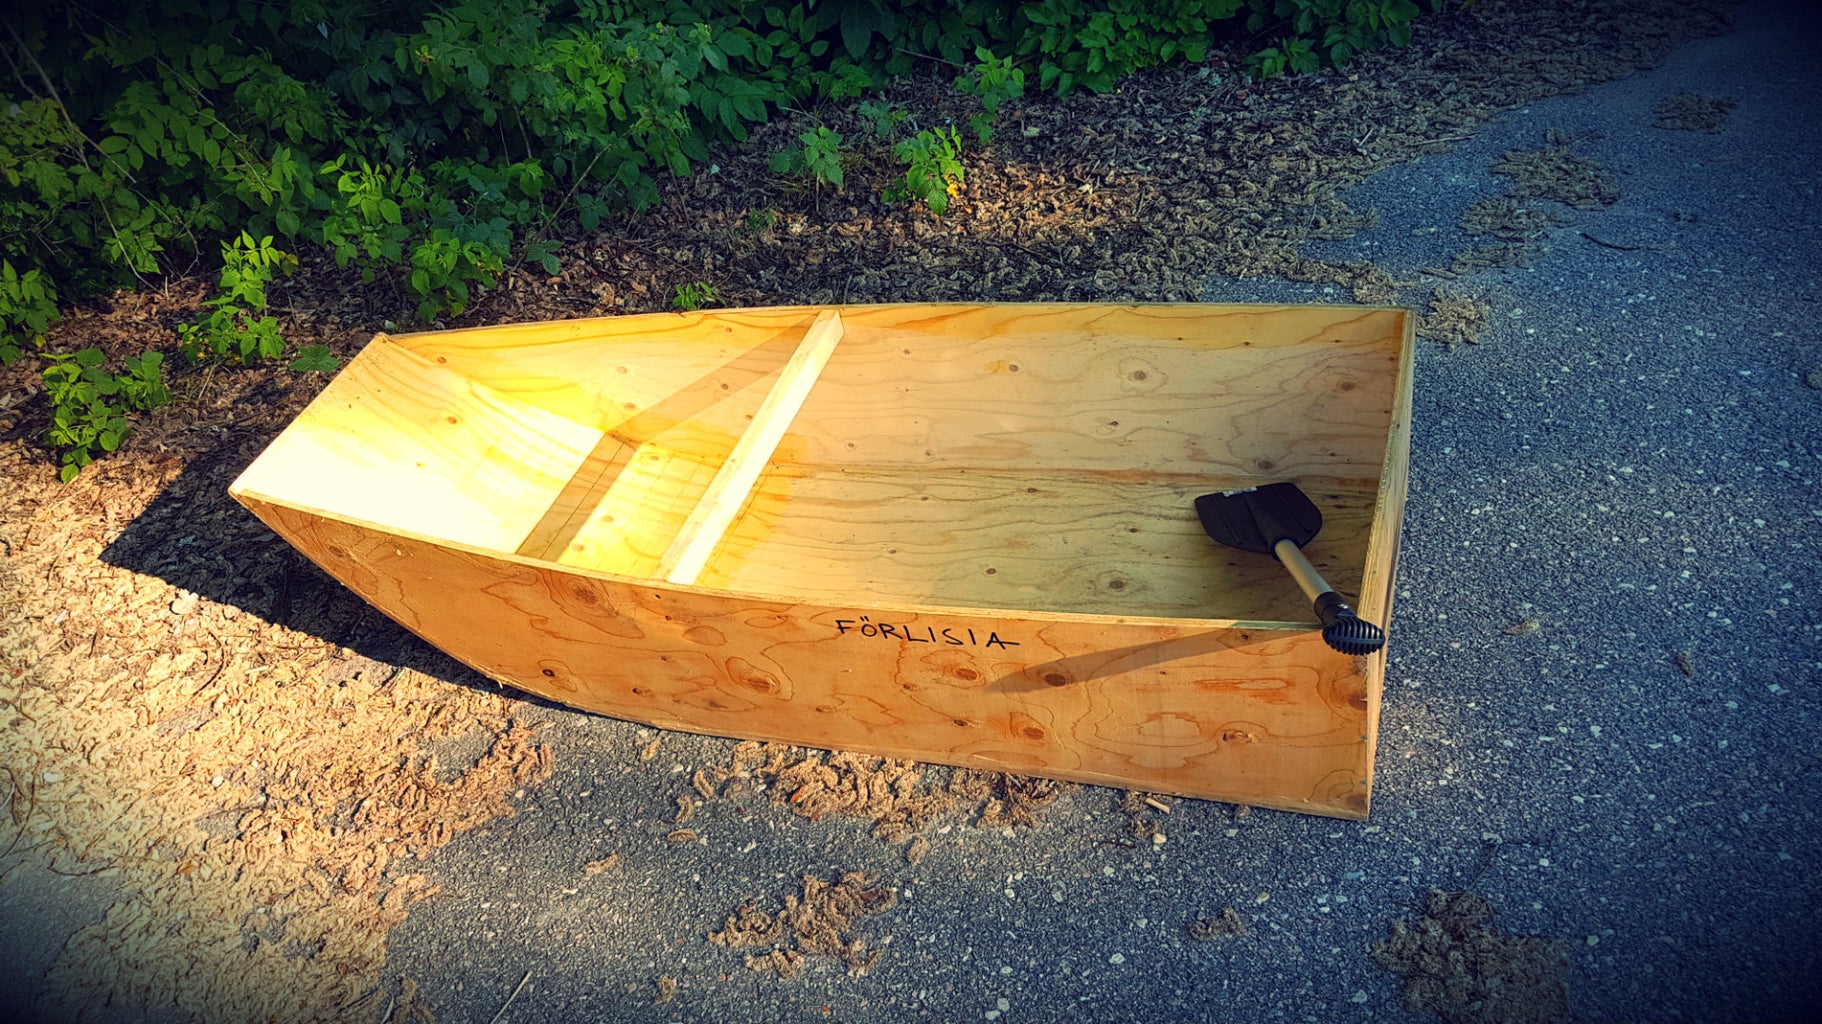

There is some more pictures of the boat "Förlisia" and action shots is found in the video here. :-)
This was a really fun build and a perfect summer project. Took a couple of hours to make. I had no plans to go on, so I made things up as I went along. So I have some suggestions for improvement.
Improvements
If possibe - use the entire length of the ply sheet.
If you are not as heavy as me, you can have shorter sides (making the bottom wider and the boat more stable in the water). I had 30 cm height on the sides. If you go with 25 cm instead, you get 70 cm wide bottom instead.
I would place some runners underneath the bottom, making the boat go more straight in the water.
I would make something to sit on, so its more comfortable.
Thank you for reading this instructable! Please let me know if you have any questions or let me know what you think. It's much appreciated! You can also look at my other projects here on instructable or check out my YouTube channel.
A vote for the boat?
I entered the Water Contest, so if you like this project please consider a vote for this little boat! :-) It would be much appreciated! Thanks again!

Runner Up in the
Water Contest


