

Introduction: PC Foot Pedals


I made the pedal for leaning in Pubg (Player Unknown Battlegrounds) as I felt like I needed extra fingers. I have used it for Kerbal Space Programme as well.
The applications are endless and you could add more buttons or less if you wish.
No soldering is required!!!
This project acts as a keyboard and is programmed to input keyboard presses. This does not work with the Arduino Uno. I have used the Arduino Leonardo
Step 1: Parts


Arduino Leonardo
Long Male USB A to Male Mini USB B Cable
Momentary or Pushbutton switches
Pack Female Spade Connectors
Arduino male to male jumper wires
Electrical wire (any light gauge)
Heat shrink tubing (slightly bigger than wire)
Step 2: Tools

Frame
Timber or metal construction tools
Drill, spade bit/ hole saw, screws
(The construction of the housing is up to you. I used plywood but you could use a box or metal tin. Have a bit of fun with it.)
Electrics
Wire cutters/ stripper (if you have them. Scissors and a razor will work)
Connection crimp (any pliers will work)
Heat gun (cigarette lighter will work)
Code
Download the Arduino IDE software
It's free and allows you to write, compile and flash the code to the Leonardo
Step 3: The Housing


This part is really up to your imagination but I will show what I built and why.
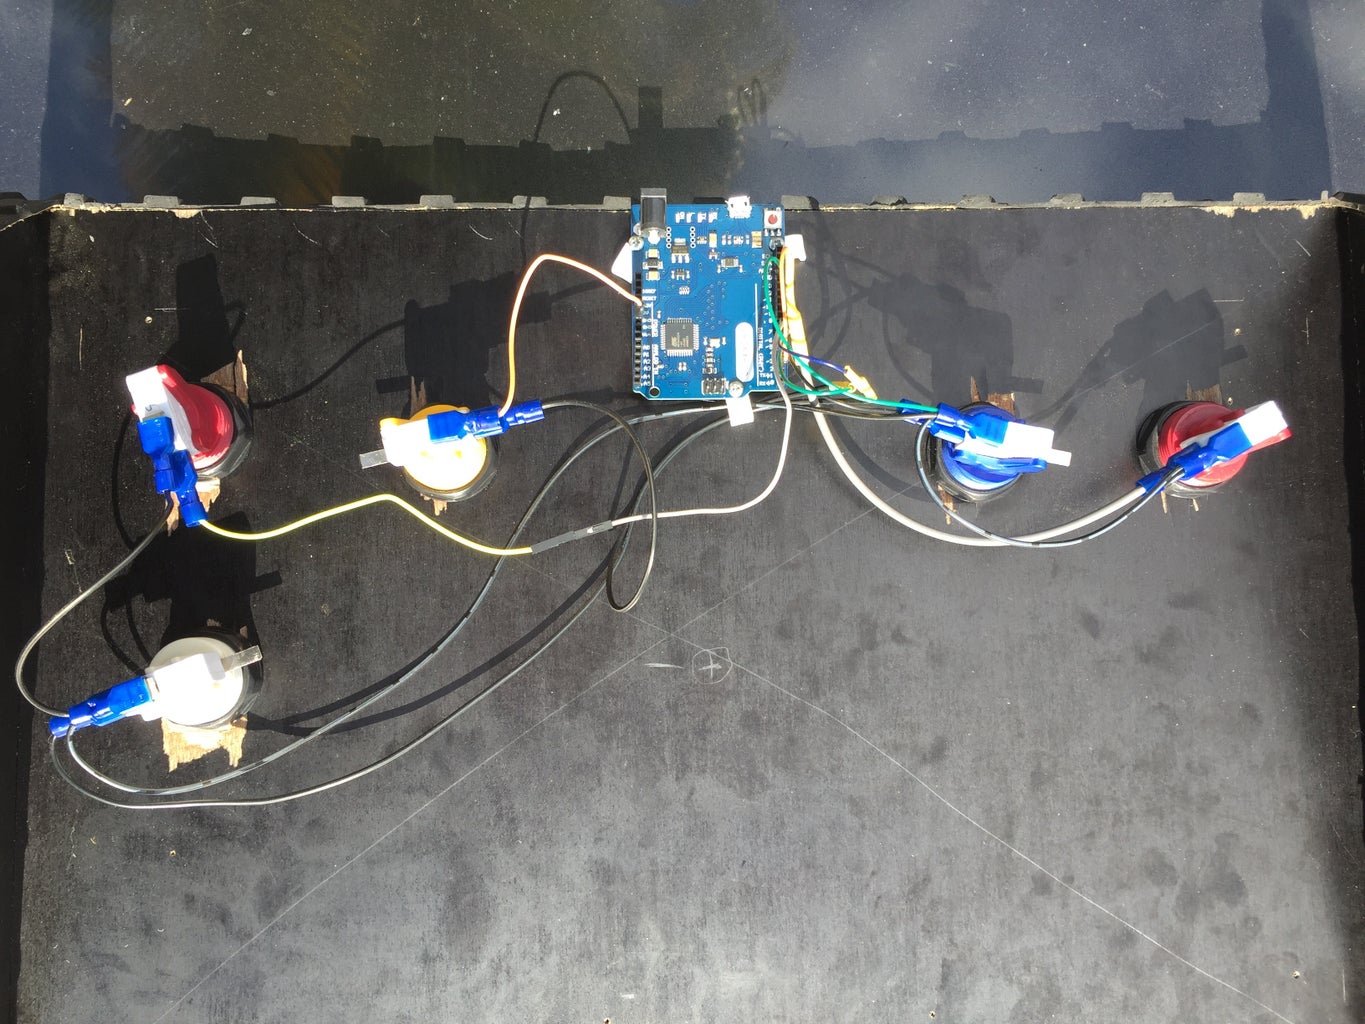
I've made the base 600mm wide so I can fit both feet on comfortably, I considered making two separate pedals but I was worried I would accidentally break the cables some time in the future. The left foot controls the two buttons on the left and the right the other three.
I used Plywood 16mm thick and 50mm screws as this needs to be strong as you are basically stomping on this thing daily. The arcade buttons can take the punishment.
If you are going paint it, now its the time. I have see people cover a whole project like this with contact (you know, the stuff you cover your workbooks with). You and buy it an a huge range of colours and patterns in office supply stores. Like this stuff
I added a few rubber strips to the feet so you can't push the whole unit away from you by accident while using it.
Step 4: Circuit and Pinout


Don't worry, this looks harder than it actually is.
Screw the Arduino board to the underside and on the edge of the housing. Make sure you will be able to connect the USB without interference.
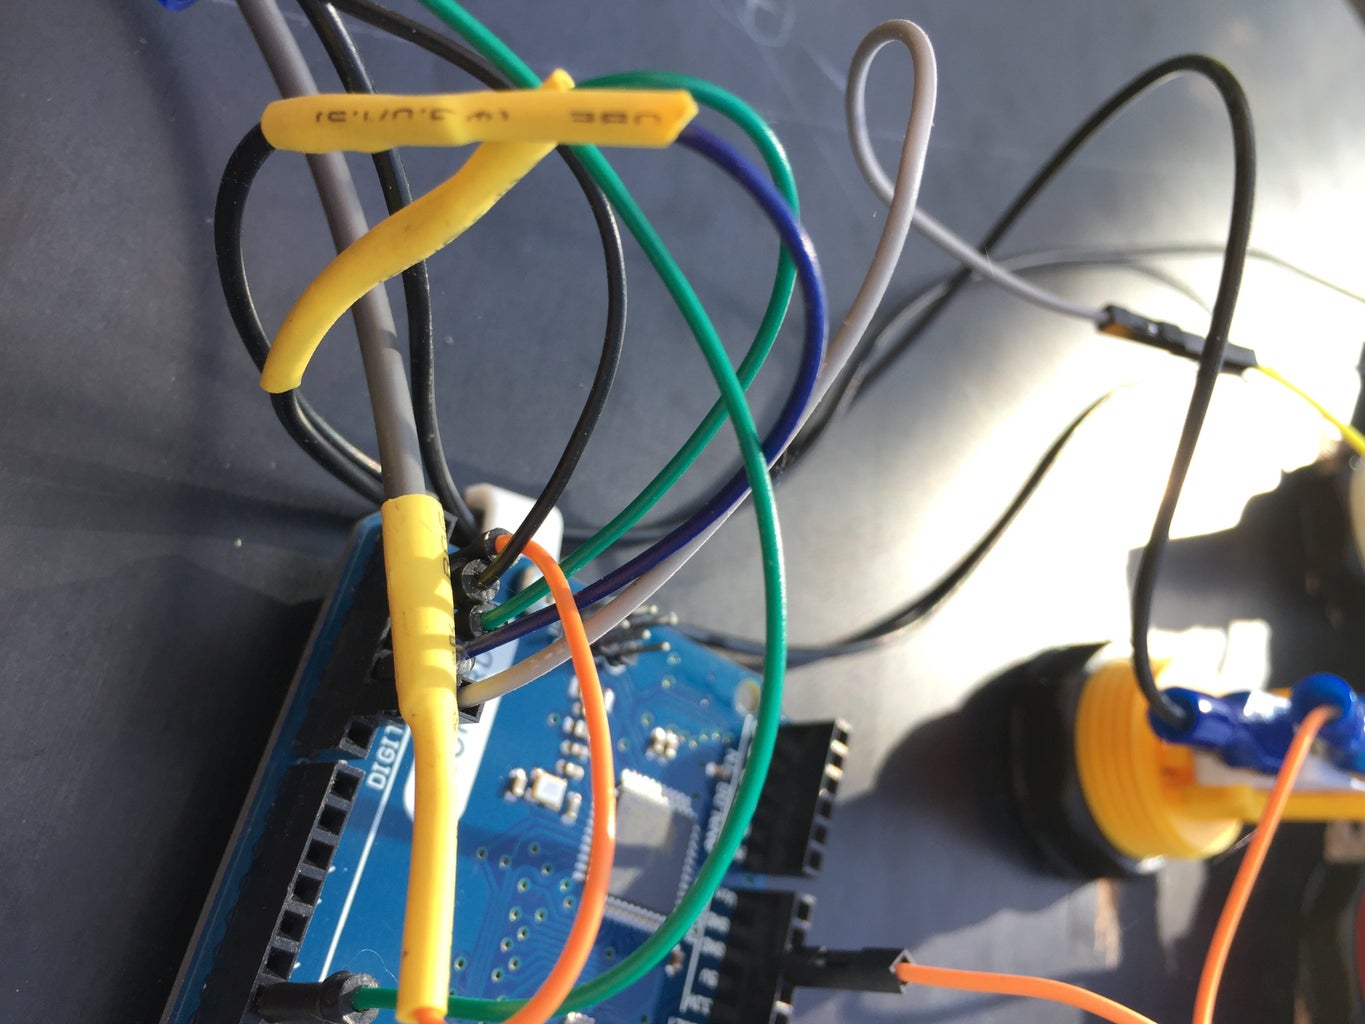
1. Make 5 cables to go from the Arduino each switch by stripping one end of a jumper cable (the cables with the pins on the end) and splicing it to a length of electrical cable. - To splice twist bare wire ends together then slide a small section of heat shrink over the join and heat to lock them together). Strip the other end of the wire (not the pin end) and crimp a female spade connector to the stripped end.
2. Push the pin end of the cable into digital pin slot 2 on the Arduino. Connect the spade connector to the button to the far left side . (note* the switches have 3 tabs for connecting cable. As pictured I have connected the pin out cable to the middle tab. This is the "always closed" tab.
3. Repeat for pins 3,4,5 and 6.
4. Now we need to make what is called a 'daisy chain' to connect the ground to the bottom tabs of all the buttons. This is a cable that will 'hop' to each button.
Cut and measure sections of electrical cable to go from button to button with a little extra. Strip both ends of each section, put two sections together and crimp on a connector until you have enough for all the buttons. Splice a jumper cable to one end and connect to any ground pin on the Arduino.
Step 5: Code

Time to use the most important skill you learned in school.....copy, paste.
Included is the text file with the code.
Download or view it, select all, copy, open Arduino IDE (link for download in the Tools step), create new, paste.
If you want to change any key bindings you can do that now by changing the keys in the code in the quotes e.g: ('q').
If you want to use modifier keys (shift, control, alt, F1, Insert etc) there is a list of what to type HERE
If you are only using 1 or 2 buttons you don't need to delete unused code. If there are no buttons connected to the coded pins it will ignore that section of the code.
Attachments

Step 6: Uploading Code to Arduino


1. Plug the Arduino into the PC via USB
2. Go to the 'Tools' tap then to 'Port'
Select the port that shows your Arduino Leonardo.
3. Go to 'Sketch' tab then 'Upload'.
This will verify and compile the code and upload it to the Arduino.
If there is an error check the code is not missing anything from the original code.
Step 7: Test and Troubleshoot
The Arduino should restart after the upload and be recognised as a USB keyboard by your PC.
Open a text editor and start stomping!! Key stokes should be popping into the text as you push the buttons.
If the text just fills with never ending keystrokes and only stops when you push down the buttons then you need to check that the cables to the buttons are connected to the 'always closed' tab not the 'always open' tab.
If nothing happens when you push the buttons check all your cables and try a different USB cable. Restart the PC.
If pin cables fall out of the Arduino due to gravity and stomping you may need to replace the jumper cables. They are meant to be the same thickness but unfortunately some are just tighter than others.
If the buttons are the the wrong order you can physically rearrange the pins in the Arduino or modify the code and repeat the upload process.


