

Introduction: PUB! Programmable USB Button


PUB! is a Programmable USB Button on which you can program a sequence of keystrokes. When you press the button those keystrokes are "replayed" over a USB connection.
The button (which is really a rotary encoder with a built-in push button switch) is programmed using an innovative and slightly quirky interface that does not require any custom software to be installed on your computer. All you need is a text editor like Notepad (for Windows) or gedit (for Linux).
Features
- One-button design (a rotary encoder with a built in switch).
- Programmed by using an ordinary text editor as a display (for example, gedit on Linux, or Notepad on Windows).
- Up to 127 keystrokes can be recorded and played back.
- Support for conditional logic. For example, Compare to value, Jump on zero, etc.
- Support for 256 x 8-bit "registers" to record state.
- Support for basic arithmetic. Add, subtract, etc.
- Can send USB System Control codes (Power off, sleep, wake) to your PC
- Can send USB Consumer Device functions (e.g. Mute, Play, Pause, Stop, etc.)
- Requires NO drivers (or custom software) for Windows/Linux etc
Futures
The possibilities are fairly broad including:
- Using a Bluetooth module to detect proximity of the button owner's mobile phone so that the USB button is only enabled when its owner is near.
- Addition of an external EEPROM for extra keystroke capacity.
- The one-button user interface will be improved to make it easier to use.
Step 1: Parts

You will need the following parts:
Qty Value          Package       Parts         Description
3   100nF          0805          C1, C2, C3    Ceramic capacitor SMT
1   4.7uF          SMC_A         C4            Tantalum capacitor SMT
1   470            1206          R1            Resistor SMT
1   ACTIVITY       1206          D1            LED (any color) SMT
1   EC12E_SW                     SW1           ALPS rotary Encoder EC12E series with switch
1   MIKROPROG                    JP1           5x1 Pin header (right angle)
1   PIC18F25K50    SOIC          IC1           PIC 18F25K50 microcontroller SMT
1   PICKIT                       JP2           6x1 Pin header (right angle)
1   USB-MINIB-5PIN               JP3           Mini-USB Type B socket SMT
Step 2: Assembly
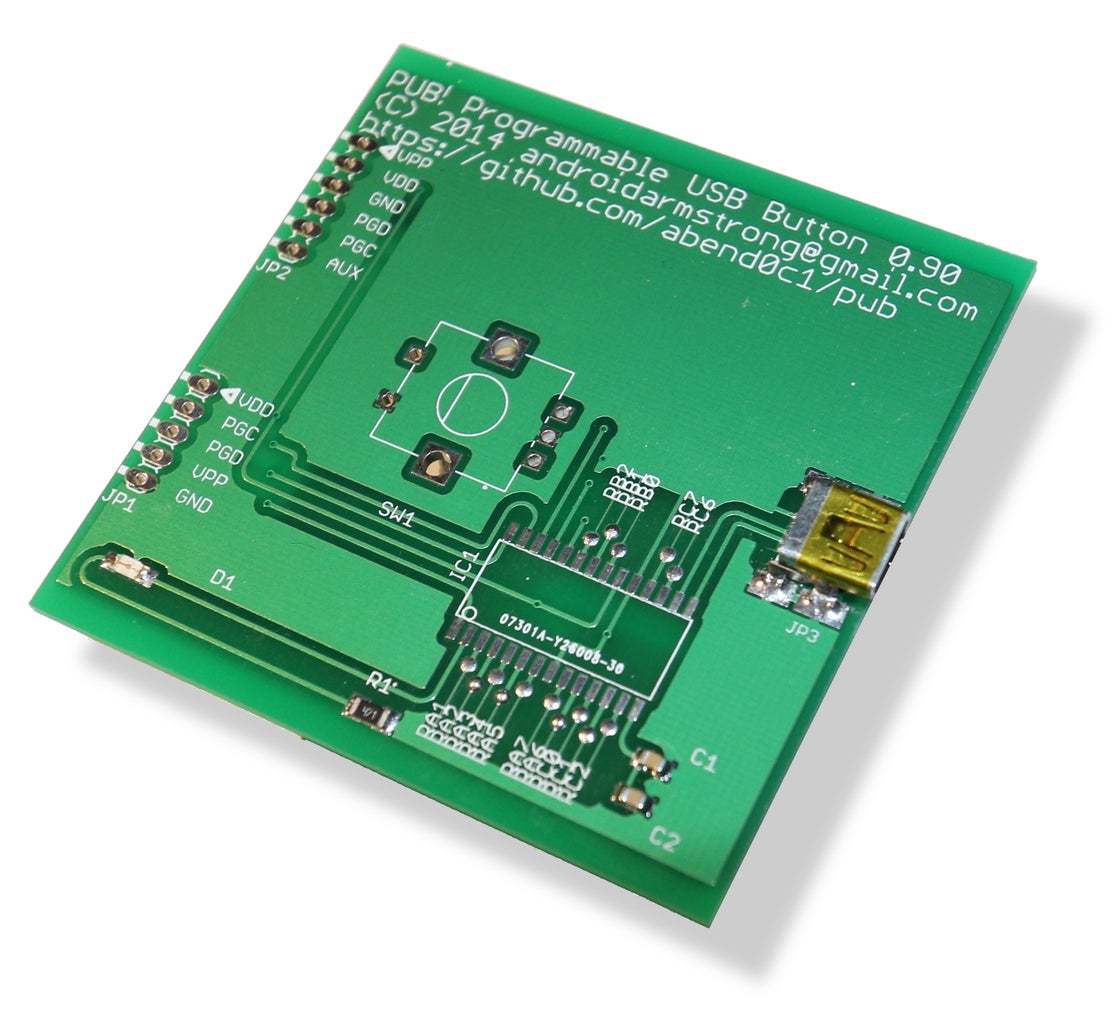

All the source files for this project are freely available from the pub-usb project on SourceForge.
You will need to either make or own double-sided Printed Circuit Board (not recommended) or use the Gerber files distributed with the source code to get one manufactured. I used ITEAD to make 10 PCBs for about AUD20.
Once you have the PCB it's just a matter of soldering each component in place. I've selected all the parts to be at least 0805 size, so hand soldering is easy. You might think that the 28-pin microcontroller or the 5-pin Mini USB socket would be difficult, but both can be easily soldered by hand. Use plenty of flux.
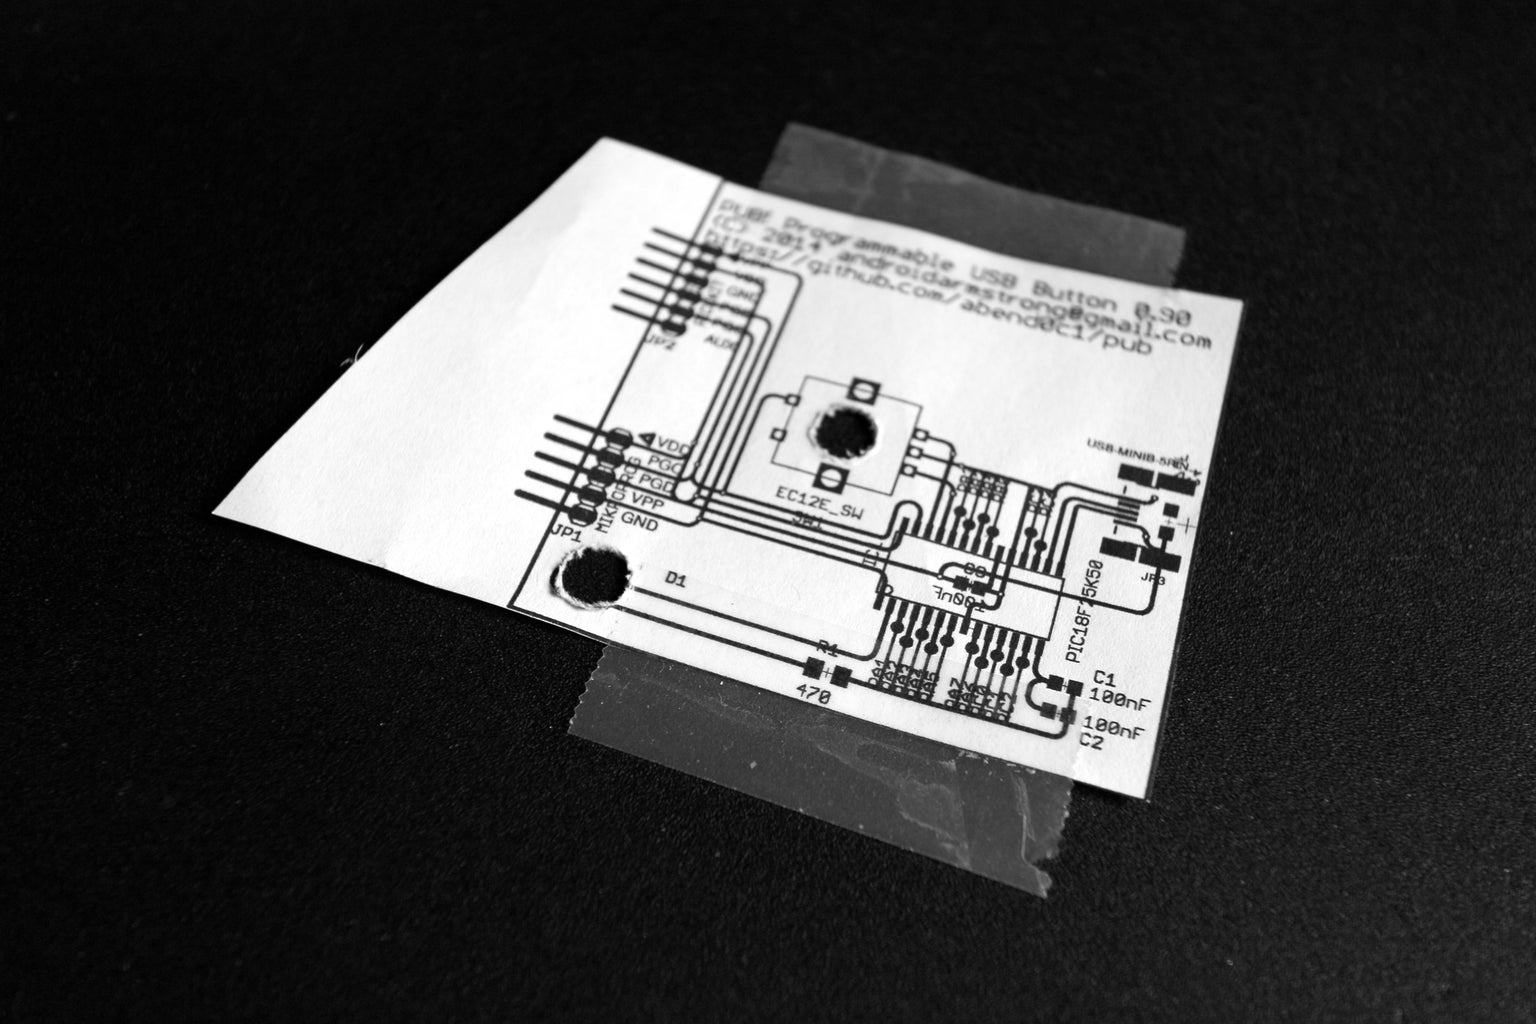
The PCB has been sized to slide inside one of these 68x15x78 mm (WxHxD) split body aluminium enclosures from eBay for about AUD10. You will need to drill an access port in the case for the USB connector. This can be a little time consuming if you want to make a perfect fit because the Mini USB connector is trapezoid. A rectangular hole would be easier to make if you don't mind what it looks like.
The holes for the rotary encoder and for the indicator LED can be positioned easily by printing a (1:1 scale) monochrome image of the PCB top layers on plain paper (see image), attaching it to the case with sticky tape and drilling through it. Make sure that the printed image size exactly matches the PCB size. You may need to adjust the scale by 1 or 2 percent.
Step 3: Programming

To program the microcontroller, you will need either a Mikroelektronika MikroProg or a Microchip PicKit programmer (or compatible).
The hex file (pub.hex) is in the SourceForge project file.
Connect your programmer to either the 5-pin MikroProg pin header, or the 6-pin PicKit pin header on the PCB.
Step 4: Usage

How to Use PUB!
This is a work in progress. I think it could be improved by minimising press+turn interactions where possible.
The basic process is:
- Connect PUB! to a USB port on your computer
- Start Notepad (on Windows) or gedit (on Linux)
- Ensure that Notepad/gedit has the keyboard focus. This is really important.
- Press and hold PUB!'s button for about a second
- PUB! will display a kind of menu in Notepad/gedit (this is why your text editor must have keyboard focus)
- Navigating the menu is done by a combination of pushing the button, pushing and turning the button, turning the button, or pushing and holding the button for 1 second or more. The menu shows you when to use these alternatives.
Example of programming a password
- Open a text editing program (for example, gedit or Notepad) and make sure it has keyboard focus
- Plug PUB! into a host USB port
- By default it is in RUN mode, so press and hold the rotary encoder knob for more than 1 second to switch to PROGRAM mode. It will display the following in your text editor:
  PUB! Programmable USB Button v0.92
  Main:   Turn=Select, Press=OK, Press+Turn=Set At, Press+Hold=Exit
     0    Set Keystroke at 00

At Code Action- Press the rotary knob to set a keystroke. It will display:
  PUB! Programmable USB Button v0.92
  Key:    Turn=Select, Press+Turn=Modify, Press=OK, Press+Hold=Return
  00 0004 a

  At Code Action
- Turn the rotary knob to choose the first letter of your password (say c) and then press the knob to add it to the list of actions:
  PUB! Programmable USB Button v0.92
  Key:    Turn=Select, Press+Turn=Modify, Press=OK, Press+Hold=Return
  01 0006 c

  At Code Action
  00 0006 c
- Continue choosing and adding the remaining letters (say, a and t):
  PUB! Programmable USB Button v0.92
  Key:    Turn=Select, Press+Turn=Modify, Press=OK, Press+Hold=Return
  03 0017 t

  At Code Action
  00 0006 c
  01 0004 a
  02 0017 t
- Press and hold the rotary knob to Return to the main menu:
  PUB! Programmable USB Button v0.92
  Main:   Turn=Select, Press=OK, Press+Turn=Set At, Press+Hold=Exit
     0    Set Keystroke at 03

  At Code Action
  00 0006 c
  01 0004 a
02 0017 t- Rotate the knob until "Do Local Function" is displayed:
  PUB! Programmable USB Button v0.92
  Main:   Turn=Select, Press=OK, Press+Turn=Set At, Press+Hold=Exit
     0    Do Local Function at 03

  At Code Action
  00 0006 c
  01 0004 a
02 0017 t- Press the knob to enter the "Do" menu:
  PUB! Programmable USB Button v0.92
  Do:     Turn=Modify, Press=OK, Press+Turn=Set At, Press+Hold=Exit
      0    Delete action at 00

  At Code Action
  00 0006 c
  01 0004 a
02 0017 t- Press-and-rotate the knob anticlockwise until "Save to EEPROM" is displayed:
  PUB! Programmable USB Button v0.92
  Do:     Turn=Modify, Press+Turn=Select, Press=OK, Press+Hold=Return
      Save to EEPROM

  At Code Action
  00 0006 c
  01 0004 a
02 0017 t- Press the knob to save "cat" to the EEPROM
Saved in EEPROM
- The device is now in RUN mode. Press the knob to "play" the recorded sequence:
cat
An example of some conditional logic
- Enter the following program into the PUB! device:
At Code Action
00 E005 Let W = 05
01 E200 Put W in R00
02 0006 c
03 0004 a
04 0017 t
05 002C Space
06 E500 Say R00
07 0028 Enter
08 EF01 Wait 1 sec
09 E801 Let W = W - 01
0A F701 Jump if Not Zero to 01
- Now when you press the knob in run mode you should see the following displayed (1 second wait between lines):
cat 05
cat 04
cat 03
cat 02
cat 01
Note that pressing the button during playback will abort the playback process.
Menu Functions
The menus, if fully expanded, would look like this:
RUN mode
        This is the normal operation mode
        Press to begin playback
        Press and hold to enter PROGRAM mode

PROGRAM mode Main menu
	0 Set Keystroke (e.g. A, Enter)
		0mxx Keystroke xx using modifier m
		     Rotate to select xx (e.g. A)
                     Press+Rotate to select m (e.g. CTL+SHIFT)
                     (too many to list them all here)
	1 Set System Control Command (e.g. power off)
		1mxx System Control Command xx (m is ignored)
		     Rotate to select xx
	2 Set Consumer Device Command (e.g. play, pause)
		2xxx Consumer Device Command xxx
		     Rotate to select xxx
	D Do Local Function
		D0xx Delete action at xx
		D1xx Redisplay (xx is ignored)
		DExx Load from EEPROM (xx is ignored)
		DFxx Save to EEPROM (xx is ignored)
	E Execute Instruction
		E0xx Let W = xx
		E1xx Get W from Rxx
		E2xx Put W in Rxx
		E3xx Compare W to xx
		E4xx Compare W to Rxx
		E5xx Say Rxx
		E6xx Format xx (display format that Say uses)
		E7xx Let W = W + xx
		E8xx Let W = W - xx
		E9xx Set all registers to xx
		EAxx Let W = W + Rxx
		EBxx Let W = W - Rxx
		ECxx Let W = W x Rxx
		EDxx Let W = W / Rxx
		EExx Wait xx milliseconds
		EFxx Wait xx seconds
	F Jump On Condition
		F0xx Jump Relative by xx
		F1xx Jump if Carry to xx
		F2xx Jump if High to xx
		F3xx Jump if High or Carry to xx
		F4xx Jump if Low to xx
		F5xx Jump if Low or Carry to xx
		F6xx Jump if Not Zero or Carry to xx
		F7xx Jump if Not Zero to xx
		F8xx Jump if Zero to xx
		F9xx Jump if Zero or Carry to xx
		FAxx Jump if Not Low or Carry to xx
		FBxx Jump if Not Low to xx
		FCxx Jump if Zero or Low to xx
		FDxx Jump if Not High to xx
		FExx Jump if Not Carry to xx
		FFxx Jump to xx
The "Condition Code" is set after each arithmetic or compare operation, in a way not unfamiliar to older IBM mainframe programmers (completely coincidental of course) as follows:
ZHLC
100x Means: Zero
010x Means: High
001x Means: Low
xxx1 Means: Carry set (not actually implemented yet...)
xxx0 Means: No carry  (...may be discarded as a bad idea)
So, Jump if Zero is encoded as:
F8xx
F    = 0b1111 = Jump on Condition
 8   = 0b1000 = Zero condition
  xx = Address jumped to if the condition is true
And, Jump Unconditionally is encoded as:
FFxx
F    = 0b1111 = Jump on Condition
 F   = 0b1111 = Zero, Low, High or Carry condition
                (it must be one of these)
  xx = Address jumped to if the condition is true
                (which it always will be)


