

Introduction: Pallet Furniture Desk - Home Command Center


This is the home command center that I built for my wife and I (and, as you can see, our 1 year old). I've been doing pallet furniture for a while now, and this has been the biggest project thus far.
We rent a 500 square foot place, and we needed a desk that would hold a printer, speakers, internet router/modem, audio receiver, tv, and tablet computer; as well as be tall enough to be out of reach for our 1 year old. Oh boy.
I picked up the pallets from places around town; Home Depot, etc (with permission), and I stained it with a mixture of #000 steel wool, vinegar, and hydrogen peroxide. I also sealed the top of it with wax, just from a normal candle, to give it a smoother feel and smooth over potential slivers.
I don't go into how to make the bench (pictured) here, just the table; that's a different project, but you can see it's pretty self-explanatory - by following the same steps I have here, you can make it easily.
*I took most of the pictures myself; however, there are some images that I used from online; they're all used with creative commons license.
Step 1: You Will Need...


1. Pallets: get them from Home Depot, Lowe's, etc. - but with permission. DON'T leave the place a mess (or else you'll ruin it for everybody!), DO ask permission first. Look on Craigslist, or Palletexchange. Or, just drive around in the industrial section and places will have pallets out; just ask for them. Also, keep an eye out for non-pallet wood - some of the best stuff I've found wasn't pallets.
Look for oak pallets especially. Although they're tougher to work with, they're higher quality and will build lighter, stronger projects. But beggers can't be choosy; I end up with alot of pine pallets anyway.
CAUTION: make SURE to get only pallets marked "HT" - "heat treated." Anything else, even unmarked, don't touch, because they may use chemical treatment, which is potentially hazardous, especially to kids. Also, if something looks to have been spilled, don't touch it - it's not worth it to pick up a potentially chemical-soaked pallet and bring that into your home or yard.
Here's someone else's Instructable that explains it better than I could:
https://www.instructables.com/id/How-to-determine-i...
2. Screws: I get mine at Walmart, nothing fancy; I just get a mixed-size container - 1in. to 3in. If you can, get square or torx screws (the star shaped) as opposed to phillips heads; they're far less likely to strip/strip your tools. Ugh. Phillips screws are frustrating; thank Henry Ford for that; or rather, the dude who held the patent on the square screw.
3. Vinegar, #000 steel wool, and Hydrogen Peroxide: all cheap and easy to find at a Walmart. You'll especially want Hydrogen peroxide. HP is amazing; it's instant, and safe (it turns into H20 -i.e. water - after a few days of exposure to light and heat)
*also, a paintbrush or too, although the solution washes off SO EASY, unlike normal paint.
4. A normal old candle and a blowdrier. (An acetylene torch is only $10 off Amazon, and would probably work better, but I don't have one at the moment, so...)
5. TOOLS (in no particular order):
(a) gloves ($3 at Walmart; the big thick leather ones; save your fingers, I promise you'll want them) and safety glasses - pallets give off alot of flying chips.
(b) Earplugs/muffs. (obviously)
(c) a dependable circular saw (7&1/2 inches works best). I have a ryobi; I know Ryobi is an off-brand, but I love it, and it eats wood like a boss.
(d) measuring tape.
(e) Nail punch (example here). You need this to get the bad nails out of pallets. Also, you'll probably want a steel file, for filing off tips of nails if they pop through (depends on how long of nails you get, and how thick your pallets are - may need, may not)
(f) Reciprocating saw (a.k.a. "Sawzall")
(g) extension power chord (just nice to have, irrelevant if you don't need it)
(h) Work bench/table (I can't imagine cutting pallets without some form of a table - ouch on the back...)
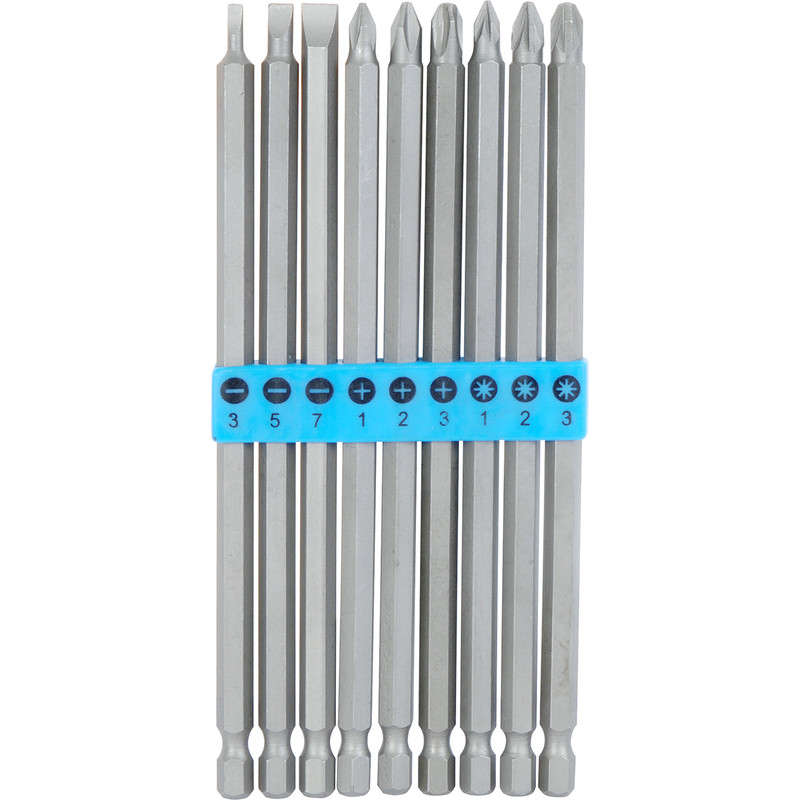
(i) Drill, with bitset (don't skimp on the bit set; don't get Ryobi or some off-brand; get a decent Makita, DeWalt, or
(j) extra long screw bit (see example here) DON'T get these at Walmart; they'll shred after one use. Get a decent one at Home Depot; save yourself headache... ask me how I know...
(k) Table saw
(l) Chop Saw (aka Mitre Saw)
(m) Handheld Belt Sander (don't even both with Random orbitals...)
(n) Box cutter (or just a knife works fine; good for trimming the hard 90-degree edges so your kid doesn't bash their head and get stiches...)
(o) Last but not least at all: Pen and Paper.
OK... so now you're all set...
Step 2: Draw!


I'm not an architect; I do use 3d graphics software, but it doesn't work as well as simple pen and paper. As you can see from the drawings, I'm somewhere between a cave-man and a hobby artist when it comes to design sketches...
Here's the deal: I'm not going to walk you through my dimensions, etc. because you'll want to make this furniture custom-made for your place and your needs: think about what you want to go on there, any extra "features" (built in light? power cords hidden somewhere? etc.) I needed to put a printer, speakers, audio receiver, internet router/modem, 52 inch tv, and tablet computer on the desk, so this was my design - but customize yours to what you need!
I can't say it enough: sketch out your project FIRST, piece by piece, so that you know where everything will be, and where it will be held together. Otherwise, you'll inevitably end up building something and halfway through realize you depending on something to stay put by magic. So:
(1) start by measuring the space where you'll put it.
(2) think about what you'll want to use it for; what you want to put on it that you can "build around", etc. and measure those items. Allow for some error, i.e. if your printer measures 8 inches across, allow for at least 10" wide (1 inch on either side)
(3) Remember that pallets aren't zero inches wide - be sure to account for the pallet width as you measure! (you may need to get the pallets first, measure their thickness, and then proceed. Pallets are usually around 3/4" thick, 3" wide, and ~32" tall, but that varies.) So, for example, don't plan on your shelf to be 10 inches wide if you have pallets on the sides - plan for a 10" wide shelf to be 10" + 3/4" + 3/4" = 11 & 1/2".
(4) Once you have an idea of what you want, sketch it. Don't fixate on your first one; it may take a few sketches before you visualize what works best in your place. I would also suggest jotting down how many of each (roughly) board you'll need (see images).
*note: sketch at least 4 angles: top, side, front, and "perspective". That way you have a good reference no matter what you're working on. I'd recommend that you even mentally
AGAIN: make sure to think "piece by piece." Think about where you'll put screws, etc. (that's where the extra-long screw bits from the last step come in - you'll need them sometimes!)
Keep your drawing with you as you work to reference - you'll need it!
Step 3: Making It Palletable


*As mentioned in the "what you need" section, ONLY get "HT" pallets. See here for someone's Instructible that explains it well.
Repeat of what I mentioned in the introduction: Places to find free pallets: Craigslist, Home Depot/Lowes/Menards, etc.; driving around industrial zones and see them lying around.
ALWAYS ask permission, and always leave the place cleaner and more organized than you found it. I can't stress this - almost everywhere I've gone, people have given me permission, but then told me stories of other pallet hunters who've trashed the place. So don't ruin it for everyone else.
How to prepare the Pallets:
There are 3 typical ways I've seen people dismantle pallets; I've found there's not "magic bullet" way that will work for every pallet and situation, because sometimes you just want ALOT of pallets, and sometimes you want every last inch. Note that you (usually) won't be able to just pound the boards off the pallets because they use nails with glue that are devilishly hard to pull out. Don't plan on pulling them out.
Note too, that I prefer getting a bunch of pallets, processing them, and then doing projects and pulling from a pre-cut pile. I find this is more efficient that processing one or two pallets for each project, and I can pick the best boards for the project this way.
So.
(1) "Specially-made crowbar" method: Some people will use a specially-made pallet crowbar. I personally think this unnecessary and slows you down. Additionally, pallets are not all made of the finest wood; it doesn't make sense to me to buy a tool when the pallet is likely to crack anyways... but what do I know? So, I don't use this method.
(2) "Quick Method": (See picture above with the two red-line cuts) The quickest way is to zip a circular saw down the inside edges of the pallet (where I've drawn the two straight red lines, pictured above). Then, work the pallets loose-ish by wobbling them like a steering wheel, back and forth, until you can slip a reciprocating saw in between each board and the frame to cut the nails that hold the board to the middle frame. You can process a pallet in about 10 minutes this way (once you get it down).
(3) "Full Board" Method: (See picture above with red circle) use a hammer to tap (careful - it's easy to destroy the pallet) the board away from the frame, so that there's a tiny tiny gap between the frame and the board. Then, just take your reciprocating saw and slice through all the nails. This way takes about 20 minutes per pallet, but it allows you to get longer boards, which is sometimes essential to your project.
Misc: note that I would recommend saving scraps from throughout the project - you'll be surprised how often they come in handy.
Step 4: Rock the Plank


Once you've processed the pallets, you'll want to use the chop saw to trim the boards to the necessary lengths. Make sure to be conscious about which side of the board is better (or worse) so that you're not chopping off the solid side and leaving the shattered end on your board. Note that you can use the table saw, but a chop saw will save you LOTS of time, and make your ends straighter. If you only have one, use a table saw, because sometimes you'll need to cut a board in half the long way - but a chop saw will make your cuts quite a bit more 90-degree-accurate, and be a huge time-saver.
Here's where you may also want to use your nail-punch to pop out the nail heads that are leftover after you've sliced off the nails with your reciprocating saw. I try to leave the nail heads in my project, for looks, but occasionally there's a nail that poking a sharp end out; I just pop it out. It's not worth slicing someone's hand over the looks...
*note: either at this point, or after you've put things together, you might want to take the box cutter and shave off the sharp edges.
Now that you're done with processing the boards, you can start putting together the frame of your table!
Step 5: You've Been Framed...


Naturally, we build the frame first, then start hanging the other elements on the frame. I started with the end frame - the image with the red dots are where the screws are inserted. Notice that some of the screws are embedded halfway through the board. This is accomplished by drilling ~halfway through the board with a 5/16" drill bit, then drilling from the other side with a standard drill bit. (*note to starters: never drill a screw without drilling the guide hole first; you will crack the board) See the hand-drawn diagram for an illustration of this.
Here is where the extra-long screw bits come into play: a standard bit, or even a bit adapter won't be able to reach inside a 5/16" hole to drive the screw in all the way. By doing this, one can construct a strong, good-looking frame.
Again, part of the reason I do it this way is that I've found it's the easiest way to subsequently attach the elements onto the frame (and look good doing it!).
Step 6: Frame 2.0


(1) Once the two side frames have been made, attach the crossbeams. This is critical: make sure the crossbeams are either oak, 2x4 pine, or something strong. I didn't have a full-length (60 inch) oak board, so I "spliced" the two beams I had with a strip of metal that I had lying around (see images). I ended up using pine boards for the cross-beams. Add any triangle supports that you feel are necessary to uphold the weight that'll be on the table (see the images above to see both of these)
(2) Once you are done attaching these, start laying the table-top boards: nothing complicated. I attached with only one screw per end, but use however many you need to get the job done. This step is pretty self-explanatory.
(3) Once you'd laid that table-top, you have a table going. Nice! Again - this is pallet furniture. Feel free to improv!
*I added the shelves on top, but again, design this table to your liking. That's the beauty of pallet furniture - it's custom-made for your living space.
Step 7: Sandstorm


Just what you'd think: grab that handheld belt sander, and go crazy. Pallets are notorious for slivers, so don't spare the lash.
Also, don't waste your time with Random Orbital Sanders, or softer versions of sanders. I use 50-grit paper, and go crazy on it. If you read woodworking forums, they'll talk about how cautious you have to be with a belt sander - and I suppose you do to some extent - but pallets need alot of love to not give slivers.
I don't both sanding every little board, I just sand the surfaces that are likely to be touched after I put it together. But that's just me... if you feel like you have to sand every last inch, go for it.
Step 8: Stain Time


Now you are ready to Stain!
Here's the deal with home-made stain: I like it better than buying stain, because (1) it doesn't smell like nasty chemicals, (2) it's not poisonous for gnawing kids, (3) it's just rust and water, so it's absurdly easy to clean off the paintbrush (with water, no gasoline or anything noxious), (4) if it dries out, you can re-constitute it, and (5) it looks awesome. Here's how:
step 1: put a few wads of #000 steel wool in a glass jar with vinegar, and put it in the microwave for a minute or two - nice and hot. How much steel wool you put it in depends on how dark you want the stain to be - you just have to experiment to get the proportions to your liking. Don't feel like you have to jam it full of steel wool, though - that's what I did the first time. Let this mixture sit for a while - the hot vinegar will rust, and oxidize the steel wool (i.e. rust it) and the rust will dissolve into the vinegar.
step 2: If things aren't going fast enough, add some magic: Hydrogen peroxide. Again, this stuff is great because it will, after a few days of light and normal heat, turn into water and be completely safe for kids or animals. Heck yes. The Hydrogen peroxide will instantly oxidize the steel wool. I freely admit: lately, when I need some stain, I skip the first step and just go right to Hydrogen peroxide - it's instant, and basically as cheap as vinegar.
*some people add black tea to get a different color; but I've never tried that. I like the stain, my wife loves the stain, so I'm not motivated to experiment at this point...
Stain away!
Step 9: Wax Finish


Obviously you don't have to do this step if you'd rather use a store-bought stain and sealant: I experimented here, and found that just a plain ol' candle sealant works best. All you need is a candle and a blow-dryer (I'm sure a portable Butane blowtorch would work faster and it's only $5, but I don't have one; so I used a blow-dryer.)
Basically, it's that simple: step 1 is just "drawing" on the table with the candle, leaving a nice white wax residue. Step 2 is just taking a blow-dryer - and maybe a rag - and melting that wax into the wood. The result is a nice smooth, dark-polished surface that is unlikely to give slivers (I've never gotten one).
... and you are done!

Participated in the
Reclaimed Wood Contest 2016


