

Introduction: Patching Up Kids' Playclothes


I have 2 little girls, and they are good at many things. But I'm pretty sure that they are the best at wrecking their clothes when they play outside. Since I'm not exactly made of money, patching them up with scraps from my other sewing projects works out perfect, and add lots of fun color to a boring (and stained, and ripped, and worn) pair of pants.
Step 1: Supplies

The things you need are:
One pair of pants that have been particularly "well loved"
Scraps of cotton
Heat & Bond Lite, or some other iron on adhesive (make sure that you get a sewable weight... the heavy duty versions of this product are not meant to be sewn through)
Embroidery thread
Hand sewing needles
Beeswax Thread wax
Iron
Step 2: Cut Squares of Your Fabric & Apply Adhesive


Take some fabric scraps and cut them to size, large enough to cover the holes that you wish to patch and then some.
Press over the edges, about a quarter of an inch. If you have cut edges exposed, it won't last as long in the wash.
Cut a piece of heat & bond to fit the patches. I like to lay a piece of scrap muslin underneath this so I don't get glue all over my ironing table. Apply adhesive to the wrong side of the fabric scraps, taking care that all of the pressed edges are tucked in where they should be. Follow the instructions on the heat and bond, usually all it takes is to set a hot iron with no steam on it for a few seconds. ** Don't let your iron touch the shiny, or adhesive, side of this stuff. It'll make a giant mess. Always iron from the paper side!!
Carefully remove the fabric from the paper backing of the adhesive, making sure that the adhesive is stuck to the fabric. (In the case of heat & bond, the adhesive is shiny, so the back of your fabric will have shiny plastic-y stuff on the back of it now. )
Step 3: Iron Your Patches Onto Your Pants


Now that you have the paper peeled off of the back of your patches, you just need to set it in place and press. This will melt the glue on the back of the patch and will adhere the patch onto your pants.
This will hold the patches in place, but it's just plain not strong enough to hold up to actual wear and tear... it will need to be stitched. Now, if you have bigger pants, it's totally possible to wrangle them into a sewing machine and stitch them that way, but since these are for a two year old and it would be a huge pain in the butt, I'm just going to hand stitch them.
Step 4: Blanket Stitch


I decided that on one of the knees I'm going to do a blanket stitch around the outside to attach it to the pants. I used blue embroidery floss, and separated it in half, so that I was only using three strands. I always wax the heck out of my thread when I'm sewing by hand, as it prevents a bunch of knots and thread tangles that make me want to shoot things.
Now I'm certainly no authority on embroidery stitches, since most of them I just figured out myself. But here's how I do a basic blanket stitch:
1- start with your thread coming up and out of the pants on the corner edge of the patch.
2 - move your needle about a quarter inch left (or right, depending on your direction) and down a quarter inch, into the patch. Put your needle into your fabric, and come out along the edge of the patch, forming an L shape
3 - make sure your thread is wrapped behind the needle coming out.
4 - as you pull tight your stitch will form. Don't pull it too tight!
(I realize that this is probably pretty confusing, please see the notes on the photos to explain better)
Step 5: Embroidering Fun Stuff


I decided that my daughter may like her name embroidered on one of her patches, and I did that with just a basic back stitch.
This is just a variation on a basic running stitch, you just always come back a step so that you have a solid line, rather than a dashed line. For example... start by taking one stich, and then another. after the second stitch, take your needle back to the spot were stitch one ended, and take a stitch. continue this way so that you have a solid line of stitches all of the way down.
Now, I just did her name, but you can do whatever you want, or nothing even. This is pretty much just for decoration and doesn't have to be perfect or exact... remember, they will look at it for .2 seconds, think it's cool, and then go and dirty it up all over again in the sandbox.
Step 6: Second Patch
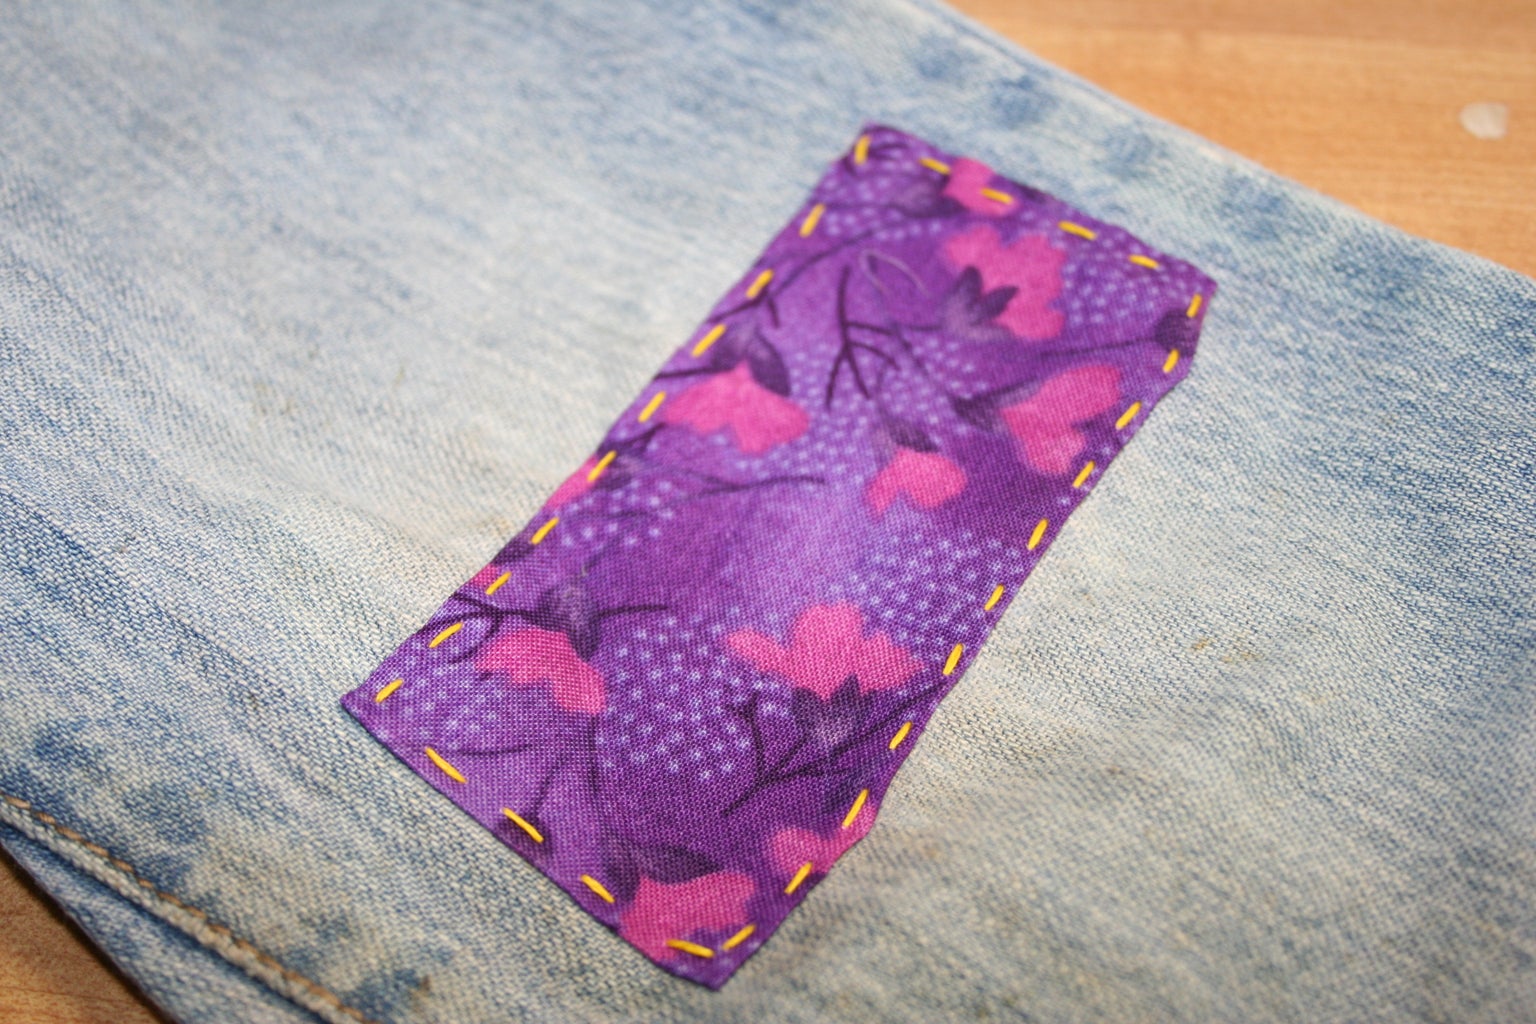
For the second patch, I just did a basic running stitch all of the way around it with yellow embroidery floss. I don't want this to look perfect, and I suppose I could go all crazy and embroider this side to, but honestly, I think it looks fine without.
Step 7: And Done!

You can really take embellishing pants like this as far as you want, adding buttons (I wouldn't add buttons to the knees, though, ouch) or bits of embroidery all over the place. For me, I'm going to keep it a bit simple, as I have lots of pants to patch.
Participated in the
Summer Sewing Contest


