

Introduction: Photography Lights on a Budget


What's common between lamps in photography and clamps in workshop?
There's never enough of either.
However, both of these can be unforgiving on the contents of your wallet (or bank account). That's the reason I set out to make a pair of lamps for lighting my pictures using mostly the materials I already had at home.
Since most of the materials I used for making these I already had (disassembled old lamps I used before and did some digging in the garage), the material list is more for the general idea and understanding, rather than a must have. I was making 2 lamps, so if you see double the stuff you think you need for a single lamp in a picture you're most likely right.
Step 1: Materials and Tools You Might Want to Have


Materials:
Some thin plywood to help cardboard maintain form;
Small piece of wood/plywood around 20mm thick (for tripod triangles);
Wood/plywood strip wide enough to make holes for sockets, thick enough to screw something to the end;
Piece of wood around 40mm thick for angled blocks;
Wooden poles for tripod legs (check the garden section);
Both thin (hand bendable) and thicker metal plates with holes (or D(rill)IY);
Lightbulbs: I used 15W non dimmable CFLs because they are bright and I got them for ~2$ a piece;
Sockets, cables, switches and anything else you need for the electrical part;
Some rope (or bike tube in my case) to hold the tripod together;
Various screws, bolts and nuts;
White paper/aluminium foil for reflectors;
Cardboard boxes for reflector carcasses;
Take into account that thin metal profiles could be used in place of most wooden parts and would probably make the end result even lighter. Just use what you have.
Tools:
Your hands and head;
Saw;
Drill;
Screwdriver;
Angle grinder (or anything to cut and grind metal);
Workbench (or clamps, if you don't have one, like me);
Stapler (don't have a proper one, would've saved some time);
Paper glue and clear tape;
X-actoknife or scissors;
Hot glue gun;
Step 2: Making the Reflector


Cut some wood strips to use for holding the cardboard reflector carcass together. The ones you can see on the left of 1st picture have their ends cut at a 15 degree angle, so the reflector is diagonal in all directions and the light is less directional, when on.
Drill holes in the thin plywood, and thin guide holes in the plywood strip to avoid splitting. Mark which end of strip goes to which piece of plywood and later screw the wrong piece on to confirm it was completely unnecessary (see pic 2).
You should put the wooden piece over the cardboard when drilling holes for sockets so you don't have to cut holes in cardboard by hand. Attach the cardboard to the wooden carcass by stapling, screwing or riveting. You can glue in sockets with hot glue now or later, it doesn't really matter.
Acquire a piece of slightly angled piece of wood. The one I used was around 40mm thick and at an angle of around 30 degrees. Attach it in a way to allow rotation, if you want to.
As for the inside - I used some paper with one side printed I had laying around which I usually use for various sketches, calculations and random wanderings, makes no difference I can see, so you should be good with anything white.
Step 3: Making the Tripod


Find a plank or something else and cut it into triangles, approx measurements in cm can be seen in the 2nd picture. Then put the triangle down somewhere and watch intensely until an all seeing eye appears. When it appears you can be sure that your lamps will illuminate what you want properly.
Cut metal plate into strips, act unimpressed when sparks are flying towards your face. Also make cuts in the triangle and poles as shown in pictures 5 and 7. Quick jig for making cuts in poles can be seen in picture 8. Add some screws and end up with something similar to what's seen in picture 6. Attach the legs with some bolts in a manner that they can move around the axis of the bolt afterwards. Attach the same kind of angled wooden block as used on the reflector to the middle of the triangle (you can see a hole there, the same bolt was used to allow rotation).
Use a rope or a bike inner tube you just punctured and aren't in the mood of repairing, or anything what works on the lower part of the legs, to limit their spread.
Step 4: Connecting the Tripod to Reflector and Wiring


Take a piece of wood (I recommend solid wood over plywood here) around 400mm long and figure a spot on it where you want to take a cut in an angle of 45 degrees (I made it around 2/3 of the way towards the reflector). After marking the diagonal cut line find the middle of it and drill a hole across the piece of wood along the line where you will add something round - a screw or a wooden stick like I did. Make the cut and attach metal plates to it as shown in picture 2, they are there to prevent slipping and deformation of wood when trying to adjust the lamp. This wooden piece should be attached to the angled blocks on the reflector and tripod in a way that the metal plates point downwards (a brief idea of that in picture 3).
You may want to drill a few holes including holes for switches somewhere so you don't have to leave them hanging on separate pieces of wood like I did. Mounting of switches and wiring is extremely simple and I won't go into detail here, you can see the rear look of the lamp in picture 4.
Side notes:
In 6th picture you can see a try of adjusting and fixating the lamp with a piece of rope. That doesn't really work because it's extremely hard to tie tight knots exactly next to each other, so don't bother with that. Also make sure you don't drill in a dumb and lazy manner like I did because sooner or later you will drill into your palm (you may guess how I became so wise regarding this). Just fix the block at least as simply as using a clamp and two pieces of wood and keep your body parts further away. If anyone knows a good instructable for collapsible workbench - please share in the comments.
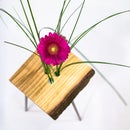
Step 5: Make Pictures, I Suppose


Some notes after taking pictures:
Should probably use cold white light bulbs, but for the price I got ones I used there's just no competition.
When possible should still use additional lighting from daylight when possible. I took those pictures in the dark already.


