

Introduction: Power and Temperature Data Logger With ESP32 and AWS IOT


In this tutorial we will see how to build a simple IOT Industrial Data Logger(IDL) to log the device temperature and current to AWS IOT and display it on Hornbill IO. The IDL connects to Wi-Fi and then to the clould.
We will be using the MAX6675 for measuring the temperature and Non-invasive YHDC SCT-013-050 AC current sensor to measure electric energy consumed. The measured temperature and current along with power is logged to server using Hornbill AWS IOT library. This data could later be used to determine device specific events like operating duration, total power consumption etc., Combing this with the device temperature can be useful in understanding operating health of the machine. We have attached Hornbill Industrial Data Logger to a bench top drill machine, you may add it any machine where power and temperature measurements can result in useful insights.
Check the earlier tutorials for enabling AWS IOT services to your user account and Hornbill AWS IOT library usage guide.
You may build this with individual parts or get the complete kit at our crowdfunding campaign with the link below: https://www.crowdsupply.com/explore-embedded/hornbill
Step 1: Schematic

The IDL can be powered either through a LiPo battery or using the on-board USB connector.
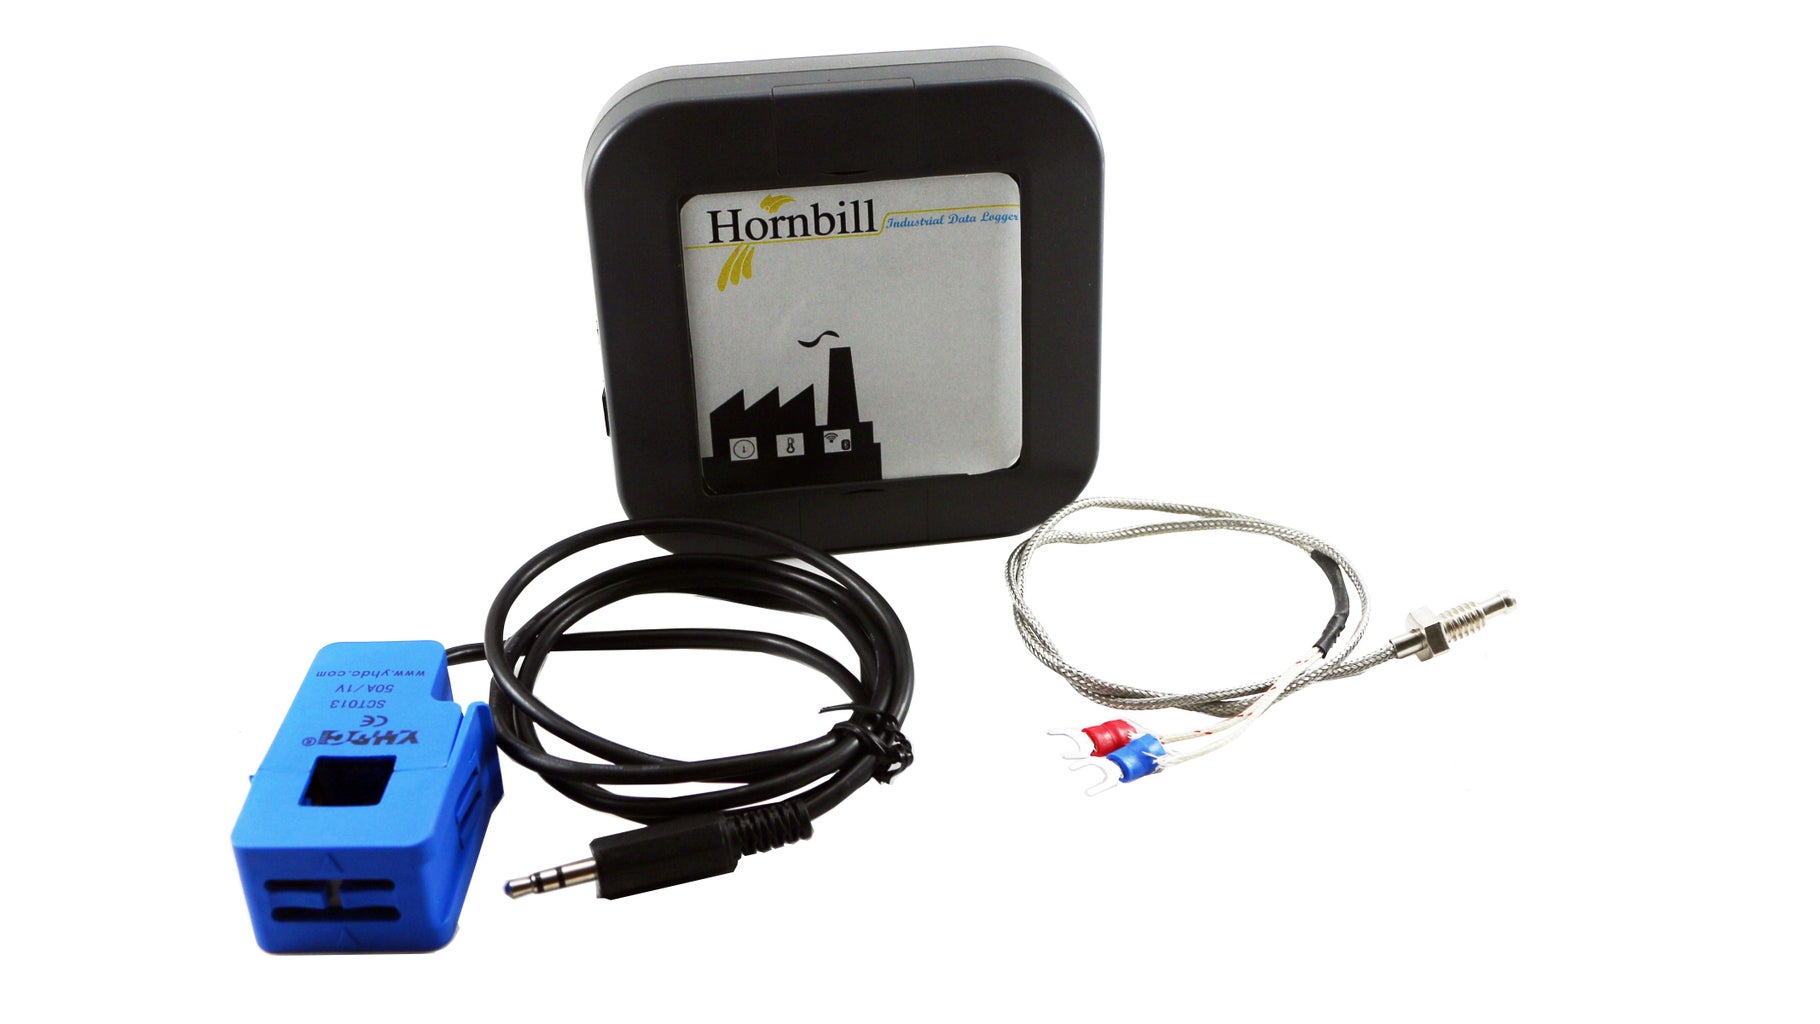
Step 2: List of Components
The Hornbill IDL kit comes with all the parts required. The steps show assembling a DIY version of the kit, however the IDL Kit we will ship will come with pre-assembled single PCB with ESP32 Module, Sensors and other circuitry built-in. To build this you'll need:
- Hornbill ESP32 Dev board
- Hornbill ESP32 Proto board
- Thermocouple
- Current Sensor
- Hornbill Case
- USB Power Adapter or LiPo Battery
Step 3: Start With Soldering All the Parts on the Proto Sheild.

Step 4: Once All the Parts Are Soldered on Proto Sheild, Solder the Hornbill ESP32 Dev Board

Step 5: The Board Assembly Looks As Shown Below.

Step 6: Screw the Board to the Hornbill Case.

You may then either power it up with a USB Charger or connect a LiPo battery. The sensor should be clipped to the phase wire of the equipment power and the thermocouple should be tagged to the device.
Step 7: Code
Indestructible code formatting is broken, so find the Arduino Code with the link below:
https://gist.github.com/SaheblalBagwan/fb516db75e7bc98393ace45584cea9b3
Temperature and current will be continuously monitored and logged to amazon server every 5sec. To compile the code add the following libraries.
- Adafruit Max6675 Library to measure the temperature
- Open Energy Monitor's Library to measure current and power.
Step 8: Data

The data is logged to AWS, however there is no way to visualize it. So we have built a data visualization and device control tool at Hornbill IO. Hornbill IO is still work in progress and we will release a beta version soon. However, here is how the plot looks on the dashboard.
Step 9: Video
Step 10: Download
Download the Arduino ESP32 AWS IOT lib and examples form this link.


