

Introduction: Print Circuit Scribe Designs With Cricut Explore


Drawing with the Circuit Scribe pen is a lot of fun and a great way to learn basic electronics. Check out the online editor on 123D Circuits if you want to try it out. When you need a lot of printouts, it can be helpful to use a pen plotter to the drawing.
I used the Cricut Explore because it's a great machine and we have it available at the Pier 9 office at Autodesk. The penholder that comes with the Cricut only works with the Cricut pens, but I modeled a custom penholder that fits the Circuit Scribe pen.
The Circuit Scribe pen is actually a Sakura Gelly Roll Pen so you can use those too.
Step 1: Model the Penholder


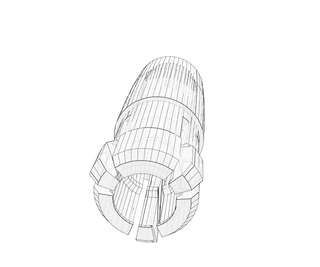
If you are not interested on how to model the penholder, you can find the 3d model in the next step, ready to printing.
To challenge here was to make sure the penholder touches the paper while the penholder is supporting the pen. I made measurements of the the Cricut penholder and of the Circuit Scribe pen with a caliper.
I started modeling in Tinkercad because it's easy and free.
Pretty basic stuff: start with a cylinder the size of the penholder, draw another cylinder with size of the pen, an opening at the top and some cutouts to make sure it's tight. You can find the result here: https://tinkercad.com/things/0rWMscQIeUI
After that I wanted to fine-tune the measurements to make it fit better and while it's possible to do it in Tinkercad I recreated the model in Modo because it's easier to do detailed modifications when you have sub selection (vertices, edges and polygons) available.
The little legs that help tighten the holder break off easily, so careful with that.
Step 2: 3D Print the Penholder
If you don't have access to a 3d printer, you can try squeezing the pen inside the Cricut penholder when you pull off the enclosure of the pen. If you have a 3d printer, print the .STL that attached to this step.
Step 3: Prepare the Pen Path for the Cricut Printer

A pen plotter needs a vector path to know where it needs to put the pen down to draw.
I made two pages in Illustrator, one that I could print on an inkjet printer with the drawing and another page with the pen path. I've attached the design in this step.

Step 4: Import and Print the Design

The software to drive the Cricut is available online. You need to make an account to get started.
In the editor I imported the path by choosing "Upload image" > Vector Upload (.svg attached to this step)
I changed the layer type to Write. To do the layer options, I clicked on the symbol next to the thumbnail in the layers panel. Then I followed the instructions to print it.
The Cricut editor has some quirks I had to work around. I put in a rectangle to make it easier to scale and needed multiple runs to get it right.
I love seeing a machine do the tedious work :)

Step 5: Enjoy the Results!
When you're ready, put the magnetic sheet under the paper and put the Power and RGB module in place to start the magic!


