

Introduction: Project Bike: Bike Hangers and Bottle Openers From Old Bicycle Frame


Some time ago I firmly decided that it's about time for me to return to riding bikes the way I like it most - fast and in the forests. The only minor issue is that I don't have one suited for this kind of riding nor do I have anything to spend on getting one. Then it struck me. Why don't I take some of the old parts I still have, several bikes from my friends who were throwing them away anyway and make them into something interesting, useful and visually appealing and then sell this stuff I made to save up for a bike. Given the time I've been making various things by now it seemed possible to pull it off.
One may wonder why am I sharing in depth instructions for the things I make for sale. This is mainly because of the fact that I have gained a lot from makers around the world sharing their processes and want to give back as much as I can now that I'm making something a little more serious and unusual. Of course there's no denying that contests here are very tempting as well.
The period between the thought and end result was a little longer than I would've wanted, but still, the process has begun and here's the first serious part. Expect to see more as time goes by since my goal is to use as much of the material bike has as possible and I'm ready to broaden the idea of what's possible here.
If you're curious - all the newest stuff which is not yet published anywhere else, i.e. stuff still in progress is best followed on my instagram.
Special thanks to everyone who voted for me in the Bicycle contest, you got me a little closer to riding actively again!
Step 1: Tools and Materials

Materials:
- Bicycle frame
- Bicycle brake cable
- Hanger base material (I used 12mm plywood)
- Screws and nuts with nylon inserts (5mm)
- Screws and self-digging furniture inserts (6mm)
- Highly expanding metal anchors
- Various wood screws
- Metal hanging plates
- Paint stripper
- Wood stain
- Wood filler
- Varnish
- Clear protective vinyl or sprayable rubber
- Wood glue
Tools:
- Angle grinder with cutting and grinding discs
- Drill with bits for metal, optionally for wood
- Hard wire brush for grinder or drill (twisted wire)
- Soft wire brush for grinder or drill (straight wire)
- Router with standard flat bits
- Orbital sander
- Dremel with bits for grinding, polishing, cutting and wire brushes
- Jigsaw
- Paintbrush (preferably several)
- Plastic brush
- Clamps (the more the better)
- Tools for marking, tightening and all the other obvious stuff
Step 2: Plan Ahead


I've found it very convenient to do rough sketches before I start making. Seems like common sense, but it makes me wonder how I did anything earlier without any proper visualization beforehand.
While it's way more useful when you're creating something from scratch, not following instructions, it's not bad to have something a little more tangible or helping to grasp what you're going to be doing anyway.
All that said, this step is more aimed at those who are interested in the creative process itself.
Step 3: Get Rid of Most of the Paint


While I was very tempted to bring the frame in somewhere to get it sandblasted, in the end I decided to do the paint removal work myself.
It's a good idea to go outside while doing this since the stripper is not the best thing to breathe in. It's pretty likely that you will need to apply and clean the stripper several times anyway, so don't be shy to apply a healthy amount of it.
As the stripper does its work you could theoretically shave it off with a metal mantle of some kind, yet I found it very effective to just use an angle grinder with a rough wire brush. This way you remove the paint which is already lifted easily and can almost as easily remove the paint which is not yet lifted by the stripper.
You could probably use either of those separately, but I found it's best to use both if messing around for extended periods of time applying stripper or trying to brush the paint in some stubborn spot is not your thing.
Don't forget to use protective gear while doing all of this. Paint flakes and dust will be flying and stripper fumes will be in the air among other things.
Step 4: Cut the Needed Parts


As you can see I actually cut the dropouts off before I started stripping the paint. That was not the best idea since it's harder to work on and place small parts in preferred orientation, so don't cut ahead of time.
Also, keep in mind that while everything can be ground flat or straight later, it's in your best interest to cut as straight as possible to avoid unnecessary work. Again, I did not know I was going to make these hangers when I cut the dropouts off. Luckily it seemed like a good idea to at least cut the dropouts for openers around the same length.
Cutting dropouts off is straightforward, just grab an angle grinder and do what you need to do. Parting them in two might be a little more tricky with an angle grinder. I used a jigsaw for that. Be aware that this is a frame from a cheap Chinese bike, so the steel is soft in comparison. I'm not sure if it would be a good idea to cut harder alloys the same way.
Cutting the seat tube in half longitudinally is a little bit trickier. It would be easier if it was just a regular tube, but in this case there are obstructions on one of the sides effectively getting in the way of cutting the tube with a jigsaw.
To cut this properly I made a simple flat bottom attachment to an angle grinder - took a scrap piece of laminated MDF and cut a rectangle out of it. I used a router, because that's the only tool I have to get something really straight in all directions, but table saw would be a lot faster for this.
I attached this rectangular piece to the what would be the bottom of an angle grinder using one of the holes designed for the grinder's handle (a regular 12mm screw did the trick). Then set up a straight edge parallel to the middle of the seat tube with a flat surface for sliding the grinder on. I also waxed the edge I will be sliding against to avoid sticking mid cut and the possibility of cutting disc shattering and other issues. You can see the setup in pictures.
Cut slow and watch out for grinder movement out of line, fix position if necessary. This was enough to get the first side almost perfectly straight and in the middle and the second one just a little bit off, still perfectly grindable.
Step 5: Do the Rough Shaping


Since probably none of the parts is cut perfectly straight, you will need to rock the angle grinder a bit more. The flat bottom is not needed any more but a straight eye certainly is. Most of the work is grinding the longitudinally cut tube straight.
First step of grinding is done with an angle grinder or any other fast way of roughly flattening the surface. If you have a big flat sanding surface, I envy you, skip the step two.
The second step is done using an orbital sander to get it even flatter. A good way to check how flat it is is simply using a flat surface and looking at the gaps present.
The final step is making the edges a little less sharp using a Dremel with a grinding wheel.
Keep in mind, that you don't need to get it super incredibly perfectly flat. Just get it flat enough that it sits tight on the surface since you're going to tighten it using screws anyway.
That's it. Not a lot of text here, you will need patience for this though.
Step 6: Attach Cable to the Opener


You will need at least one, but better two holes in the end of the opener to attach the cable, so drill those (I used a 2.5mm/0.1" bit).
If you haven't cut the cables to preferred size already - do so, mine were around 20cm/8" long.
You will also need to drill a hole in a screw to allow tightening the cable ends together. Washers could alternatively be used instead of drilling, but a hole is more secure strength wise.
If you, like me, aren't using a drill press for this, make some flat spots on screws using a Dremel first to avoid annoying drill slipping. Also, don't break the only drill bit of the needed diameter you have like I did.
Now you should actually stop and wait until you have brushed the openers to preferred finish and add the cable only then.
After the screws are drilled put the ends of the cable in and tighten it, just make sure, that you are actually putting the screw in a spot, which goes inside the opener! While it should fit inside the opener as is, it will require less bending and effort if you cut off the remaining screw ends.
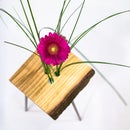
Step 7: Prepare the Hanger Base


For the bases of hangers I used several layers of 12mm (0.5") thick birch plywood. While you could theoretically use only a single layer, the main reason to use several here was wall clearance.
Mounting would be possible using only a single layer as well, but it is easier to make everything neatly using at least two layers which is what I used for one of the hangers. The other one received 5 layers.
To cut them I simply used a jigsaw. A table or cross cut saw would be way better though. Sizes were intended to be as close to the length of hanger as possible with width being bigger than that of the metal part.
Holes for mounting the metal part are best drilled with the metal part clamped on the wood to ensure perfect hole position. Then, using a router and drill work from there and make all the necessary holes for screws or general guidance. See pictures for what goes where.
As you have everything as it should be, sand the ends if they do not align with the metal part.
Step 8: Apply Stain and Varnish (optional)


This is not necessary, but it felt like having a light shiny metal would work well with a contrasting darker wood base while the stain is going to give a little better look to plywood as well.
A water based stain and semi gloss water based varnish was used as finish. It's not a good idea to apply water based clear coat on water based stain since things can get ugly and I don't recommend that to you. This is why after the stain was dry I took a can of acrylic lacquer and applied a few thin coats of it over stain. After that was dry I went on with the actual top coat intended. The process had a lot less smudging, although applying very thin coats at first is a good idea to avoid smudging.
To save the waiting, use something fast drying and plan things ahead to do while the varnish dries, unless, of course, you're in no hurry at all.
Step 9: Make and Attach a Hanger Element


This really is optional and only useful if you're making a hanger from the lower part of rear triangle.
The part of the frame which originally had the function of the top tube seemed a somewhat reasonable candidate to make this element which works as a hook for frame so I went with that.
The first thing I did was of course cut it off the frame, then I marked some roughly parallel lines to the bottom of it and cut it to near the form it's going to take.
Since it was a little too narrow to allow for a frame of any reasonable size, it had to be widened quite a lot. The only way which seemed reasonable at the moment was to look for tubes and other round objects which had a radius bigger than the radius of this metal piece and widen it by clamping it on an increasingly bigger round objects until the desired size was achieved. See pictures to get a better idea of it.
As you have it bent, place it one the cut tube ends (which should be ground in a way that they are in the same plane or close to it, of course) in a way that they are straight and mark around the tubes, then determine the middle points of markings by eyeballing or a better way if you have one and drill there.
Holes are meant for screws which are used to attach to anchors, which are placed in the chainstay tubes. Again, look at the pictures.
Afterwards, attach the metal part for hanging to the other part and mark a rough shape you intend to cut it at. Then cut, shape and sand using an angle grinder and a Dremel or whatever else suits you.
After you've made it and it's ready to attach, brush the mounting and close to mounting areas with the wire brush to add shine first, before attaching.
Step 10: Add Shinium!


It's a good idea to do this in between the coats of varnish.
If there are any larger spots with paint, clean those with the hard twisted bristle brush. The actual tool you need here is a drill with a soft wire brush attached. Work it everywhere to get a shiny brushed look of your wildest dreams. If there are some stubborn spots - use something sharp to remove the small paint bits and then brush over it. For holes a Dremel with a straight wire brush bit is a pretty good bet.
Dremel with a bigger brush wheel should fit just fine on the inside of tubes as well. You don't need those shiny probably, but cleaning the fine dust and rust off is not a bad idea at all.
Just work the wire brush or even different sizes of brushes until you are satisfied with how it looks. Don't overheat by brushing for extended periods of time in a single spot because you will get a distinctive look which is pretty visible. Especially keep the overheating in mind in case you are making these from an aluminium frame.
Step 11: Apply Protection


If your bike is entitled enough to be hung on a wall hanger in a room somewhere, you probably don't want the frame scratched. This is why it's a good idea to apply some clear vinyl on the surfaces which get the most contact to bike.
After you've done this, it's also a pretty good idea to apply a light layer of protection over all of the metal. This is mainly done to prevent it from rusting. I used regular beeswax polish for it (1 part beeswax to 4 parts mineral oil) and wiped the excess off with a paper towel after application.
An alternative to clear protective vinyl could possibly be spray rubber (I tried it before vinyl), but in my experience it just didn't have the properties needed for the job or maybe I didn't apply enough coats of it, who knows. Vinyl is faster to apply, thicker and sturdier with the only disadvantage being that it's too thick to heat apply over more intricate surfaces.
Step 12: Hang Your Bike on the Wall, Open a Beer and Enjoy Life


With everything done it's time to enjoy what you've made.
Hopefully you liked the instructable and the end result and get some ideas out of it!
If you have any questions - just comment here. I try to reply to every comment posted.
If you feel like helping me out a bit in my way back to cycling actively - vote for me in the Bicycle Contest, thanks!
Obviously, those of you who want to be the first to find out when my next instructable is live - follow me here on instructables.
Happy riding!
Raitis
Most of the things I make as a part of Project Bike are for sale in my Etsy store.
The most important stuff and updates regarding project bike are posted on my page here.

Third Prize in the
Bicycle Contest


