

Introduction: Quadcopter Using KK 2.15 Module


For a drone to fly autonomously, all the necessary sensors, processing power, and communication chips must be built-in. While that may not seem like much, it actually eliminates a lot of currently existing commercial civilian drones available to the general public.
NOTE: This Instructable has been entered for the Coded Creations, Move it, and Things That Fly Contests,if you love this project and appreciate my efforts, I would be highly grateful if you could vote for this project there and help me win.
Step 1: Materials Used


Hardware Items:
1) Quadcopter Frame (Preferrably one which has a built in Power Distribution board)
2) Microcontroller (KK 2.15 Flight Controller)
3) Electronic Speed Control (30 Amps) (4 pieces)
4) Brushless Motor (850KV) (4 pieces)
5) Propellers (2 sets)
6) Power Distribution Board (Not needed if frame has a built in one)
7) Lithium-Polymer 2300 mAH Battery
8) FlySky FS-T6 Controller includes the Receiver
http://www.amazon.com/ZJchao-Digital-Proportional-...
9) Stress balls (4)(Extremely useful if you are a novice flyer like me)
Tools and knowledge:
1) Basic soldering skills
2) Alan keys
3) Shrink tubes(Preferably Turnigy)
4) Zip ties (To hold the ESC's onto the frame)
5) Glue gun (To put all over the connections to avoid any contact between them)
Step 2: Assemble and Connect

1) The motors and ESC's can be connected to each other via direct soldering or using Bullet Connectors of 4mm dimension.
2) The ESC's are then connected to the power distribution board, or in this case directly to the frame which has an inbuilt power distribution board, by soldering. (Make sure to know if the ESC's are supposed to be flashed or not, mine did not required to do so.)
3) Once this is done, solder the battery wire to the frame.
4) Once all the soldering work is done,and the hardware is setup, connect the KK Board(again flashed with the latest firmware) with the ESC servo wires, and Receiver.
Step 3: Plug in the Battery and Test Your Quadcopter

1) If your code is all correct and your connections are all good you should see the LCD screen on the board lit up, from where you can easily calibrate both the Accelerometer and Magnetometer.
Exact steps to be followed for the setup
2) Connect the controller to your laptop and download the T6Config application on to your desktop and test the controls to see if the Throttle, Pitch, Yaw and Altitude are not inverted.
http://www.hobbyking.com/hobbyking/store/uploads/9...
3) Set End points to 100% and subtrim each channel according to your needs and quad's stability.
4) Now arm the KK Board(you'd see ARMED come up on the LCD screen) and gradually increase the throttle. If everything is perfecty connected, flashed and calibrated the motors will start rotating.
Step 4: First Flight and Future Improvements

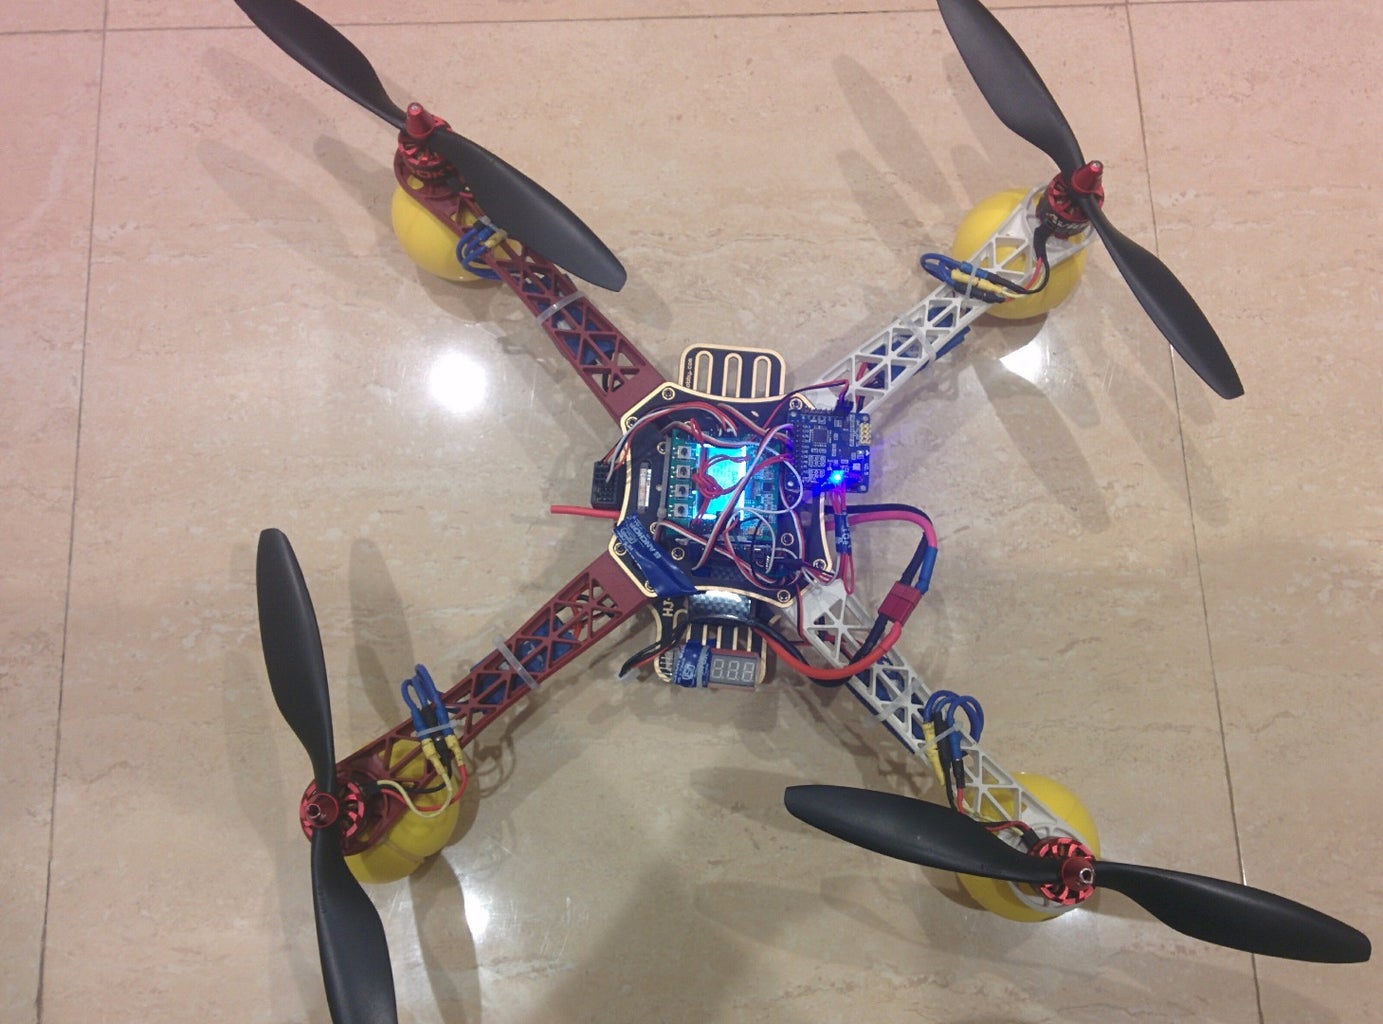
I attached the Stress balls, to ensure in the event of I having to cut the throttle at any instant, the landing wouldn't destroy any of the parts or the frame.
While this whole task took me 2 days, there is still room for improvements like controlling the quadcopter with a mobile device rather than a remote.
Also,
When I will upgrade my quadcopter with FPV (first-person view), i.e. equip my quadcopter with a camera, video transmitter, video receiver and goggles/monitor to have a live video feed down to the ground, which will also mean purchasing a battery of much higher capacity than the present one.
Attachments


Participated in the
Mind for Design

Participated in the
Move It

Participated in the
Coded Creations

Participated in the
Things That Fly Challenge


