

Introduction: Raspberry Pi Live Video in 5 Minutes (Secure, Low-latency Video Stream)


What you'll be building
In this tutorial you'll learn how to set up a live video feed from your Raspberry Pi that can be viewed across the internet on your desktop, tablet, or mobile phone.
Requirements
Raspberry Pi connected to the internet
Step 1: Enable the Camera

The camera must be enabled first using the command:
sudo raspi-config
Visit the official documentation for more info.
Step 2: Run LimitOS on the Raspberry Pi

LimitOS runs alongside your existing operating system, and can be run via:
curl -sS https://limitos.com/run | bash
Follow the on-screen instructions to register the device afterwards.
Step 3: Enable LimitOS Video
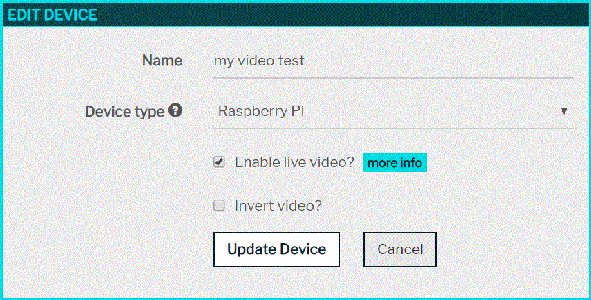
After registering your device, you'll be on the LimitOS website at https://limitos.com . From there, edit your device by selecting "My Devices", clicking on the device, and then clicking "Edit Device".
Make sure to check the "Enable live video" checkbox.
If your video appears upside down, you can also come back here later to invert the video.
Step 4: View Your Live Video Feed

On the LimitOS website at https://limitos.com , navigate back to your device, and click the "Start Video" button. Your live video feed should now appear!


