

Introduction: Router Inlays With a Guide Bush and Collar


Using a router for inlays can be both fast and accurate
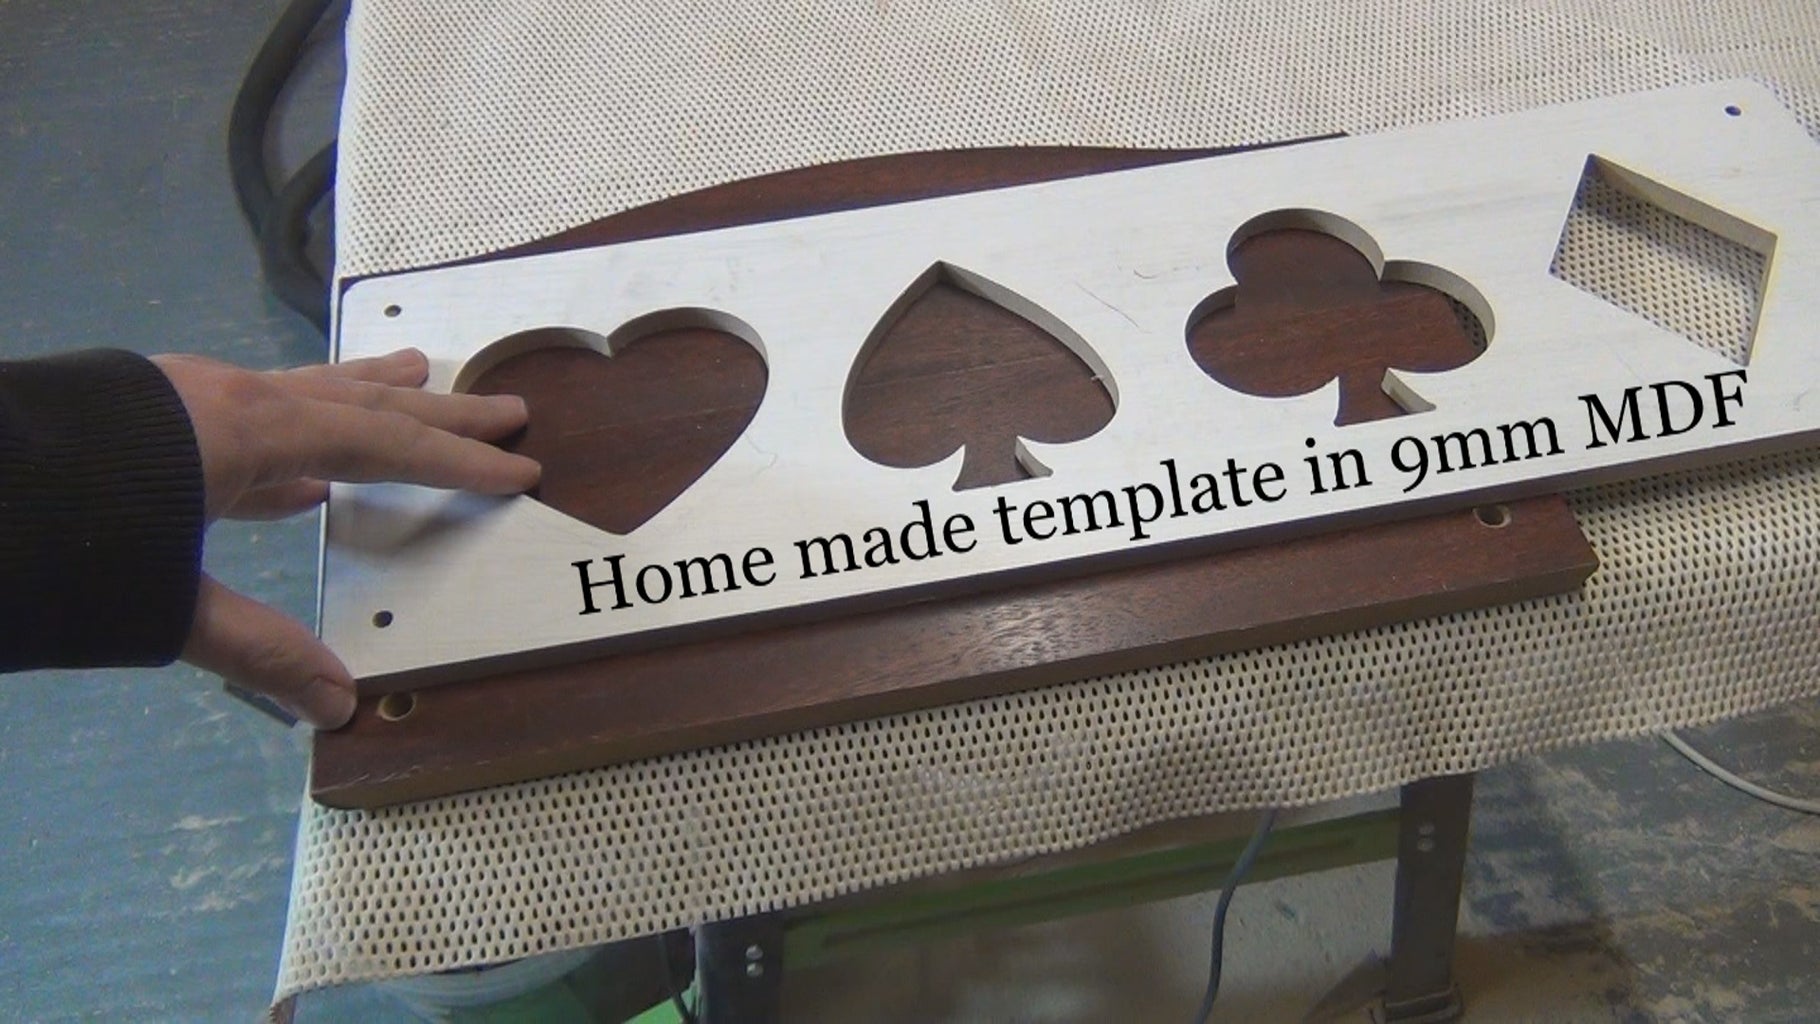
The easiest method is to use a guide bush, with a collar (that adds twice the cutter diameter to the guide bush when installed) and a single, external template
You could also use two guide bushes which differ in diameter by twice the cutter diameter, or a single guide bush with two different sized templates
I'm using a dedicated kit, made by Trend, which includes cutter, guide bush, and collar
The video is worth watching, if only to demonstrate how quick the process can be.
Step 1: Initial Setup


Install a cutter. A down spiral cutter will help keep the edges tidy
Attach the guide bush
Make a template of the shape you wish to inlay. Remember, due to the collar and guide bush, the template hole will need to be oversized all round by one half of the collar diameter minus the cutter diameter. The template material must be at least as thick as projection of the guide bush below the router base
Step 2: Routing the Inlay Pocket


Install the collar on the guide bush
Clamp the template in position
Zero the cutter on the work piece
Set the depth of cut limit to the depth you want the pocket. In most cases, make this a little less than the material you plan to inlay, as the inlay can then be planed or sanded flush later
Start the router, and remove all the material to create the pocket. For large areas, you could first rout around the edges, and in any tight areas, then swap guide bush and cutter for a larger cutter, and remove the central area freehand
You should be left with a nice clean inlay pocket
Step 3: Routing the Inlay Patch


First remove the collar from the guide bush
Use double stick tape to hold the thin inlay material flat and secure
Clamp on the template, aligning any grain or figure as required
Position the router so that the guide bush is tight against the inside of the template, and set the depth stop so that the cutter will just go right through the inlay material.
Start the router and plunge straight down
Keeping the guide bush tight to the inside of the template, move the router around the entire perimeter
Lift the inlay patch away from the double stick tape
Step 4: Final Fit

Because of the round cutter, and the round guide bush and collar, tight corners get rounded off
Use a sharp knife or chisel to chop in the tight corners to fit the patch to the pocket
Alternatively, use a file or sand paper to round over sharp areas
Step 5: Finish Off


Apply adhesive to the inlay pocket
Insert the inlay patch
Clamp and allow to cure
Flush the surface with a plane, card scraper, sander, etc. if desired
That's it!
Thanks for reading my instructable. Please share if you liked it.
Cheers,
Mitch


