

Introduction: Running LEDs Arduino Uno


Hi everyone, this is a quick and simple tutorial on how to make a cool light effect using Arduino UNO and LEDs.
It is very good for beginners who are just learning how to use Arduino.
Parts needed:
1x Arduino (UNO)
1x Breadboard
12x 5mm LEDs
13x Wires
1x 100Ohm resistor
1x good Will
Step 1: Video
Step 2: Wiring the Circuit
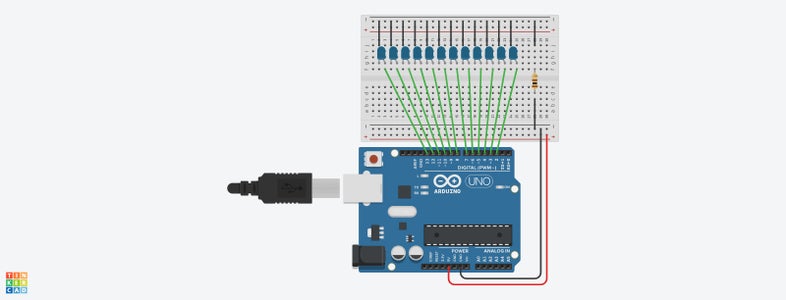
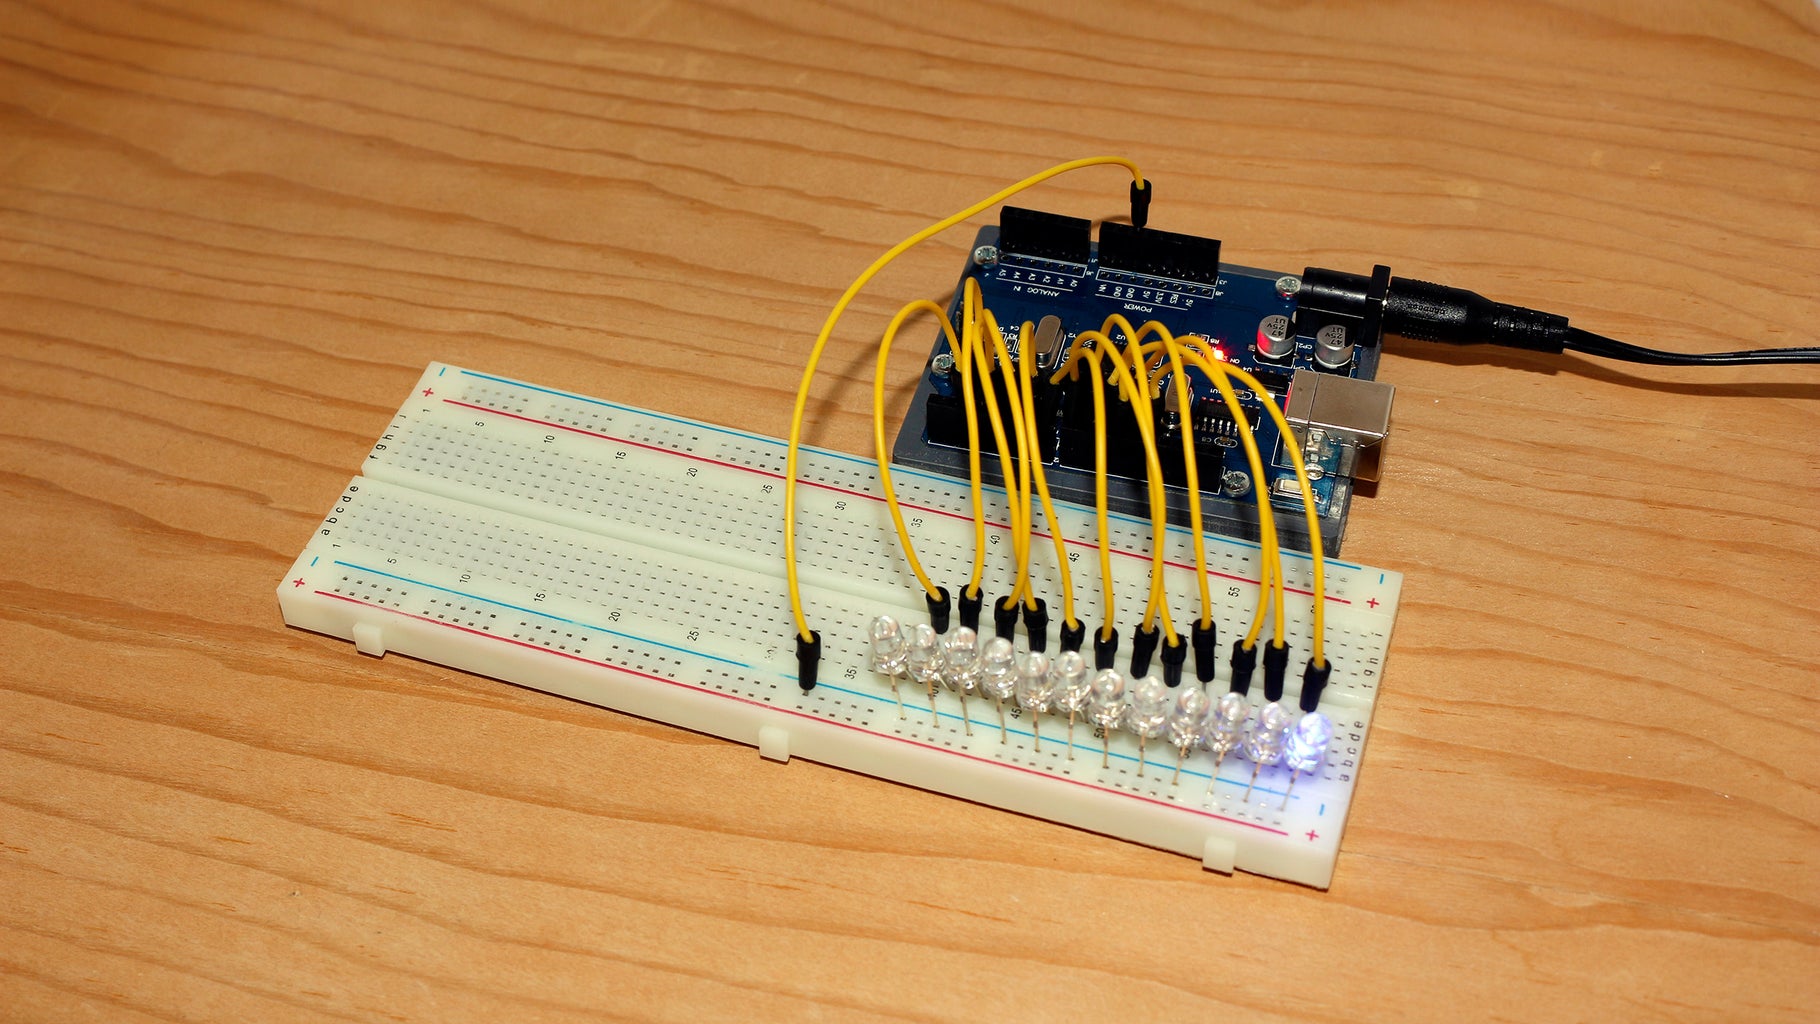
So first thing to do is to connect all the LEDs to the Arduino using breadboard. The easiest way is to linear connect all the LEDs to the desired Arduino pins using wires.
We have to add 100Ohm resistor to the circuit in order to limit the current through LEDs.
Also a TinkerCAD project:
Step 3: Arduino Programming
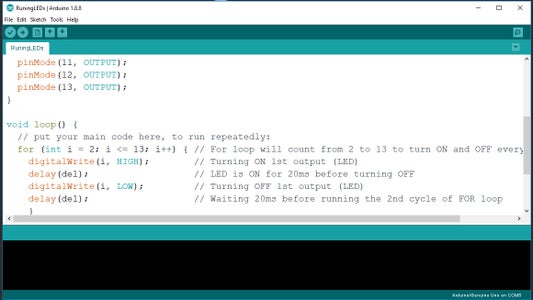
Next thing is to write a program for Arduino. First we define delay value outside any loop, that value will be the same through the program. Then we define PINs 2-13 as Outputs.
First For loop turn on the LEDs with the delay value between turning on the next LED. Second For loop turns off the LEDs in the opposite order.
In video, I have added some more variations of the program, so that LEDs acts in a slightly different way.
Attachments

Step 4: Conclusion
This is a very simple project that anyone can make, using only a few components to achieve a cool light effect.
It is also good to understand how Arduino outputs works and also the For loop.
Thanks for passing by....
