

Introduction: Running the Mill


More by the author:


About: Autodesk Technology Center San Francisco is a hub for research, development, and demonstration of new manufacturing technologies and workflows relating to configurable microfactories.
LOAD PROGRAM
Follow these steps to transfer your program to the machine.
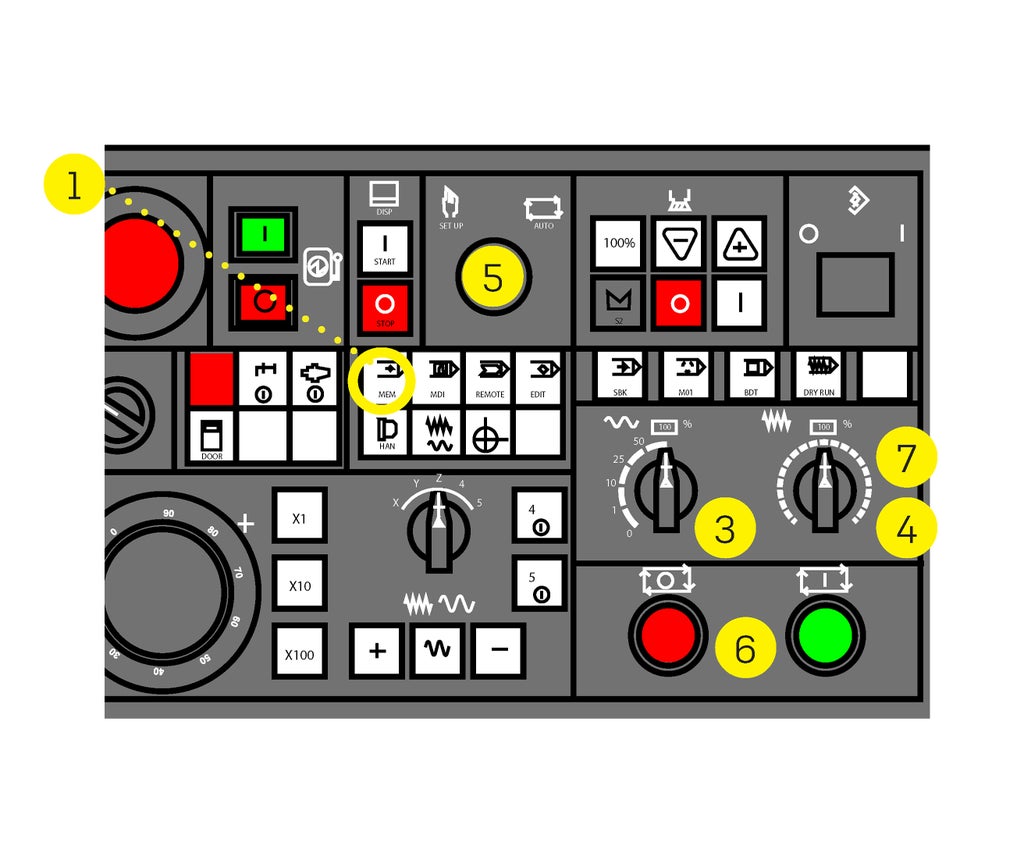
- Press MEM.
- MEM mode is used to run programs.
- Insert USB into controller on left side of screen.
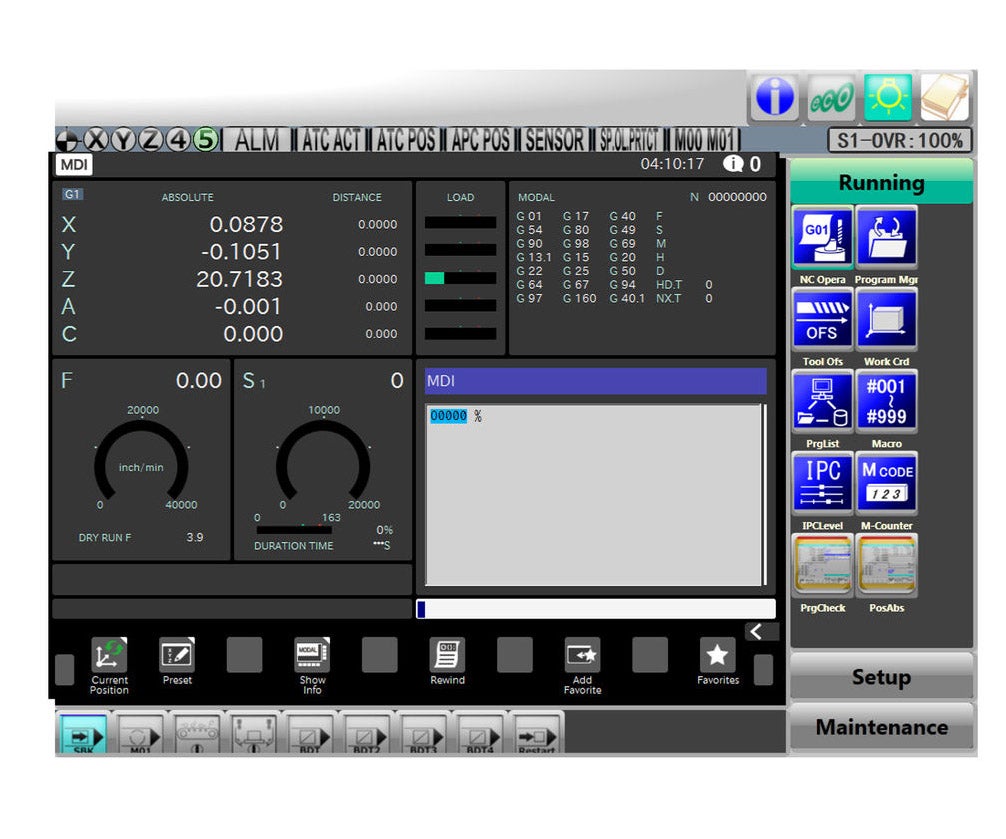
- On the display, under Running, select Program Mgr.
- On left side of screen, select Data_SV.
- Select Input.
- Highlight your program.
- Select OK.
- Green text “Executing” will appear while program is transferring.
- Program will transfer to Data Server.
- This can take a while. For larger programs, use Filezilla File Transfer Protocol software.
PRE-RUN CHECKLIST
You're ready to run the program. Double check that these tasks have been completed.
- Stock is measured and updated in CAM software.
- There are no errors in CAMplete.
- All tools are loaded in machine.
- Tool length offsets have been measured.
- The Work Coordinate System (G54) is correct.
- Stock is centered in the vise.
- Correct torque was used to attached vise to platter.
- Correct torque was used to tighten vise jaws.

Using coolant
Because of the spindle's high speed and feed rate, coolant is required.
- Flood coolant will automatically be turned on after every tool change.
- To disable flood coolant for a dry run, use dry run mode (red button).
- Toggle flood coolant on and off to increase visibility while tool is descending in Z.
- Use through spindle coolant for deep pockets and holes.
Step 1: Run Program
RUN PROGRAM
- Press MEM.
- Highlight program in Data Server.
- Data Server is under Running/Program Manager.
- Select OPEN
- Turn Rapid Rate to 10%.
- Turn Feed Rate to 0%.
- When Feed Rate is 0%, neither the spindle nor the trunnion will move, even for rapid moves.
- Switch key to AUTO.
- Press CYCLE START.

While program is running
- While looking through the wiper viewport, keep one hand on Feed Hold and the other on Feed Rate.
- Use Single Block (SBK) after each tool change.
- Turn off before tool begins cutting.
- Turn off coolant when needed to verify tool length offset.
- Change Rapid Rate to 1% and Watch Distance to Go in Z on the main screen to verify tool length offset.
- Use FEED HOLD or Feed Rate at 0% to pause the machine.
- Press Feed Hold and Rewind to reset to the beginning of the program.

Inspecting part during program
- If you need to inspect your part mid-program, you must turn off the spindle before opening the door.
- Press FEED HOLD.
- Press HAN.
- Turn spindle off.
- Turn coolant off.
- Press Door Unlock.
- Open door, check part, and close door. 7. Turn spindle on.
- Press MEM.
- Turn coolant on.
- Press CYCLE START.
Don't remove the part yet
As long as you keep your part inside the vise, you will be able to continue machining at any point.
- When you’re finished, inspect the part and check tolerances.
- If another user needs the machine and you have more operations to complete, remove the vise and keep it at your desk.
- When returning to the machine, ensure the G54 Work Coordinate System coordinates are the same as before.
Step 2: Clean Up
Plan on 30 Minutes to clean the mill.
CLEAN UP
Run the Goodnight Program.
- On the Display, under Running, select Program Mgr.
- Select Path 2 and highlight Goodnight Pier 9.
- Select Open.
- Press CYCLE START.
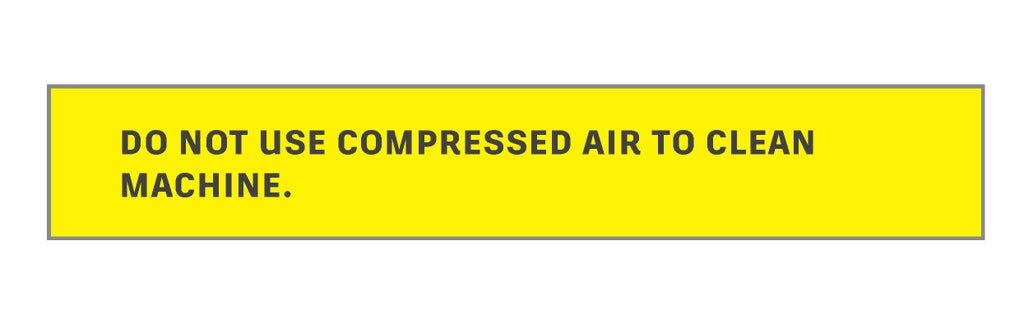
Clear chips.
- Wipe chips from machining platter, vise, and trunnion with a red rag.
- Do not use compressed air.
- Walk around to the back of the machine and empty chip bins into the Haas Mill chip container.
- Do not put chips into metal recycling.
Final Steps.
- Remove USB from controller.
- Press E-stop.
- Switch key to SETUP.
- Press Power Off.
- Wait for computer to shut down completely.
- Turn the MAIN POWER switch to OFF.
- OFF is green.
- Make sure oor and surfaces are clear of objects, tools, and chips.


