

Introduction: SD Card Module With Arduino: How to Read/Write Data


![Color Recognition W/ TCS230 Sensor and Arduino [Calibration Code Included]](https://content.instructables.com/F9K/6MIC/K7BBJPVB/F9K6MICK7BBJPVB.gif?auto=webp&crop=1%3A1&frame=1&width=130)
Overview
Storing data is one of the most important parts of every project. There are several ways to store data according to the data type and size. SD and micro SD cards are one of the most practical ones among the storage devices, which are used in devices such as mobile phones, minicomputers and etc.
In this tutorial, you’ll learn how to use SD and micro SD cards with Arduino. In the end, as a simple project, you will measure the environment temperature every hour and store it on the SD card.
What You Will Learn
How to use SD and micro SD card
Writing data on SD card
Reading data from SD card
Step 1: What Is SD and Micro SD Card Module?

The SD and micro SD card modules allow you to communicate with the memory card and write or read the information on them. The module interfaces in the SPI protocol.
To use these modules with Arduino you need the SD library. This library is installed on the Arduino application by default.
Note
These modules can not handle high-capacity memory cards. Usually, the maximum identifiable capacity of these modules is 2 GB for SD cards, and 16 GB for micro SD cards.
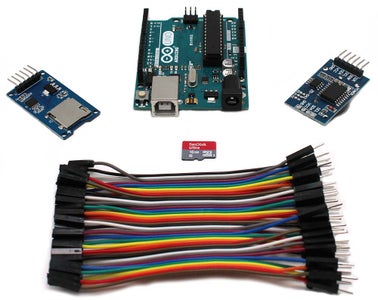
Step 2: Required Components
Step 3: Important SD Module Library Commands

A brief explanation of practical SD library’s commands is provided in the attached table.
*file is an instance from File class.
You can find more information about the SD library Here.
Step 4: How to Use SD and Micro SD Card With Arduino?
Tip
The module used in this tutorial is the micro SD module, however, you can use the code and tutorial for SD modules as well.
Step 5: Circuit

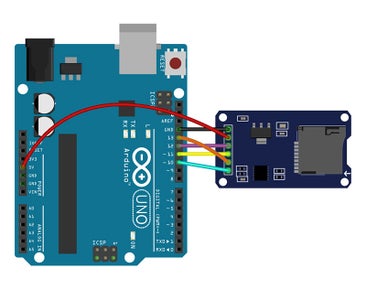
Using this module is very simple and its configuration is as picture.
Step 6: Code
Writing data on SD card with Arduino
Attachments

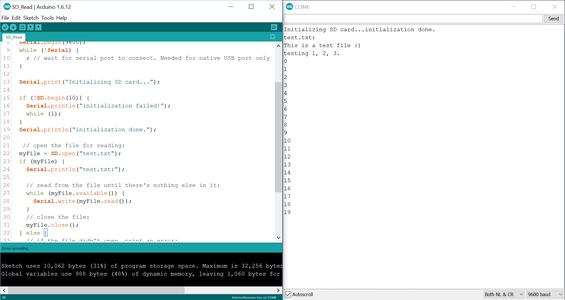
Step 7: Result

The result of the above code execution
Step 8: Reading Data
Reading data from SD card with Arduino
Attachments
Step 9: Result
The result of the above code execution
Step 10: Project: Save Temperature Data on a MicroSD Using DS3231 Module
You can find DS3231 here. In addition to the IC clock and calendar, this module also has a temperature sensor.
Step 11: Circuit

Step 12: Code

To work with the DS3231 module, you must first add the library (Sodaq_DS3231.h) to the Arduino application.
After storing the temperature at different times of the day, you can draw this information into Excel using the chart.
Attachments
Step 13: Draw a Chart in Excel:


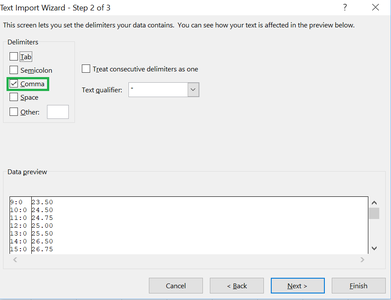
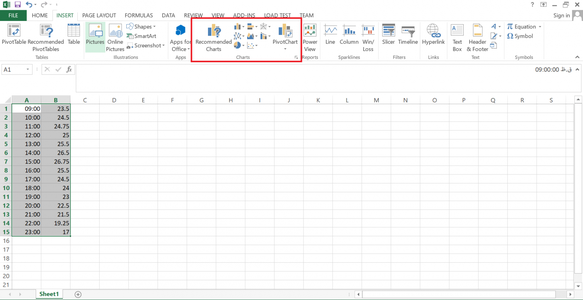

To do this, follow these steps:
Connect the SD card to your PC.
Enter the Excel software and select the From Text option from the data window and select the file from your memory card.
Step 14: What’s Next?
- Create an entry/exit control device. Using the RFID module and Arduino, save entrance and exit time for several persons on the memory card. (Consider an RFID card for each person)
- Like our FaceBook page to notice the latest projects and also support our team.


