

Introduction: Self-Watering Plant Using Arduino

Welcome to my project! This is a plant that has the ability to take care of itself and water itself whenever it detects that it needs it. This picture is a front view of my final project. The cup contains your plant which you stick your soil moisture sensor into to monitor the moisture level in your plant. In my code (which you will find below) I have it setup so that the plant waters itself whenever it goes below a 20% soil moisture level. The LCD is to display the moisture level at all times for the user and the LED is set to be turned off above 30%, to blink between 20% and 30%, and to stay on when below 20%. This is to notify the user what phase the project is currently undergoing.
Step 1: Schematic
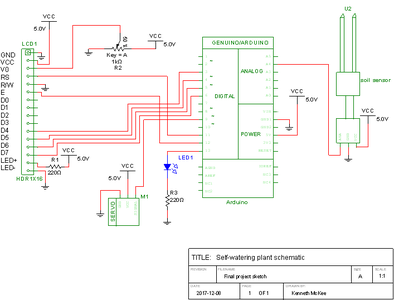
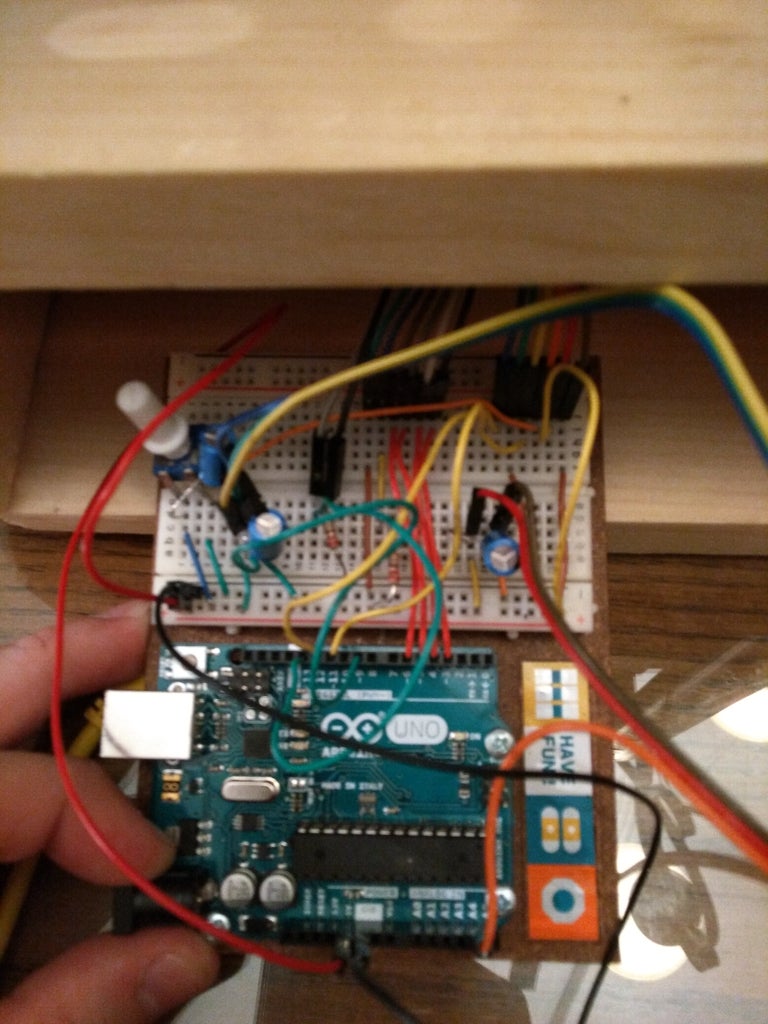
This is a schematic of my project made in Multisim 14.1 along with an actual picture of my Arduino board all hooked up. This is to give you an idea of how I hooked everything up and how it all works.
Step 2: Source Code

Here I have included a picture of my source code. This is a code I made myself and works for my project. If you want to use it for yourself I recommend you test your own soil moisture sensor and make sure you change the values under the map function to match your findings. If you use my values depending on what sensor you use, it's sensitivity, etc. your results may vary and it would throw off the program.
Step 3: Extra Pictures of My Project


In case you like the design or want to know more about how my project is set up I have included a few more pictures. I have included a picture of a more close-up view of my project, a behind view, the bowl on top of my project, and a small storage spot under my project.


