

Introduction: Small Wooden Box


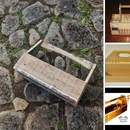


Small wooden box - ideal for beginners - fun to make!
The corner joinery presents an achievable challenge for students keen to practice their hand skills.
Material list
4 @ 90mm x 120mm x 15
2 @ 120mm x 120mm x 3ply
Dowel 2 @ 6mm x 20mm

Step 1: Mark Out Your Material


Write your name on the front.
Mark 15 mm margin in from left and right sides
Mark a centre line horizontally
Transfer all marks to all edges and the back.
Hatch the waste material on all sides
Step 2: Use Saw to Remove Waste


Hold your material in a bench vice
Saw the short line first, then the long one.
Step 3: Make Small Adjustments

Use a file to make small adjustments to your joinery.
All sides should be the same height, or level
Step 4: Sand Inside Faces

Sand the inside faces of your box.
Leave your name on the outside face.
Step 5: Glue Corners and Clamp


Use a brush and a dish of glue.
Carefully cover each corner surface that will touch another corner surface with glue.
Clamp the sides into a square and sit flat to dry.
Step 6: Glue on Base


Sand your base edge as flat as you can
Glue your base on and gently clamp.
Your name should be on the base facing out
Step 7: Drill Holes in Top Edge


Mark half way along two opposite top edges (60mm)
Also mark the centre of the material thickness (7mm)
Secure your box to the drill press.
Drill down 30mm, mark this depth using tape on your 6.5mm drill bit.
(I am using 6mm dowel and a 6.5mm drill bit)
Step 8: Glue on Lid


Again use the sanding boards to make sure the top edges are all flat.
Cover top edge with glue and clamp lid in place.
This will give you a sealed box, with your name on the bottom.
Step 9: Smooth All Sides


Step 10: Separate Box Lid


Use the band saw to remove top 15 - 20 mm
Sand the newly sawn edges smooth
Step 11: Insert Dowel


Sand the top of your dowel round so it looks neat.
Glue the dowel into the hole.
The dowel will act as a lid locator and make sure the lid fits neatly in place.
Step 12: Finishing


To finish this box I tried a natural stain I have read about.
- Coat of black tea
- Coat of white vinegar that has had some mild steel sitting in it for a week or so.
This mixture creates a dark stain on the pine
When that had all dried I gave the project a coat of water based varnish.
Note: The holes in the lid needed to be drilled out with a 7 mm bit for the dowel to fit.


