

Introduction: Solar Polymorph Mushrooms


My brother has always had a strange obsession with mushrooms (not eating them just looking at them) so I made this mushroom lamp thing. It is solar powered and made with polymorph plastic so you can always change the poses of the mushrooms later. It will charge during the day and turn on at night. This can be made for about seven dollars. Other than materials and tools, you will need some basic soldering/desoldering skills.
Step 1: Materials/Tools

Materials
- Solar Lamp
- Super Glue (other glues will work as well)
- Solder
- Heat Shrink (optional but recommended)
- Wire
- Magnet Wire
- LEDs (one for each mushroom you make)
- Polymorph Plastic (I used ShapeLock but any will work)
- Whatever you want to mount the mushrooms on (I think driftwood looks nice)
Tools
- Soldering Iron
- Drill
- Lighter (or other heat source)
- Screwdrivers (whatever fits the screws on your lamp)
- Razor Blade
Step 2: Prepare the Solar Lamp


Separate the lamp pieces. The only thing you need is the piece with the solar panel on it. Open up this piece by unscrewing the three screws on the edges. Inside there should be a small circuit board. Pry this off from the plastic by first cutting through the small plastic thing holding it in. Then push on the LED to break the glue. Now that you have the circuit board by itself you need to desolder the LED. It took me about half an hour to do this so I would recommend just cutting the wire connected to the LED. Now solder a longer piece of wire to it. Thread the wire through the hole originally occupied by the LED and reconnect the top piece that you unscrewed.
Step 3: Make the Mushrooms


Solder
Take two pieces of magnet wire. The length of these pieces should be the thickness of the wood you are attaching it too plus the length of the stem of the mushroom plus an extra one or two inches. To remove the coating just burn it off with the lighter on both sides. You could also sand the coating off with steel wool if you prefer but I think the fire method is easier. Solder one wire to each lead on the LED. I recommend cutting the leads on the LED shorter to prevent shorts. Twist the wire as far as you can go without letting the LED leads touch. Now would be a good time to test the LED to make sure it works.
Mould
Heat some polymorph until it is clear. Do this by microwaving it in a jar filled with water for about two minutes. Create a small ball and a thin rectangular piece. Wrap the rectangular piece around the wires on the LED. Smooth out the creases. Next take the ball and squash it over the LED and form it into the cap. I was surprised by how easy it was to make it look like an actual mushroom. You can bend the stem however you want but you may want to consider where it will be going on your piece of wood.
Repeat this step until you have the desired amount of mushrooms.
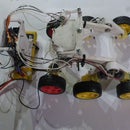
Step 4: Putting It Together


Drill holes in the wood slightly bigger than the mushroom stalk. Thread the mushroom wires through the holes. If the mushrooms do not fit snugly enough you could either glue them in place or add a small amount of polymorph plastic. Next test the mushrooms with the solar lamp to find the positive and negative sides. Solder the positives together to another piece of wire. Do the same with the negatives. Test it with the solar lamp again then solder each wire to the wires from the solar lamp. If all is correct and there are no shorts you should be finished. The lamp should automatically turn on in a dark room. You could attach the solar panel to the wood or use really long wires to mount the solar panel outside of a window or something.
Please note that you may need to use additional solar lamps if you have more mushrooms.

Participated in the
Make it Glow!


