

Introduction: Sound Reactive Lightning Cloud
This is a DIY cloud lamp that flashes like realistic lightning if it hears a loud noise. It took me only 4 hours to make and my knowledge of coding NeoPixels and wiring is very basic! So if I can do it, then pretty much anyone can!
I followed this tutorial (http://www.makeuseof.com/tag/build-cloud-lamp-soun... but had to make some adjustments due to having different resources. To do my version of this project you will need:
Paper Lanterns: https://www.amazon.com/gp/product/B00S0JI4B0/ref=o...
Hot glue and gun
A breadboard (small is better, but a normal-sized one will work. Just be sure it has the + and - strip on the side): https://www.adafruit.com/products/64?gclid=Cj0KEQj...
An Arduino Uno: https://www.amazon.com/Arduino-Uno-R3-Microcontrol...
An A to B USB cord: https://www.amazon.com/dp/B00NH11KIK/ref=asc_df_B0...
A cell phone charger block (5v, 2A sats work best; the one I used was a 5V, 1A iPhone charger)
A sound sensor/microphone module for arduino: https://www.amazon.com/gp/product/B00AF2GB1U/ref=o...
2 meters of NeoPixels:
What I used – https://www.adafruit.com/product/1138
What I suggest using– https://www.adafruit.com/products/1460?gclid=Cj0KE...
Pillow Stuffing (you can buy bags of this at Walmart or craft stores if you don't have any old pillows to tear open)
Spray Adhesive (you can find this at Walmart in the craft section)
(May also need soldering gun and solder.)
Step 1: Solder (optional)
My NeoPixel strand came with wires a special connector on the beginning end so I didn't have to solder wires onto the LED. But, if yours doesn't come with a connector, you will need to do some soldering (honestly, I find this easier than trying to figure out which wire is ground, Din, or +5V). Also, if you're like me, you may need to solder two strands of NeoPixels together. Just make sure to solder the Din side of the LED to the Dout side of the of LED (on my strands there were little arrows on the strand to show the flow of information, so as long as all the arrows point the same direction than you're good.)
Step 2: Create the Structure

Open all the paper lanterns and then hot glue them together in a formation you think resembles a cloud. Then wrap the NeoPixel strand around the structure (the strand I used had an adhesive back to them, but if yours don't then you can apply copious amounts of the spray adhesive to the back of the strand). As you can see, I wrapped mine horizontally, but I suggest sort of wrapping them around in a sort of spiral-like pattern to have all sides (including top and bottom) covered in NeoPixels. Just be sure to leave an opening at the top to put the breadboad, arduino and microphone in the lantern.
Step 3: Add Fluff

Using spray adhesive, stick the pillow stuffing (or polyester fiberfill) onto the paper lanterns. Just be sure you can access the beginning end (the Din side) of the NeoPixels so you can connect it to the other components. I suggest spraying the structure in sections, as opposed to spraying the whole thing at once and scrambling to put the fiberfill on before it dries. and don't be too worried about evenly applying your fluff; the more unevenly the fiberfill is applied, the more realistic the cloud will look and light up.
Step 4: Wiring
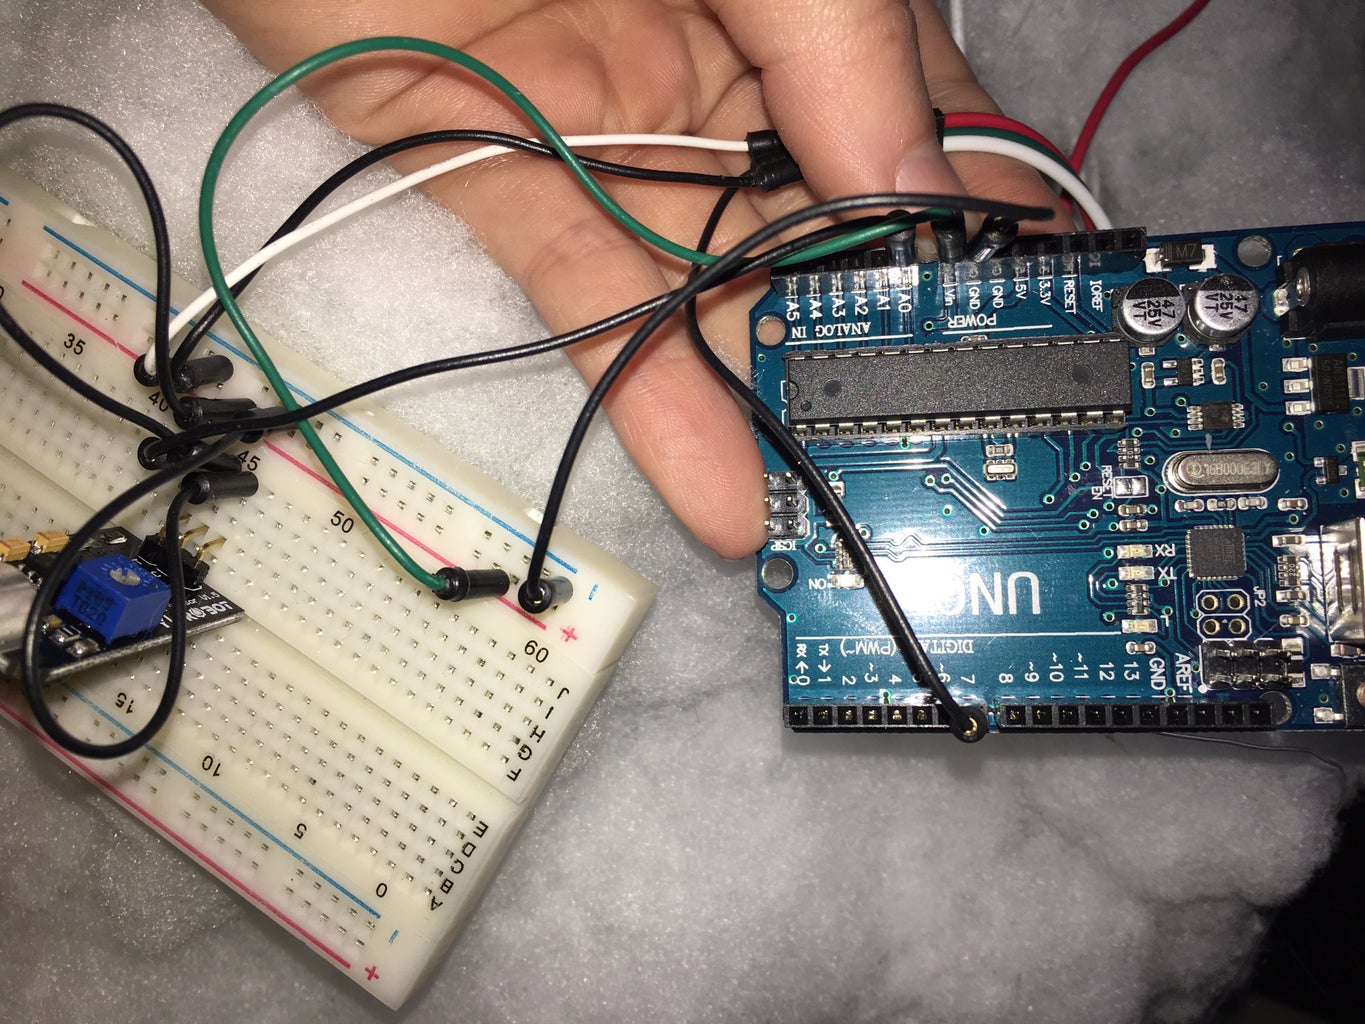


This is where things can become a bit complicated. Let's start with the wiring. Do NOT have the Arduino connected to power while doing any of the wiring, EVER. There is a possibility of frying the LEDs if you mess around with the wiring and it's connected to power, so just to be on the safe side always disconnect from the power source when fiddling with the wires. With that said, I will now explain the diagram I have included.
The green and red wires have to do with transferring power and the black wires have to do with transferring information. The red wires are specifically related to the positive part of wiring, so any time there is a Vin, 5V, or +, it will need to be connected to the (+) column on the breadboard. Green wires are associated with negative or ground, so any time there is a GND port or wire used it gets connected to the (-) column of the breadboard.
On my project, I connected the Din part of the NeoPixels to the 7 on the Arduino. You can choose any numbered port on the side of the Arduino labeled "digital'', just make sure to change it in the code if you end up using the code I've provided for you.
Step 5: Coding
Here is the original code that I borrowed and adapted, if you want to modify it yourself: https://github.com/jamesabruce/cloudlamp/tree/mast...
However, if don't really understand coding all that well (like me) and have used exactly the same resources as me (including the use of 120 LEDs) and done exactly the same wiring as me, then this code should work without having to do any adjustments: http://pasted.co/d250b934
Step 6: Adjusting Sound Senor Sensitivity
Connect the cloud to your power source and adjust the sensitivity of the sound sensor. See the note on the image of the sound sensor. This step is easiest to do while playing a recording of a thunderstorm at the desired volume and having the cloud at the desired distance from the speaker. I suggest that when you find the perfect sensitivity for when the sound sensor is outside of the cloud, you should make it just a tad more sensitive as it will be surrounded by fiberfill which can muffle and dull the intensity of the sound reaching the microphone.
Step 7: Final Steps

Connect the Arduino to power and place it and the breadboard inside the lantern. Then attach fishing line to the the metal bar of the paper lantern so you can hang it. ( I recommend tying the fishing line to all of the lanterns, instead of just the center, so as to reduce the possibility of the lanterns separating while hanging; in other words, to evenly distribute the weight of the cloud to all parts of it.)
There you have it! Your very own sound reactive lightning cloud lamp! Enjoy falling to sleep with your own simulated storm :)

Runner Up in the
Lights Contest 2017


