

Introduction: The Coolest Two-way Drawer Slides


Have you ever needed a drawer that could be opened from either end; like for a kitchen island or tool cart? If you've looked, there are two-way slides that can be purchased. They are quite expensive. Plus, the way they are constructed, part of the slide has to extend with the drawer in each direction. This makes it impossible for an inset drawer front to fit, unless it is notched to fit around the slide, or made with a gap on both edges of the drawer.
I recently encountered this dilemma when building a cart in my shop. I wanted a drawer that could be pulled out from either side. I also wanted access to more than half of the drawer at a time. I didn't want an unsightly gap at the ends of the drawer. And I wasn't going to spend a bunch of money.
This instructable assumes you already know how to construct drawers and cabinets. I'll go into a little detail. And I'll share the dimensions of what I made. But, it is up to you to modify this design to suit your particular situation.
One other disclaimer. I built this into a shop cart for myself. While I like to make things that look nice and will last, I didn't necessarily strive for a perfect surface finish. It's a tool for me to use (and abuse). If I were putting this into a piece of fine furniture, it would have been nicer looking, for sure.
Step 1: The Concept

Again, my purpose here is not to tell you how to build a drawer or a cabinet. I'm going to focus on the design aspects of this concept, and the specific things that are different from a conventional drawer slide. The attributes of this design are as follows:
- Opens in both directions
- Opens roughly 3/4 of the way in either direction for generous access
- Flush, inset drawer fronts for smooth appearance and minimal dust intrusion
- Positive stop at closed position
- Inexpensive
- You only have to make one drawer, which is half the work of making two
The positive stop at closed position was a happy consequence, and not originally on my wish list. But it's nice to have. Two-way ball bearing slides large enough to accommodate my drawer (32 inches deep) would have cost well over $100. And again, they would have not met #3 above. My cost was around $25. In order to make this reasonably easy to build, I chose to make these slides from wood. But the design is so simple, if they wear out, I can replace them easily.
If you look at the CAD image, you can see how this works. Note one side of the cabinet is invisible to reveal the interior. Both the drawer and the cabinet have cleats attached to them to act as slides. But whereas a conventional drawer slide would have the drawer cleat sliding on the cabinet cleat; in this design, they don't touch. Between them are additional pieces of wood that I call shuttles. The idea is that each side of the drawer has two shuttles to support it. At any given time, one of the shuttles is positioned against the inside of the cabinet on the side the drawer is opened toward. Simultaneously, the other shuttle is positioned against the inside of the "back" drawer front, and moves with it as the drawer operates. Because of the shape of the shuttles, and the arrangement of the slides, they are always trapped between those two surfaces. When the drawer is in the closed position, all four shuttles are stuck to both the drawer fronts and the cabinet. So if you visualize the drawer open toward one side, moving through the closed position, the two shuttles that were fixed behind the cabinet face move with the drawer as soon as it contacts them. The two shuttles that were moving with the drawer stop against the cabinet face at the same time. Two are always fixed. Two are always moving.
You can probably guess that the shuttles might not always behave, as the sliding friction from the drawer movement could pull them out of position in random ways. This is resolved by the use of small but powerful rare-earth magnets arranged in a particular way. This forces the shuttles to behave properly, provided the slide parts are smooth enough and the magnets are strong enough.
Step 2: Tools and Materials


This requires no special tools, and very little in the way of special materials. It is up to you to design how large your drawer slide will be, and what you want to make them from. I used white oak, since I had some convenient scraps laying around. But you could use any stable hardwood, plastic, or even metal. In addition, you will need the following:
Tools:
- Portable electric drill
- Drill bit, sized to the same diameter as the magnets you choose (5/16 in [8 mm] in my case)
- Drill bit and countersink, for screw holes used to mount the slides
- Toothpick, or small, disposable stick
- Small scraps of cardboard, wood or whatever to mix glue on
- One dowel transfer plug the same diameter as the magnets you choose
- Sandpaper; 100 grit and 220 grit
- Optional - a drill press
- Optional - rubber gloves
Materials:
- Wood or other suitable material for slides and shuttles (see text)
- Stainless steel or solid brass screws to attach the guides (not plated steel)
- 16 rare earth magnets (see text for source)
- 1 tube of 5-minute epoxy, or other adhesive as described below
- Optional - paste wax (or car wax, provided it doesn't contain silicone)
Be sure the screws you choose are not plated carbon steel. If they are, they may interfere with smooth operation, since they are magnetic!
I ended up using magnets I bought at the following link:
http://www.amazon.com/gp/product/B0089OFRH0/ref=oh...
These are 5/16 inch (8 mm) diameter x 1/4 inch (6 mm) long Neodymium (NdFeB) magnets, with a N42 strength and nickel plating. In my first version, I used some similar magnets that I had purchased from Harbor Freight left over from a different project. But they were only 0.08 inch (2 mm) long, and not nearly as strong. Once it was built, I found that one of the slides would sometimes misbehave, because the magnets weren't strong enough. Once I upgraded to these larger ones, that problem went away. Depending upon your specific situation, you may want to use other sizes. But I suggest you use the Neodymium magnets, as they are the strongest available. Higher ratings than N42 can be obtained. But in my case, I'd have had to order them direct from the manufacturer, with higher shipping cost and larger minimum quantity. In the end, these were good enough. They're advertised with a 7.6 lb (33.8 N) pull force. This is a good estimate. But online calculators put the actual number a little lower. And, that number is under laboratory conditions of temperature, cleanliness and perfect alignment. More about that later. Neodymium will rust if left exposed. So the nickel plating keeps them protected.
I should probably repeat the warnings I've seen regarding rare earth magnets. Due to their high magnetic strength for their size, they can attract each other over fairly large distances and fly together without warning. This poses a risk of pinching you if you are holding one of the magnets when this happens. Also, they are brittle, and can shatter if allowed to freely snap together. Lastly, you should never allow small children to play with magnets. If they are swallowed, they can adhere to each other and pinch internal tissues, which can cause severe internal injury.
You can use other adhesives for the magnets. Cyanoacrylate (aka CA glue, or superglue), polyurethane, or acrylic adhesive would work just as well as epoxy. But epoxy gives you more working time than CA, dries much more quickly than polyurethane, and is easier to obtain than acrylic. If you use CA glue, try to get the gelled form. It will give you more working time, wont instantly bond a magnet to your fingers, and isn't as likely to wick into the wood grain and starve the glue joint.
Step 3: Make the Slides

For this type of drawer slide, you simply need four strips of material that are straight, wear resistant and dimensionally stable. Mine are white oak, 3/8 inch (9.5 mm) thick x 1 inch (25 mm) wide. My drawer and cabinet are 32 inches (813 mm) deep. The slides don't need to fit tightly into the cabinet for this to work. So leave yourself a little gap at each end to make things easier.
The slides need to be supported along their entire length. This is because at any given time, the full weight of the drawer will be supported just where the four shuttles are. Conventional slides, supported only on the ends, might distort enough to bind up if the drawer is heavily loaded and opened all the way out. The best way to provide this support is to drill and countersink them at several places along their length, and screw them down. I used six screws in each, evenly spaced. Make sure the holes are countersunk to completely bury the screw heads, so they don't interfere with smooth operation. Once you have them made, be sure to sand all three operating surfaces smooth with 220 grit sandpaper (or smoother if you want). Also, put a small chamfer or radius on the outside corners, so they will allow the shuttles to slide smoothly. A buffed coat of paste wax isn't a bad idea, either.
Step 4: Make the Shuttles


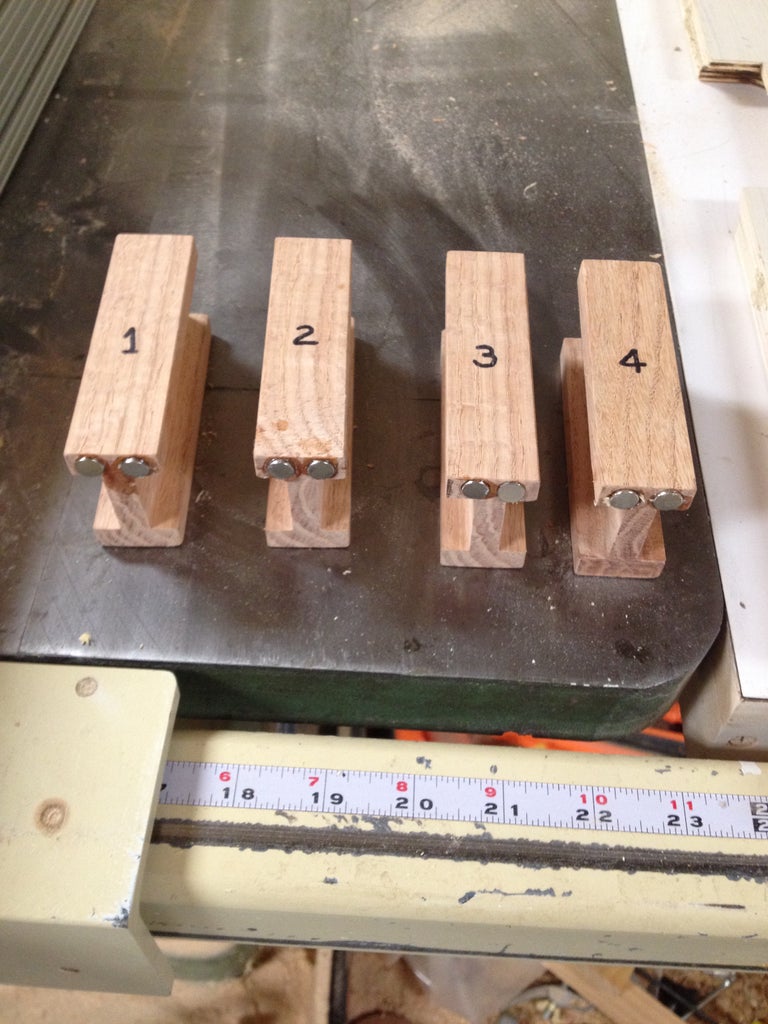
You can make the shuttles out of the same wood as the guides, as I did. Or you can use another material. Just make sure it isn't magnetic! You can also make them in a variety of ways. I made the overall rectangular piece from which they were cut, using a table saw and planer. They are 1 in (25 mm) wide and 1-3/4 inch (44 mm) tall. Then I used a router in a router table to make the dados in the sides. The dados are 1 in (25 mm) wide and 5/16 inch (8 mm) deep. It is very important when making the dados to insure that they slide smoothly on the guides. I made the guides first, and used them to test the fit of the dados. They need to slide smoothly, but not have too much clearance. Too much clearance will allow the drawer to sag as it is pulled out. I made one long piece with that "H" profile, and cut it into four 4 inch (102 mm) long pieces, as shown in the photos.
Once the shuttles were cut and sanded smooth on all sides, I marked and drilled the locations for the magnets. They're basically centered vertically in the flanges of the shuttle (see photo), and as close to the outer edges of them as possible. You need two magnets per shuttle, both on the same end as shown in the photo. My dimensions worked out so that the flanges were 3/8 inch (8 mm) thick, which gave just enough material around each hole to support the magnets. Drill the holes slightly less deep than your magnets are long. You want them to protrude a small amount. Most importantly, make sure the holes are drilled straight. I recommend you use a drill press if you have one. This arrangement of magnets maximizes their attractive force (see notes at end), even if some misalignment occurs. But, it works better if everything is as close as possible to being flat and parallel.
Now you are ready to install the magnets. If you use epoxy or acrylic, you'll have to mix it. I prefer the self-mixing tubes, as pictured. But for this project, I didn't need very much. So I didn't use the static mixing nozzle supplied with the adhesive (they only give you two, and they're one-time use!). I just squirted a small amount onto a scrap of cardboard and mixed it with a small wood stick. With epoxy, you have a few minutes to work, so there's no need to rush. Dab a small amount onto one end of each magnet, and press it into its hole. Note you only want to install one at a time. And you want to keep each one separated from the others as you work. These are strong enough to hurt if two should decide to attract themselves together from across the workbench. Not to mention the mess that would result if one of them already had glue on it (don't ask me how I know that). Be especially careful installing the second magnet, as it will want to pop out of your fingers and stick to the first one. 7.6 pounds doesn't seem like much. But they're hard to hold due to their small size. At this point, the polarity of the magnets doesn't matter.
Once the glue has hardened on the magnets, double check the sliding fit between the shuttles and the slides. I have found that if the magnets are nearly as wide as the shuttle flanges, pressing the magnets in will cause the flanges to bulge slightly. If your shuttles do this, a little sanding should fix it. Better to do this now than later.
Step 5: Install Magnets in Cabinet and Drawer Fronts


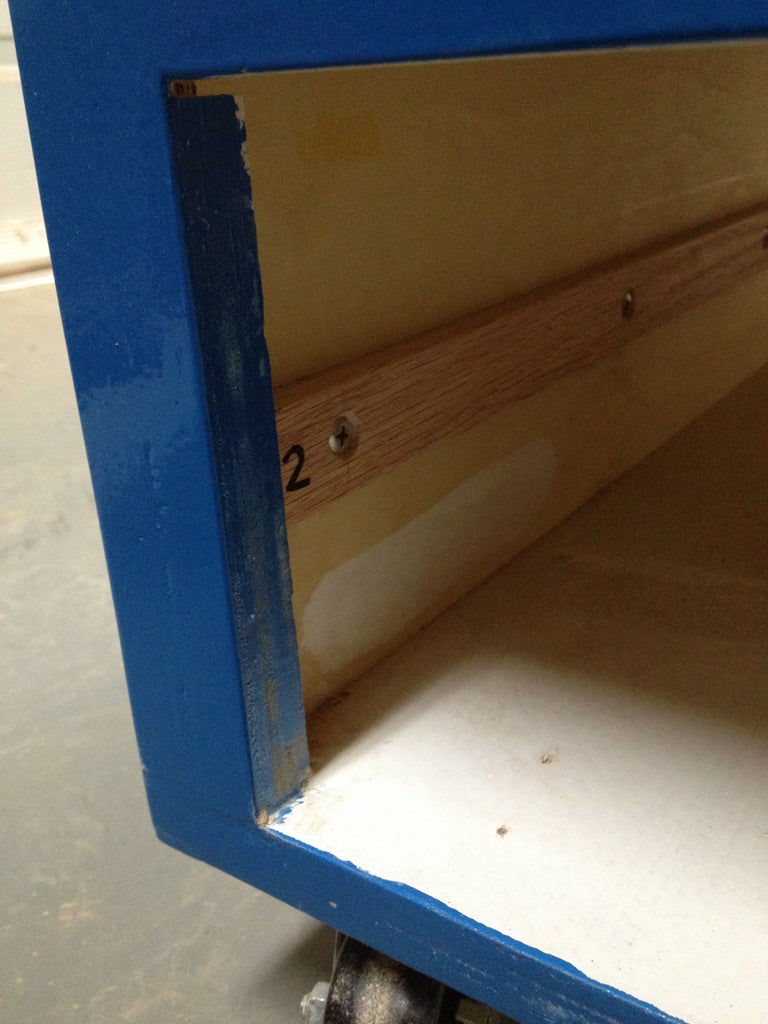
Now comes the tricky part. If you're like me, you can draw everything out and carefully make the parts, and get a pretty good fit most of the time. But, these magnets really need to be aligned pretty well to work at their best. So I chose to mark and drill the holes for the remaining magnets after the shuttles were finished and the guides were installed in the finished cabinet and on the drawer.
By far, the easiest way I've found to do this is to use a dowel transfer plug (see tools). If you can, choose one that is as close as possible to the diameter of your magnets. In my case, 5/16 is a common size. In the first photo above, you can see I've placed a shuttle on the guide in the cabinet. To mark the inside face, just place the transfer plug on the magnet, making sure it is centered. Slide the shuttle along the guide and press it against the face frame so that the transfer plug leaves a dimple to mark where the hole goes. If you don't have a dowel transfer plug, you can dab paint or marker on the end of the magnet, and press that against the face frame to mark where the hole goes. Do this for each end of each slide. This gives you the location to drill a hole for each magnet. As before, you want the magnet to protrude. So don't drill too deeply.
A similar process is used for the drawer fronts. Your process might vary a bit from mine, depending upon how you build your drawer. But for inset drawer fronts, I typically build the drawer with half-blind dovetails, and apply separate fronts (much easier to get a perfect reveal around the drawer front that way). For this particular project, this method is almost a requirement, because you have to remove one drawer front to install the drawer. Assuming you've made your drawer this way, you just need to preassemble the drawer fronts onto the drawer (I do this on the workbench for better access). Then you can use the shuttles to mark and drill the magnet holes the same way you did for the cabinet.
Once the holes are all drilled, you can install the magnets as you've done before. Except this time, you have to pay attention to the polarity. If you get one wrong, this whole thing won't work! Because I'm easily distracted, I numbered each shuttle 1-4, and numbered the ends of each guide to correspond to each shuttle. As I prepared to glue each magnet into place, I stuck it to its corresponding shuttle magnet to make sure I had it oriented correctly. Then I added a dab of glue, pressed it into the hole (still stuck to its mate), and slid the magnets apart sideways to separate them. If you try to pull them straight apart before the glue sets, you will likely pull the magnet right back out of its hole (don't ask me how I know that either). Once all the magnets are glued, allow sufficient time for the glue to harden.
Step 6: Final Assembly

Now you're ready to put it all together. Remove one drawer front from your drawer, and set it aside. Place all four shuttles in position in the cabinet, with their magnets holding them against the cabinet face frames. Carefully slide the drawer into place, inserting the end with no drawer front between the shuttles. If a shuttle dislodges, you may have to do some more sanding, or double-check your measurements. Slide the drawer all the way through the other shuttles until it is in the closed position. You should hear a reassuring click when the shuttles contact the drawer front you're pushing on.
Now, push the drawer into the cabinet, exposing the other end for installing its drawer front. You should feel some resistance until the magnets on the near side let go, allowing the shuttles to move with the drawer. Once you've slid the drawer far enough, you can move to the other side and pull it out. Install the other drawer front. You're done! If everything is done correctly, the drawer should slide easily in both directions. Watch to verify that the shuttles behave as they are supposed to. If you hear clicks at times other than when the drawer passes through its closed position, one of the shuttles may be misbehaving. I didn't have that happen once I upgraded to these magnets. But if it does, a little sandpaper or paste wax should smooth things out.
Step 7: Notes
You might wonder why I chose to go to all the trouble to use two magnets at each junction. A single magnet adheres to a steel plate with higher force, theoretically. And you could attach a small square of steel to the face frames and drawer fronts beforehand with no worries about alignment. Or, you could make the shuttles out of steel. One reason is that this theoretical higher force only occurs if the steel plate is relatively thick. Assuming you don't want to make the shuttles from solid steel, the plate you use is likely thin enough to reduce this force. More importantly, this higher theoretical force only occurs within a very small distance of the magnets touching. While the theoretical maximum force for two magnets is slightly lower, it falls off with distance much more slowly. My reasoning is that if a small sticky place on the guide attempts to pull one of the shuttles away from where it is supposed to stick, this higher force at a distance is more likely to pull it back. In practice, it probably doesn't matter much. But I felt the extra effort was worth it for peace of mind.
You may have noticed that the positions of the magnets isn't the same in all photos. Some photos were taken with the first prototype, where I used the Harbor Freight magnets, and oriented the shuttles with the magnets on top. When I switched to the stronger magnets, I had difficulty removing the old magnets from inside the cabinet. I had to flip the shuttles over so that I could drill new holes in the face frame for the new magnets on the bottom.
Lastly, I don't presume that I'm the first person in the world to think of this. If you've seen it done before, I'd like to know of it. All I can say is, I'd never seen it before when I thought of it. And I did a little bit of searching to see if it had ever been done. I didn't find anything. But I may have just used the wrong search terms or something. Nevertheless, I hope you'll consider giving it a try next time you need a two-way drawer. Thanks for your time.

Participated in the
Wood Contest


