Introduction: Tinkering With LEGO: Art Machines
In the Tinkering Studio workshop at the Exploratorium, we think that LEGO pieces offer lots of possibilities for investigating motions, mechanisms, and linkages. One exploration that we've tried is attaching markers to LEGO technic pieces to create surprising and delightful art machines that draw patterns as they move. With a selection of LEGO parts, you can create endless variations and make unexpected discoveries.
This guide includes a LEGO parts list, a link to the file for a custom made 3D printed pen holder, a few ideas of how to get started, and some inspiration to take the projects further.
But as you follow this guide, treat it as a starting point for your own ideas. We suggest messing around with different ways to make moving machines, experimenting with different drawing implements, and creating you own custom mix of LEGO parts. Please share your ideas and designs with us as we continue to develop interesting ways to tinker with LEGO.
Step 1: 3D Printed Pen Holder
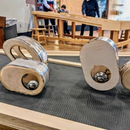
To make art machines, we use a pen holder to connect markers to LEGO technic beams and bricks. This piece has four technic pin holes that you can use to attach to your art machine.
We use an Ultimaker 2 printer in our workshop to make the pieces, but it should work with a variety of 3D printers. After you print the piece, prepare it for the machine by adding a nylon set screw. With a tap 1/4"-20 thread size (and a tap driver) create threads in the screw hole on top of the circle. We use a nylon screw (1/4"-20 thread, 1/2" long, black, fully threaded) to hold the markers in place. We recommend having at least 2-3 pen holders on hand per machine to experiment with different ways of making motion.
We’ve gone through a few different versions of this piece and if you're interested, you can read about the design process for this part on the Tinkering Studio blog: http://tinkering.exploratorium.edu/2016/04/12/lego-pen-holder-evolution
If you don't have a 3D printer, you can attach markers to the machines in a variety of different ways. It's possible to use masking tape, zip-ties, or rubber bands to connect the markers to the bases. We also made a low-tech custom part by hot gluing a technic beam to a clothespin, which can also work well in a pinch. Be experimental as you combine outside materials with the LEGO set.
Step 2: LEGO Parts List
Through experimentation, we have put together a collection of parts that we feel work well to explore Art Machines using LEGO. We have listed them on Brick Owl, a website that provides individual LEGO pieces, so you can see the elements and quantities that we recommend.
Tinkering with LEGO: Art Machines Parts List
This is a comprehensive parts list of what we usually put out for our workshop at the Exploratorium. You might not need all the parts to create one art machine, but the wide variety of pieces is good to have on hand to explore different ways of making motion through vibration, linkages and propulsion. With this basic set, you'll be able to make an diverse set of machines to create many different artistic designs. However, feel free to start with what you already have on hand and see what you can create!
Step 3: Markers and Paper
The two extra things you'll need to collect before you get started creating beautiful art machines are markers and some paper to draw on.
For these machines to scribble, you'll need to collect some drawing implements. We typically use both long thin crayola markers and the shorter pipsqueak kind. But other possibilities include paint brushes and watercolor, charcoal pencils, crayons, or even taking the exploration outside with sidewalk chalk.
In the workshop, we typically cover the table with large pieces of white butcher paper to give participants a big surface for the jumping, flipping, and spiraling machines. We’ve also built individual frames to wall off small sections of the paper to make intentionally framed designs. Hula hoops set on the ground on large sheets of paper also work well to contain the machines’ movements.
Step 4: Base Models and Starting Points
Now that you have all the supplies, you are ready to start experimenting with building art machines with LEGO parts! For our workshops, we’ve found that it’s helpful to have the motor and battery pack connected together in a single unit, so we give people a “base model” to help them get started and show a few examples of different types of motion before attaching the markers.
We went through a few different versions of designs before settling on a simple way to connect the two parts. To make the base model add 2 15-hole technic bricks to the side rails of the battery pack with the lengths extending off the side with the green button. Plug in the motor and press it onto the bricks on the side of the battery pack. Connect a 9 hole technic beam using three grey pins to the motor and the brick to lock it in place.
We try to vary the different types of movement for the starting point examples. Some of the ways we've experimented with movement include vibration from an offset weight, linkage based mechanisms, and machines that scoot along the ground. Each of these starting points can provide a suggestion and inspiration for people to take the ideas futher, remixing, iterating and complexifying them as learners follow their own paths
Step 5: Creating an Environment for Tinkering
If you plan to share this activity with others in a school, library or makerspace, here are a few helpful tips that we’ve found support learners in their process of tinkering with art machines.
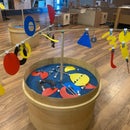
Our curved tables provide shared working spaces for people to see ideas that other are working on, share their process, and learn from each other. This social scaffolding helps participants stay engaged and introduces many new challenges and solutions.
The tinkering studio workshop is a facilitated environment and we constantly practice helping learners follow their own ideas, work through failure and frustration, and make connections between people and projects. Having friendly, open and approachable facilitators in the space creates an environment that allows for fun, experimentation, and collaboration.
The LEGO pieces are small and often look similar to each other so we think a lot about how to arrange the materials on the table. We often use metal cafeteria trays or paper food containers to sort out different categories of parts. Having the pieces easily accessible encourages experimentation and iteration as people build their art machines.
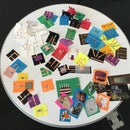
And finally, we set aside space for collaborative testing stations so that people can have a place to test their machine when they are happy with the design. These art bots make beautiful patterns so it also would be great to think about ways of displaying the work in the space to get a sense of the history of projects and provide inspiration.
Step 6: Taking It Further
Building art machines can lead to lots of divergent explorations. You experiment with different types of artistic mediums like oil paints, crayons or chalk outside. You can event attach LEDs to the moving machines and take long exposure photographs to trace the path of a light over time.
Its also possible to get more invested in a more scientific process of testing and observing iterations of your machines. Creating diagrams and graphs helps keep track of the ways that small changes make big differences in the way that the art machines move. The Lego WeDo system allows you to add programming to the robots which could be an interesting way to make more precise patterns.
We've also been exploring other ways to tinker with LEGO. Check out our other instructable on LEGO Sound Machines and create a linkage based music machine! Let us know what you end up experimenting with and keep checking the Tinkering Studio website for more ideas.


